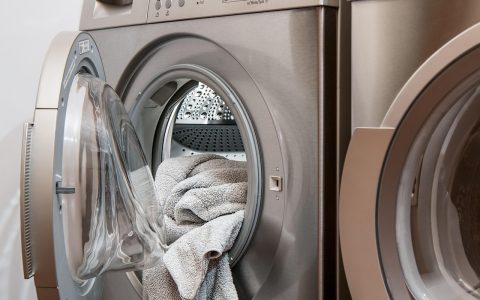
When a washing machine refuses to start or holds your wet laundry hostage behind a locked glass door, the primary culprit is almost always the door safety interlock. Completing a DIY front load washer door lock switch replacement US repair requires a clear understanding of how these safety systems operate both electrically and mechanically. Modern washing machines rely on reliable door interlocks to prevent high-speed spin cycles from operating while the door is unlatched, protecting your home from catastrophic water leaks and severe mechanical hazards.
Understanding whether your appliance uses an instantaneous electromagnetic solenoid or an expanding thermal wax motor determines your exact troubleshooting path. This comprehensive manual breaks down the anatomy of front-load washer door locking systems, guides you through safe manual override techniques to free trapped clothes, demonstrates multimeter electrical testing protocols, and provides step-by-step replacement instructions tailored for major US washer brands including Whirlpool, LG, Samsung, Maytag, and GE.
How Front-Load Washer Door Interlock Systems Work
Front-load washing machines utilize sealed tub assemblies that fill with water above the lower lip of the door opening. To prevent water spillage and high-velocity drum hazards, washing machine main control boards demand a verified signal from the door lock switch before opening the water inlet valves or driving the drum motor. If the control board fails to receive circuit continuity from the latch assembly within a specified timeframe, it aborts the wash cycle and triggers a diagnostic fault code.
Door interlock assemblies perform two distinct functions: sensing door closure and locking the door latch bolt. Sensing is accomplished through a simple microswitch that depresses when the metal or plastic door striker enters the bezel slot. Locking is achieved using either an electrical solenoid coil or an expanding thermal wax actuator. Modern appliances integrate these sensing switches and locking mechanisms into a single enclosed plastic module mounted directly behind the front cabinet sheet metal.
Solenoid-Driven Door Interlocks vs. Thermal Wax Motors
To accurately diagnose your machine, you must identify which locking mechanism your washer model uses. While both serve the exact same safety purpose, their electrical properties, physical operation, and failure modes differ significantly.
| Feature | Solenoid Lock Assembly | Thermal Wax Motor Assembly |
|---|---|---|
| Activation Speed | Instantaneous (milliseconds) | Delayed (30–90 seconds) |
| Operating Mechanism | Electromagnetic coil pulls or pushes plunger | Internal PTC heater expands thermistor wax |
| Primary Failure Mode | Burned coil windings, broken mechanical catch | Seized pin, degraded wax chamber, open heater circuit |
| Common Machine Types | Modern HE front-loaders (2010–present) | Older front-loaders and select commercial units |
| Multimeter Resistance Reading | Low resistance coil (typically 15–120 Ohms) | Moderate resistance PTC element (1,000–2,000 Ohms) |
Solenoid locks click sharply the moment a cycle starts and unlock immediately when the pause button is pressed, provided the internal water level and tub temperature are safe. Thermal wax motors operate silently; electric current heats a positive temperature coefficient (PTC) ceramic disk inside a sealed wax chamber. As the wax heats, it expands rapidly, pushing a metal pin outwards to physically block the door latch mechanism and close the high-current run contacts. Understanding this distinction is crucial when performing a front load washer door lock switch replacement US project, as diagnostic procedures vary according to component type.
Recognizing Symptoms of a Failed Door Lock Switch
Door lock failures manifest in three distinct ways: physical lockouts, complete refusal to start cycles, or mid-cycle shutdowns accompanied by specific diagnostic error codes on the digital display panel.
- Washer won’t start despite door being closed: The control board displays a door open warning or clicks repeatedly without initiating the water fill process.
- Door remains locked after cycle completion: The cycle finishes, water drains completely, but the mechanism fails to drop the mechanical lock pin, trapping clothes inside.
- Error code door latch washing machine warnings: Control panels display specific alphanumeric fault codes signifying door circuit failure.
- Machine stops mid-cycle: Vibrations during high-speed spinning naturally cause loose contacts or worn microswitches in an aged door switch to break circuit, prompting the control board to initiate emergency stopping routines.
Common Door Lock Error Codes by Brand
When a door lock switch fails, the washer’s onboard diagnostics usually store or display a specific error code. Refer to this breakdown of common US washer error codes:
- LG:
dE,dE1,dE2(Door Error) - Samsung:
dL,dS,dE,dc,LO(Door Lock Error) - Whirlpool & Maytag:
dL,F22,F05 E01,E01 F02 - GE:
E22,E23,E61 - Bosch:
E13,F13,Door
Safety Precautions Before Beginning Repairs
Working on major household appliances involves severe risks from electric shock and sharp mechanical edges. Always observe safety protocols before attempting diagnostics or repairs.
1. Disconnect Electrical Power: Unplug the washer power cord from the 120V wall outlet. Turning off the display panel or pressing the power button does not eliminate line voltage from reaching the internal door lock wire harness.
2. Shut Off Water Supplies: Turn both hot and cold water supply valves clockwise to the fully closed position. While door lock replacement rarely opens water lines, preventing accidental tub flooding is essential if the drum is full.
3. Drain Trapped Tub Water: If the cycle interrupted while full of water, perform a manual drain via the lower pump filter panel before opening the door or removing components. Keep bucket and towels ready for residual water.
4. Protect Hands and Arms: Sheet metal edges inside the washer frame and metal boot spring clamps are extremely sharp. Wear heavy duty mechanics gloves during spring removal and panel access.
How to Manually Unlock Trapped Laundry
If your washer door won’t unlock and laundry is trapped inside, do not force the handle. Plastic door handles and catch hooks break easily under tension, drastically increasing your repair costs. Use these non-destructive manual release methods instead.
Method A: Lower Access Panel Emergency Pull Tab
Many modern front-load washers feature a built-in emergency mechanical pull cord located near the drain pump filter assembly at the bottom front of the cabinet.
- Open the small access door on the lower front panel of the washer.
- Locate the small plastic teardrop pull tab or plastic ring attached to a thin cable, usually mounted near the pump filter housing.
- Gently pull the tab or cord downward while pressing slightly inward on the door handle area. You should hear a distinct mechanical click as the lock pin bypasses.
- Open the washer door normally.
Method B: Reaching Behind the Front Panel
If your machine lacks a lower access door or dedicated pull cable, you can manually release the lock mechanism from behind the front panel sheet metal.
- Ensure the washer is completely unplugged and water is drained.
- Remove the top panel of the washer by unscrewing the two or three hex-head screws along the top rear edge, then sliding the lid backward and lifting it off.
- Reach down along the inner side of the front cabinet wall until your hand reaches the back of the door lock assembly.
- Feel for a small, round plastic knob or sliding pin located on the bottom or side of the plastic lock housing.
- Pull or push the pin downwards (depending on model design) while pulling gently on the door glass frame until the latch releases.
Tools and Supplies Required for Diagnosis and Replacement
Gather all necessary tools before starting your repair to avoid delays midway through the project:
- Digital multimeter with thin needle probes
- #2 Phillips head screwdriver
- 1/4-inch and 5/16-inch nut drivers or socket set
- Flathead screwdriver or boot clamp expansion tool (spring pliers)
- Needle-nose pliers
- Flashlight or headlamp
- Protective work gloves
- Replacement door lock assembly (exact OEM part matching your machine model)
Accessing the Front Load Washer Door Lock Switch
Gaining physical access to the door lock mechanism requires peeling back the flexible rubber door boot seal (bellows) from the front panel cabinet rim.
Step 1: Remove the Outer Boot Spring Clamp
The rubber door boot is held securely against the outer sheet metal panel by a wire clamp pulled tight with an expansion spring.
- Open the washer door fully and locate the spring on the outer wire ring. The spring is typically positioned at the 6 o’clock position (bottom center) or 3 o’clock position (side).
- Insert a flathead screwdriver under the wire loop right next to the spring coiled section.
- Pry outwards gently while using your free fingers or pliers to grasp the wire ring, stretching the spring until the wire pops out of the rubber gasket groove.
- Set the spring clamp aside safely.
Rule of Thumb: Avoid over-stretching the spring clamp during removal, as a bent wire spring will fail to create a watertight seal upon reassembly.
Step 2: Peel Back the Rubber Bellows
- Grasp the outer lip of the rubber boot seal with your fingers.
- Carefully peel the rubber gasket off the folded metal rim of the front panel opening, working around the right side near the lock latch region.
- Tuck the loose portion of the rubber gasket inward into the washing drum to create a clear working space behind the sheet metal panel.
Step 3: Unbolt the Lock Assembly Mounting Screws
- Locate the two Phillips head or hex screws on the exterior face of the front panel, positioned on either side of the door catch slot.
- Unscrew both mounting fasteners while supporting the lock module from behind through the peeled boot opening.
- Carefully draw the lock switch assembly out through the gap between the tub gasket and the steel front panel.
Testing the Door Lock and Wax Motor with a Multimeter
Before purchasing replacement parts for a front load washer door lock switch replacement US project, perform electrical continuity testing to confirm whether failure stems from the lock switch module, wiring harness, or main control board.
Understanding Terminals and Wiring Schematics
Door lock modules typically feature three to five wire terminal connections. Consult the tech sheet (found folded inside the washer cabinet top panel or lower toe kick) to identify terminal roles:
- Line Input / Power Terminal: Delivers voltage to activate the solenoid or PTC heater element.
- Neutral Terminal: Completes the circuit for the activation element.
- Sense / Lock Switch Terminals: Internal microswitch contacts that close to inform the control board that the lock pin is fully engaged.
Testing Solenoid Lock Assemblies
- Set your digital multimeter to the lowest Resistance setting (Ω Ohms) or Continuity test mode.
- Place probe tips across the solenoid coil terminals (check tech sheet for exact terminal numbers, e.g., terminals 1 and 3).
- Normal Reading: A functioning solenoid coil displays a stable resistance reading between 15 and 120 Ohms (depending on specifications).
- Faulty Reading: An open circuit reading (indicated by
OLor infinite Ohms) indicates a burned out coil. A reading of 0 Ohms indicates a short circuit. Replace the module if either occurs.
Testing Thermal Wax Motors
Testing wax motor interlocks requires measuring resistance across the internal PTC heating element.
- Set your multimeter to the 2k Resistance (Ω) range.
- Touch meter probes to the two primary terminal spade connectors on the wax motor body.
- Normal Reading: A cold, functional wax motor PTC element typically measures between 1,000 and 2,000 Ohms (1k–2k Ω) at room temperature (70°F).
- Faulty Reading: A reading showing
OLindicates a blown heating element that cannot expand the wax chamber. Replace the wax motor component or complete lock assembly.
Step-by-Step Replacement Instructions
Once you’ve verified a mechanical or electrical failure inside the door latch, perform a complete unit replacement with these steps.
Step 1: Disconnect Wiring Harnesses
Door lock wiring harnesses use locking plastic molex connectors to prevent loose connections during high spin vibrations.
- Inspect the plastic connector plugs attached to the lock assembly.
- Depress the small plastic locking tab on the wire harness plug using your thumb or a small flathead screwdriver.
- Pull straight back on the plastic connector body—never pull on the wires directly, as this pulls individual pins out of the plug socket.
- Inspect wire harness terminals for signs of heat discoloration, pitting, or corrosion. If harness plugs show melted plastic, replace the wire terminal pigtail alongside the switch.
Step 2: Install the New Door Lock Mechanism
- Position the new original equipment manufacturer (OEM) lock assembly behind the front panel opening.
- Attach wire harness plugs firmly until you feel or hear the plastic locking tabs snap shut.
- Align the mechanical latch holes on the switch module with the screw holes on the front cabinet sheet metal.
- Insert and hand-tighten the two mounting screws. Snug them down with a screwdriver without over-tightening, which can crack the plastic module mounting lugs.
Step 3: Reattach the Rubber Door Boot Seal
Restoring a watertight seal around the front panel edge requires precise seating of the rubber gasket lip.
- Unfold the rubber boot seal back toward the front panel.
- Fit the inner channel groove of the rubber gasket over the folded metal rim of the cabinet door opening. Work around the perimeter, ensuring the gasket seats fully without kinks or twists.
- Locate the outer spring clamp removed earlier.
- Position the top loop of the wire ring into the outer rubber groove at the 12 o’clock position.
- Hold the wire securely in place with one hand, pressing it into the groove as you work downward along both sides with your other hand.
- Grasp the spring ends with needle-nose pliers or a spring extension tool at the bottom, stretch the spring, and snap the final section of wire into the bottom rubber groove.
- Run your fingers completely around the boot rim to verify the wire clamp is completely recessed into the rubber channel.
Post-Installation Testing Procedure
Perform a systematic operational test before considering the job finished.
- Plug the washer back into the 120V wall electrical outlet and open the water supply valves.
- Close the washer door firmly until the striker latches cleanly without excessive effort.
- Select a brief cycle, such as Drain & Spin, and press the Start button.
- Listen for the distinct click (or wait for thermal wax activation) of the door interlock locking, followed by the door lock indicator light illuminating on the console panel.
- Press the Pause button. Verify that the control board successfully unlocks the door after the drum stops spinning, allowing normal access.
- Run a short wash cycle while monitoring the rubber door boot rim with a flashlight to ensure complete watertight integrity without drops or leaks.
Brand-Specific Nuances and Variations
While the general procedure for front load washer door lock switch replacement US applications is consistent, key structural differences exist among top domestic appliance brands:
Whirlpool and Maytag Front Loaders
Whirlpool and Maytag models frequently use three-terminal solenoid locks. Access is gained through the boot seal as described above, but these models feature a particularly tight boot spring tension. Utilizing spring expansion pliers prevents damage to the soft rubber lip during reassembly.
LG Direct Drive Front Loaders
LG front loaders use a distinctive door lock switch with a microswitch sensor lever. A common fault occurs when the plastic sensing lever wears thin, preventing physical contact even when the solenoid fires properly. Always inspect the plastic arm on LG replacement switches before installing.
Samsung VRT Front Loaders
Samsung front-load washers often incorporate a dual-solenoid system designed to handle quick lock and unlock commands rapidly. On these machines, verify that the door striker hook on the door frame itself is not slightly cracked, as minor misalignment prevents the dual solenoids from engaging.
Common Mistakes and Troubleshooting Tips
Avoid these common installation errors when replacing door switches:
- Purchasing Aftermarket Non-OEM Switches: Cheaper generic door switches frequently feature incorrect spring tensions or improper PTC resistor tolerances, leading to recurring error codes within weeks of installation. Always purchase exact OEM replacement parts matching your appliance model number.
- Improper Boot Clamp Seating: Failing to seat the wire clamp spring fully inside the rubber boot channel causes water leaks that run down the front panel and flood internal electronics.
- Pinched Harness Wiring: Ensure the internal wire harness hangs free behind the cabinet sheet metal and does not bind against the spinning outer wash tub.
- Ignoring Damaged Door Strikers: If the plastic or metal door hook (striker) mounted on the door frame is bent, cracked, or misaligned, it will not fully activate the internal microswitch on your brand new lock module. Inspect and replace damaged door hooks alongside the latch.
When to Call a Professional Appliance Technician
While door lock switch replacement is an accessible DIY repair for most homeowners, certain scenarios warrant professional intervention:
- The replacement door lock fails to engage and new error codes persist, pointing to damage on the main control board microprocessors (often caused by a shorted door lock coil blowing board-level triacs).
- The wire harness connector is severely melted, requiring specialized wire crimping and terminal replacement.
- The door frame or cabinet panel is warped, preventing correct physical alignment between the door latch and lock bezel.
By following structured diagnostic routines and observing electrical safety protocols, a DIY front load washer door lock switch replacement US project restores full functionality to your laundry appliance safely and reliably.
Frequently Asked Questions
Why does my front load washer door lock switch keep failing?
Repeated failures are often caused by heavy loads stressing the door alignment, water intrusion from a leaky boot seal, or an electrical short on the main control board sending improper voltage to the lock solenoid coil.
Can I bypass a front load washer door lock switch temporarily?
Bypassing a door interlock on a front-load washer is strongly discouraged and unsafe. Modern control boards perform complex resistance checks and momentary power cycles during operation; jumping wires will trigger immediate control panel error codes and poses significant flood and injury risks.
How long does a front load washer door lock switch replacement take?
For an average DIYer with basic hand tools, replacing the door lock switch takes between 30 and 60 minutes, including diagnostic multimeter testing and boot clamp installation.