washing machine drain pump filter cleaning replacement US is the central question in this guide. Here’s how to evaluate the options, avoid common mistakes, and make a practical decision.
Few appliance disruptions stall household routines quite like a front-loading washing machine that stops mid-cycle, leaving a sloshing load of sodden laundry submerged in gallons of murky gray water. When modern washers encounter a drainage blockage, they typically abort the cycle and display a cryptic digital error code on the control panel. Fortunately, the culprit behind this aggravating problem is rarely a catastrophic electrical failure. In most cases, the issue stems from an accumulation of stray coins, bobby pins, baby socks, or dense lint balls trapped inside the pump cavity. Master the process of washing machine drain pump filter cleaning replacement US to clear clogs, restore proper evacuation, and save hundreds of dollars on service calls.
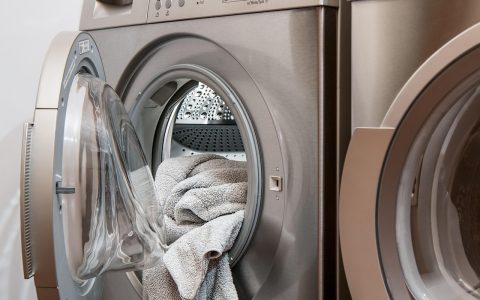
Front-load washing machines rely on high-speed electric drain pumps to evacuate water through internal plumbing hoses during rinse and spin phases. To protect the delicate plastic impeller blades from mechanical damage caused by pockets stuffed with loose hardware, manufacturers install a debris catcher—often referred to as a coin trap or pump filter—directly in front of the pump housing. Over months and years of regular laundry cycles, this filter catches trapped debris until water flow drops below acceptable thresholds. Understanding how to locate, drain, clean, inspect, and replace this critical assembly is essential maintenance for every homeowner and renter operating a front-loading washer in American homes.
Understanding the Role of the Washing Machine Drain Pump Filter and Coin Trap
To fix drainage issues effectively, it helps to understand how the lower hydraulic assembly of a modern washing machine functions. Water flows downward from the outer tub through a thick rubber bellows, often called the tub-to-pump hose, into the drain pump housing. Before the water reaches the spinning impeller of the pump motor, it must pass through a fine plastic strainer or perforated basket known as the pump filter or coin trap.
This trap catches hard objects like loose change, hairpins, collar stays, screw nails, and plastic debris before they strike the rapidly spinning impeller blades. If a hard object passes through the filter, it can snap the delicate plastic fins of the impeller or jam the motor armature, causing the pump coil to overheat or burn out. Additionally, the filter traps organic matter, pet hair, threads, and undissolved detergent sludge, preventing these materials from forming clogs inside your home’s main wall standpipe or under-sink drainage plumbing.
However, because the filter is designed to catch debris, it gradually restricts water flow over time. When severe restriction occurs, the washer’s internal microcomputer senses that the water level switch (pressure transducer) has not cleared within a predetermined timeframe—usually 4 to 8 minutes—triggering an automatic safety shutdown to prevent tub overflow or motor overheating. Knowing how to perform routine washing machine drain pump filter cleaning replacement US keeps this vital flow channel wide open.
Recognizing the Warning Signs and Common Error Codes
A completely clogged pump filter rarely happens without warning. Long before your machine stops mid-cycle with a full drum of water, it typically exhibits subtle signs of restricted drainage capacity. Recognizing these early symptoms allows you to clear the coin trap before a complete failure disrupts your routine.
- Excessively wet clothes after spin cycle: Laundry feels unusually heavy, soggy, or dripping wet despite going through a high-speed spin routine.
- Extended cycle times: The digital countdown timer pauses or remains stuck on specific minutes (often around the 6-minute to 11-minute mark) while the pump attempts to evacuate water.
- Gargling or humming noises: The lower pump area produces a continuous low-frequency hum, grinding tone, or rattling sound as the impeller strains against restricted water flow.
- Musty odors inside the drum: Residual trapped water remains trapped in the filter well between washes, creating an ideal breeding ground for mildew and bacterial biofilm.
- Sudden wash aborts: The machine stops entirely during rinse cycles, leaving clothes swimming in soapy water without proceeding to the spin stage.
When the internal timer threshold is exceeded, major appliance manufacturers display specific diagnostic codes on the electronic display. The table below outlines common error codes across major brand platforms used in US homes:
| Manufacturer Brand | Primary Drainage Error Codes | Secondary / Related Fault Codes |
|---|---|---|
| LG Electronics | OE (Drain Fault) | IE (Water Inlet), DE (Door Error) |
| Samsung | 5E / 5ND (Drain Fault) | 4E (Inlet), UB (Unbalanced Load) |
| Whirlpool / Maytag | F03 E01 / F09 E01 / LDD | F01 E02 (Thermal Overload) |
| Bosch | E18 / F18 | E23 (Base Pan Leak Detected) |
| Electrolux / Frigidaire | E20 / E21 | EF1 (Vent / Low Drain Flow) |
| GE Appliances | E22 / E23 | 71 (Drain Timeout) |
Safety Precautions and Essential Tools to Assemble Before You Begin
Working on household appliances that combine high-voltage electricity and standing water requires strict adherence to basic safety protocols. Before attempting to open your machine’s service door or filter compartment, always disconnect electrical power to eliminate the risk of electric shock. Unplug the power cord from the wall outlet or trip the corresponding circuit breaker in your home’s main breaker panel.
Never attempt to unscrew a drain pump filter while the machine is actively connected to power or running a wash cycle. Additionally, if you just ran a hot water or sanitary cycle, allow the appliance to cool for at least 45 minutes to prevent scalding when opening the filter chamber.
Gather the following tools and supplies before starting your washing machine drain pump filter cleaning replacement US project:
- Shallow baking pan or rimmed tray: A low-profile cookie sheet or tray that fits under the lower edge of the washer cabinet to catch runoff water.
- Old bath towels or shop rags: At least 3 to 4 absorbent towels spread across the floor directly beneath the access hatch.
- Small catch vessel: A wide-mouth plastic measuring cup, shallow plastic tub, or cut-open milk jug for emptying the emergency drain hose.
- Pliers or needle-nose pliers: Handy for removing small rubber drain hose plugs or pulling trapped foreign objects out of tight pump housings.
- Flashlight or headlamp: Essential for illuminating the deep, dark recess of the internal filter chamber and inspecting impeller fins.
- Nylon scrub brush and dish soap: For scrubbing away accumulated scale, soap scum, and sludge from the filter threads and mesh basket.
- Flathead screwdriver or putty knife: Wrapped in tape to gently pry open stubborn access panel doors without scratching painted metal surfaces.
Step 1: Draining Standing Water Safely Without Flooding Your Floor
The most crucial phase of filter maintenance on a front-load washer is controlling the evacuation of standing water trapped inside the outer tub and lower housing. A full washing machine tub can hold anywhere from 5 to 15 gallons of water. Unplugging and immediately opening the pump filter knob without draining this water first will cause an overwhelming flood across your laundry room floor.
To execute a controlled water release, locate the small access panel door situated on the lower front corner (typically bottom-right or bottom-left) of the appliance cabinet. Press the spring-latch tab or use a tape-wrapped putty knife to pry open the door flap. Inside, you will see two main components: a larger round screw knob (the main pump filter cap) and a smaller black or grey rubber drain hose capped with a plastic stopper plug.
- Lay your thickest bath towels flat on the floor directly beneath the access door and slide your shallow catch basin under the small rubber drain hose.
- Unclip the flexible auxiliary drain hose from its retaining bracket on the door housing and pull it forward as far as it stretches.
- Position the open tip of the drain hose inside your catch vessel, holding it lower than the base of the washing machine drum to establish gravity siphon flow.
- Twist and gently pull the plastic end plug out of the rubber hose tip. Water will immediately begin flowing into your catch container.
- Once your catch container fills to near capacity, re-insert the plug into the rubber hose to stop the flow, empty the container into a nearby sink or bucket, and repeat the process until water stops flowing from the hose.
If your machine is an older model or a specific style that lacks a small auxiliary drain hose beside the filter cap, you must drain the water directly through the main filter knob using micro-controlled turns. Crack the filter knob counterclockwise by only a quarter-turn, allowing water to trickle out slowly along the lower tray lip into a shallow baking sheet. Tighten the knob clockwise to stop the trickle, empty your pan, and repeat until the flow stops completely.

Step 2: Accessing and Removing the Drain Pump Filter
Once you have completely emptied all standing water through the auxiliary hose or slow-trickle method, you can safely remove the main filter core without causing a flood. Small drops will still escape, so keep a dry towel tucked under the lower lip of the housing port.
Firmly grasp the central handle or textured ridges of the filter cap. Rotate the filter knob counterclockwise (to the left). Most filter caps require anywhere from three to six full rotations before the internal locking threads disengage. As you unscrew the cap, you may hear residual vacuum pressure release from the internal hose lines.
If the filter knob refuses to turn or feels seized after half a turn, do not force it using heavy locking pliers or pipe wrenches. Heavy metal tools will easily snap off the plastic handle tabs or crack the internal filter cage. Resistance usually means a rigid foreign object—such as an oversized bra underwire, nail, key, or wedged coin—is jammed across the filter intake port inside the housing chamber.
If the filter is stuck tight, try wiggling the knob gently back and forth in tiny clockwise and counterclockwise arcs while pulling outward. This slight agitation often shifts trapped coins, allowing the plastic threads to clear the obstruction. If it remains completely frozen, you will need to access the pump body from the underside or rear panel of the machine to dislodge the object from behind before the filter can be unscrewed.
Step 3: Clearing Debris, Coin Traps, and Foreign Objects
Once the filter assembly slides out of the housing cavity, place it directly into an empty utility bucket or sink basin. You will likely find a heavy accumulation of wet lint mats, hair strands, loose coins, buttons, toothpicks, and biological slime wrapped around the basket structure.
Manually pull away all visible mats of lint and solid debris, discarding them into your trash can rather than washing them down your sink drain where they could cause household plumbing clogs. Use a pair of needle-nose pliers to extract any items tightly jammed inside the inner slots of the plastic cage.
Take the filter core to a sink and scrub it thoroughly using warm water, a gentle dish soap, and a stiff-bristled nylon scrub brush. Pay special attention to the fine threads around the cap base and the rubber O-ring gasket mounted on the handle assembly. Accumulated detergent residue, hard water mineral scale, and mold spores on these sealing surfaces will prevent an airtight seal when reinstalled, leading to persistent floor leaks during subsequent wash cycles.
Step 4: Inspecting and Manual Testing of the Pump Impeller
Cleaning the filter basket solves only half of the diagnostic puzzle. Before reinstalling the filter knob, you must inspect the inside of the empty pump chamber and test the mechanical health of the pump impeller motor assembly.
Shine a bright LED flashlight directly into the dark open cavity of the filter housing. Look deep into the back center of the chamber, where you will see a small set of plastic fan blades (usually white, red, or yellow). This is the impeller fan attached to the electric pump motor shaft.
- Look closely for hidden debris wrapped around the base of the impeller shaft. Threads, dental floss, fine human hair, and pet fur commonly slide past filter screens and wrap tightly around the motor shaft pin, creating rotational resistance that slows or stalls the motor under load.
- Use long needle-nose pliers or tweezers to carefully pull away any hair or wrapped strings bound around the axle behind the plastic blades.
- Reach into the chamber with your finger (ensuring power remains completely disconnected) and attempt to spin the impeller blades manually.
- Observe the rotational feel of the impeller. A healthy magnetic induction pump motor will not spin freely like a toy windmill. Instead, it should offer distinct, spring-like magnetic resistance as you turn it with your fingertip—feeling like it snaps smoothly in 90-degree or 180-degree increments from one magnetic pole position to the next.
If the impeller spins completely loosely with zero magnetic resistance, feels gritty and crunchy when turned, or wobbles loosely on its central shaft, the internal motor bearings or magnetic rotor shaft have failed. Conversely, if the blades refuse to turn at all even when cleared of foreign objects, the motor shaft is seized. In either scenario, clearing the filter will not fix your machine—the entire drain pump motor assembly must be replaced.
Step 5: Cleaning the Housing, O-Rings, and Reinstalling the Filter
Before reassembling your machine, clean the internal housing wall where the filter seats. Dampen a rag with a 50/50 mix of warm water and white distilled vinegar, then thoroughly wipe down the smooth interior cylinder walls of the pump housing, paying close attention to the female thread grooves at the front edge of the port.
Inspect the rubber O-ring or silicone sealing gasket located at the base of your filter handle cap. Check for any sign of cracking, dry rot, flattened sections, or deep tearing. If the gasket is damaged, water will seep past the service hatch during operation. If the gasket is intact and flexible, apply a micro-film coating of plumber’s silicone grease (do not use petroleum jelly/Vaseline, which degrades rubber seals) to keep the ring supple and ensure a smooth seal.
To reinstall the clean filter core during your washing machine drain pump filter cleaning replacement US procedure:
- Align the internal guide rails or central core shaft of the filter squarely with the center of the housing opening. Do not force the cap in at an angle.
- Rotate the filter knob clockwise by hand. It should turn smoothly without severe binding.
- Continue turning clockwise until the cap stops completely and the front handle sits flush with the housing faceplate. Give it a firm final quarter-turn hand squeeze to seat the gasket tightly against the housing lip. Never use tools to over-tighten the cap, as excessive torque will split the plastic housing flange or crack the filter body.
- Re-insert the plastic stopper plug securely into the end of the auxiliary rubber drain hose. Push the drain hose back into its designated retaining clip on the door frame.
- Close and latch the outer access door flap.
Diagnosing Damaged Filters vs. Failed Drain Pump Motors
How do you determine whether a simple filter cleaning resolved your problem or if you need to buy a replacement filter or a new electric drain pump motor? Understanding the differences between mechanical housing failures and electrical motor burnouts helps you order the correct replacement part the first time.
If you encounter any of the conditions outlined in the comparative table below, use the recommended resolution path to complete your repair efficiently:
| Symptom / Physical Observation | Root Cause Analysis | Required DIY Repair Action |
|---|---|---|
| Filter handle cracked, threads stripped, or O-ring missing | Physical mechanical damage to removable filter cap assembly | Replace filter plug core only (Part cost: $15–$35) |
| Filter clean, impeller turns with crisp magnetic snap, but machine still displays OE/5E codes | Restricted wall drain standpipe, kinked external drain hose, or failed water level sensor switch | Clear house drain plumbing, check rear discharge hose for kinks, or test water pressure switch |
| Impeller spins completely free with no resistance or wobbles off-axis | Broken internal motor rotor shaft or snapped magnetic driver pin | Replace entire drain pump motor assembly (Part cost: $45–$110) |
| Pump hums continuously during drain cycle, but impeller does not rotate even when clean | Burnt electrical stator windings or internal motor thermal fuse failure under load | Replace complete drain pump motor unit |
| Water leaks constantly from lower hatch cover during wash phase | Misaligned threads, missing/damaged O-ring, or hair caught in filter seal line | Re-seat filter cap correctly, replace damaged O-ring gasket, or clean seal surfaces |
How to Replace a Broken Drain Pump or Filter Assembly
If your diagnostic checks reveal a cracked filter housing shell, stripped threads, or a burned-out electric pump motor, executing a full washing machine drain pump filter cleaning replacement US procedure is a straightforward repair that requires basic hand tools. You do not need to replace the entire washing machine when the pump motor fails.
1. Ordering the Correct Exact-Fit OEM Replacement Part
Never buy generic multi-brand replacement pumps based solely on photo appearance. Appliance pumps vary significantly in electrical connector pin styles, mounting bracket angles, operating wattage, and gallon-per-minute (GPM) ratings. Open your washer door and locate the model number sticker printed on the door frame edge or cabinet door recess. Search for this exact model number on an authorized appliance parts supplier website to obtain the correct original equipment manufacturer (OEM) part number for your pump assembly.
2. Accessing the Internal Pump Housing Assembly
Depending on your brand and model design, accessing the pump assembly requires one of three approach routes:
- Through the lower rear panel: Common on many European and compact front-load models (such as Bosch or Miele). Remove 4 to 8 Torx or hex-head screws holding the lower metal back cover plate to expose the rear of the pump motor.
- Tipping the machine backward: Standard approach for many US-style front-loaders (such as Whirlpool, Maytag, or LG). Disconnect water inlet hoses, secure the wash drum, and safely tilt the appliance backward at a 45-degree angle, resting it securely against a wall or heavy wooden block. Access the open bottom frame of the cabinet.
- Removing the front cabinet panel: Required on select Samsung or GE front-load machines. Requires removing the top panel cover, loosening the door rubber boot spring clamp, disconnecting the door lock wire harness, and unscrewing the lower front fascia plate.
3. Swapping Out the Electrical Motor and Housing Connections
Once you have a clear view of the plastic pump housing inside the cabinet frame:
- Snap a high-resolution photo of all attached wire harnesses and rubber hoses with your smartphone to serve as a wiring reference during reassembly.
- Use wire pliers to squeeze the metal spring clamps on the large black tub-to-pump inlet hose and the smaller corrugated outlet drain hose. Slide the clamps back onto the rubber hose bodies, then twist and pull the hoses off the plastic pump nipples. Have a shop towel ready to catch residual water.
- Disconnect the quick-connect electrical wire plug attached to the pump motor terminal pins. Depress the plastic retaining clip tab while pulling the connector housing off—never pull directly on the insulated wires.
- Unscrew the 2 to 4 mounting bolts or release the rubber isolator dampening feet holding the pump frame to the machine base frame. Lift the old pump assembly out of the appliance.
- If you bought a motor-only replacement without the plastic filter housing, remove the 3 or 4 Torx screws securing the motor head to the plastic scroll housing, pull the old motor off, align the new motor O-ring seal, and screw the new motor head tightly into the original housing body.
- Position the new pump assembly into the cabinet, tighten all mounting bolts, reconnect electrical wire harnesses securely, and slide all rubber hoses back over the housing ports, ensuring the spring clamps rest squarely over the internal connector ridges to guarantee a leak-tight seal.
Testing the Machine and Post-Repair Quality Checks
After completing a filter cleaning or replacing a pump assembly, always run a diagnostic leak test before sliding the appliance back into its tight installation space or re-attaching permanent panel covers.
Connect the power cord back into the wall outlet and open the main water supply valves. Leave the lower plastic access door open or leave the back service panel visible during this test run.
- Select a short Rinse & Spin or Quick Wash cycle on the appliance control panel and press Start.
- Watch the tub fill with a small charge of fresh water. Shine your flashlight directly onto the filter cap seal line and lower hose connections to confirm no static water drops are seeping past the O-ring seals while the tub fills.
- Advance the cycle directly to the Spin stage or wait for the automatic cycle to reach the drain phase.
- Listen carefully as the electronic control board energizes the drain pump motor. The pump should kick in immediately with a smooth, continuous humming sound, and water should discharge in a strong, steady stream through your wall standpipe.
- Inspect all lower hose clamps and the filter cap face for dynamic leaks while the pump operates under full water flow pressure.
- Once the cycle finishes and the door unlocks, confirm that the inner stainless-steel drum is completely dry and empty of standing water.
Preventive Maintenance Strategies to Keep Your Washer Draining Smoothly
Performing a routine cleanout of your washing machine drain pump filter every 3 to 6 months keeps your appliance operating at peak efficiency, shortens overall wash times, and significantly reduces wear on internal motor components. Integrating a few simple laundry habits into your weekly routine will prevent future clogs and extend the operating life of your machine:
- Check garment pockets thoroughly: Train all family members to check pockets completely before dropping clothes into laundry hampers. Coins, paper clips, lip balms, screws, and receipts are the leading cause of clogged coin traps and torn pump impellers.
- Use mesh laundry bags for delicate small items: Small items like baby socks, thin thongs, cloth facemasks, wire bras, and small handkerchiefs can easily slip over the lip of the inner drum gasket during high-speed tumbling and get sucked down into the tub drain line. Wash these items inside zippered mesh laundry bags.
- Brush off heavy pet hair before washing: Excess pet fur combines with residual liquid detergent fat to form dense, waterproof mats that quickly blind filter screens. Use a rubber lint brush or roller to remove loose pet fur from blankets and dog beds before tossing them into the washing machine.
- Avoid over-dosing with liquid fabric softeners: Thick silicone-based fabric softeners do not dissolve fully in cold water cycles. Over time, these products coat internal drain lines and filter mesh baskets in a sticky, waxy film that catches lint and breeds foul-smelling mold and mildew.
- Run a monthly drum-clean cycle: Perform a monthly hot water tub clean cycle using standard washing machine cleaner tablets or two cups of white distilled vinegar to break down soft detergent sludge, bio-slime, and mineral deposits before they travel down into the lower pump chamber.
Frequently Asked Questions About Washer Drain Pump Filters
How often should I clean my front-load washer drain pump filter?
For average households running 4 to 6 loads per week, clean the filter every 3 to 4 months. If you have multiple shed-prone pets, wash heavily soiled work wear, or frequently launder bulky rugs, inspect and clear the coin trap every 30 to 60 days to prevent sudden flow restrictions.
Why is my washing machine filter stuck and refusing to unscrew?
A stuck filter cap is almost always caused by a rigid item—such as a coin, key, or bra underwire—wedged horizontally across the internal intake port. Do not force the cap with pliers. Try gently wiggling the handle back and forth while applying light pressure, or access the pump housing from the bottom frame to clear the obstruction from behind.
Do top-loading washing machines have drain pump filters?
Most modern US top-loading washers do not feature a user-accessible front filter hatch. Instead, top-loaders rely on self-cleaning pump impellers that pass small lint particles directly into the household standpipe. However, if a top-loader fails to drain, debris may be caught in the tub-to-pump rubber hose or wedged beneath the wash basket agitator.
Can I operate my front-load washing machine without the filter installed?
No. Running a washer without the drain pump filter core installed will cause water to gush out of the lower access hatch as soon as the machine fills. Furthermore, omitting the filter exposes the fragile pump impeller to loose coins and hardware, causing immediate mechanical destruction.
By treating your front-load washer’s drain pump filter as a routine maintenance point rather than waiting for an emergency water backup, you eliminate one of the most common causes of home appliance breakdowns. With a couple of towels, a shallow catch pan, and twenty minutes of spare time, executing proper washing machine drain pump filter cleaning replacement US routines will clear error codes, restore high-speed water evacuation, and keep your washing machine running smoothly for years to come.