
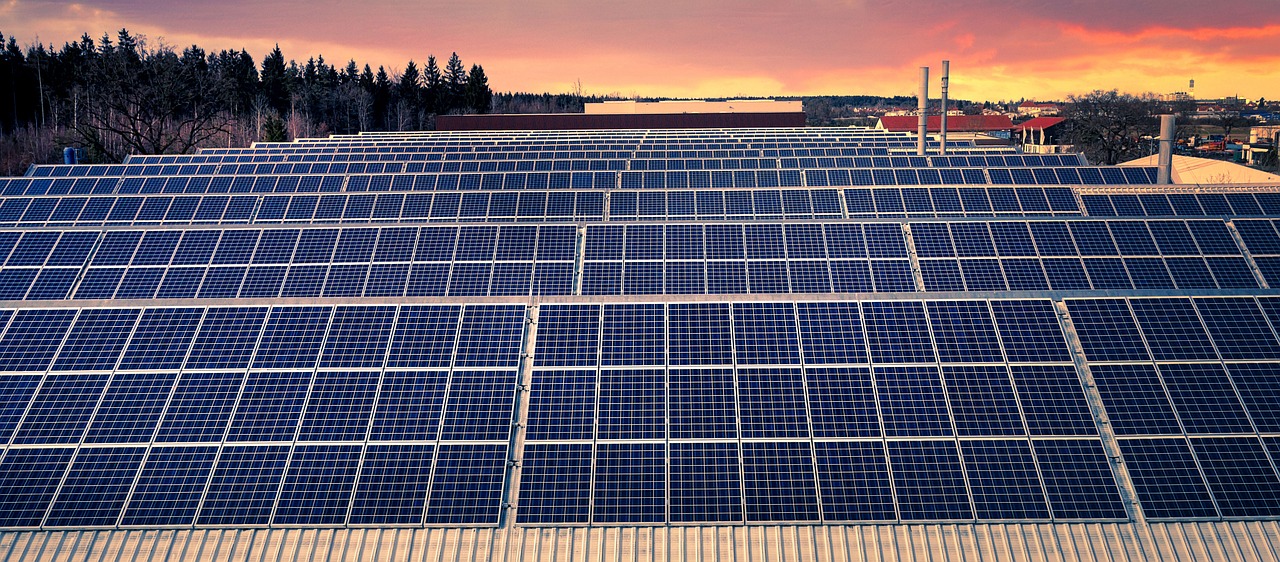
When summer sun bakes your roof, attic air temperatures easily surge past 130°F or even 150°F, turning the space above your ceiling into a giant thermal radiator. That trapped heat bleeds downward into your living spaces, forcing your central air conditioner to run long, costly cooling cycles. When analyzing the solar attic fan vs electric attic fan cost US homeowners navigate today, looking solely at retail price tags leads to incomplete conclusions. Deciding between solar and hardwired grid power requires weighing equipment prices, professional electrician fees, seasonal utility bills, available federal tax credits, and raw airflow performance.
A well-engineered active attic ventilation system pulls superheated air out through roof or gable vents while drawing cooler ambient air in through lower intake vents. However, choosing between a self-powered photovoltaic unit and a hardwired 120-volt motor involves balancing initial cash outlay against long-term operational expenses and cooling capacity. This guide provides a detailed breakdown of equipment prices, installation labor, airflow calculations, thermal mechanics, and practical climate suitability to help you select the ideal system for your home.
Understanding the Physics of Attic Heat and Ventilation
To evaluate ventilation equipment effectively, it is essential to understand why attic spaces accumulate extreme thermal loads during hot weather. Direct solar radiation hits your asphalt shingles or tiles, raising surface temperatures up to 170°F on bright summer afternoons. That intense surface heat conducts downward through roof decking, warming the structural rafters, trapped air mass, and ceiling insulation below.
Passive attic ventilation relies on natural convection—hot air rising naturally toward ridge vents or upper turtle vents while pulling ambient air through soffit openings along the eaves. While passive ventilation works adequately on steeply pitched roofs in mild climates, it often struggles during severe heatwaves or on low-pitch roofs where air movement stalls. Active, powered ventilation speeds up air exchange by mechanically flushing hot air out of the building structure.
Properly planned active ventilation provides three core benefits for residential structures:
- Lower Living-Space Heat Gain: Lowering attic air temperatures reduces heat conduction through ceiling joists and drywall, keeping top-floor bedrooms and hallways substantially cooler.
- Reduced HVAC Strain: Air conditioning ductwork running through a 105°F attic suffers far less thermal pickup than ductwork sitting in a 140°F attic, resulting in colder vent discharge temperatures and shorter compressor cycles.
- Moisture Control and Structural Longevity: During colder months, ventilation flushes out humid indoor air escaping through ceiling penetrations, preventing moisture condensation on rafter surfaces that causes wood rot and mold.
Solar Attic Fans vs. Hardwired Electric Attic Fans: How They Differ
While both fan types are designed to exhaust superheated air from the top of your roof, their motor designs, power sources, and operational traits differ fundamentally.
Hardwired Electric Attic Fans
Traditional electric attic fans connect directly to your home’s 120-volt electrical panel. Powered by robust alternating current (AC) motors, these units are governed by mechanical or digital thermostats, often paired with humidistats. When attic temperatures cross a pre-set threshold (typically 90°F to 100°F), the thermostat switches the motor on, running the fan continuously at full rated speed until air temperatures drop below the set point.
Because hardwired fans draw uninterrupted power from the electrical grid, they deliver high, reliable airflow regardless of weather, shade, cloud cover, or time of day. However, running a 100-watt to 300-watt AC motor for eight to twelve hours a day adds a noticeable charge to your monthly summer power bills.
Solar-Powered Attic Fans
Solar attic fans feature an integrated or remote photovoltaic (PV) panel mounted on or adjacent to the exterior weather dome. The solar panel converts sunlight directly into low-voltage direct current (DC) electricity to power a high-efficiency, brushless DC motor. As sunlight intensity rises, the motor accelerates; as sunlight fades, fan speed decreases naturally.
Because solar fans generate all their operating power on site, running them costs nothing on your monthly electric bill. However, their total volumetric airflow varies throughout the day depending on cloud density, roof orientation, nearby tree shading, and sun angles. When peak attic heat lingers into the late afternoon or early evening, a standard solar fan slows down as available sunlight drops.
Solar Attic Fan vs Electric Attic Fan Cost US: Complete Pricing Breakdown
Evaluating the total financial commitment of a solar attic fan vs electric attic fan cost US project requires breaking down expenses into three primary components: initial equipment purchasing, professional installation labor, and ongoing electrical operation.
Upfront Equipment Costs
Equipment prices vary based on solar panel wattage, motor design, casing materials, and smart control features:
- Hardwired Electric Fans: Standard roof-mounted or gable-mounted electric fans typically range from $80 to $230 for reliable residential models. Commercial-grade or high-volume residential units featuring heavy-gauge aluminum bodies and integrated thermostat/humidistat controls cost between $250 and $420.
- Solar Attic Fans: Entry-level solar units equipped with small 15-watt to 20-watt panels cost between $200 and $350. High-performance models featuring 30-watt to 50-watt adjustable tilt panels, brushless motors, thermal switches, and hybrid power modules range from $400 to $800.
Installation and Labor Expenses
Labor charges depend heavily on whether new electrical wiring must be pulled through interior wall cavities or rafter bays.
Solar Fan Installation: Installing a solar attic fan is primarily a roofing job. A qualified roofer cuts an opening through the roof deck, slips flashing under upper shingle courses, seals all seams with high-grade elastomeric sealant, and fastens the fan dome. Because there is no high-voltage electrical connection, installation takes two to three hours. Professional labor costs typically range from $250 to $500.
Electric Fan Installation: Hardwired electric fans require both roofing and licensed electrical labor. An electrician must run electrical wire from a junction box or breaker panel, install a safety disconnect switch, mount the junction box, and wire the thermostat controller. If your panel lacks open slots or the attic access is tight, wiring labor can increase rapidly. Combined roofing and electrical installation costs generally run from $400 to $950.
Operational Utility Costs
Ongoing utility expense is where solar models regain their financial advantage over hardwired alternatives:
- Hardwired Electric Fan: A typical 250-watt electric fan running 9 hours per day across a 90-day summer season uses roughly 202.5 kWh. At the average US residential electricity rate of approximately $0.16 per kWh, operating one fan costs around $32.40 per season. In high-cost utility regions like California, Hawaii, or the Northeast—where electricity rates range from $0.28 to $0.42 per kWh—operating costs can hit $60 to $85 per season per fan.
- Solar Attic Fan: Seasonal operational cost is strictly $0.00 because the fan generates its own electricity from solar radiation.
Federal Tax Credits and Incentives
Under the Inflation Reduction Act in the United States, qualifying residential solar electric property installed through 2032 is eligible for the Section 25D Federal Energy Efficient Home Improvement Credit. This tax provision allows homeowners to claim a 30% federal tax credit on both the equipment purchase price and professional installation labor for qualifying solar attic fans. A $600 solar fan setup with $350 in installation labor ($950 total) yields a $285 tax credit, substantially reducing the net project cost.
| Cost Factor | Hardwired Electric Fan | Solar Attic Fan |
|---|---|---|
| Average Unit Price | $80 – $250 | $200 – $600 |
| Professional Installation Labor | $400 – $950 (Roofer + Electrician) | $250 – $500 (Roofer or Handyman) |
| Federal Tax Credit Eligibility | 0% (Does not qualify) | Up to 30% of total installed cost |
| Estimated Net Upfront Cost | $480 – $1,200 | $315 – $770 (after 30% credit) |
| Annual Operating Cost | $30 – $85 per summer | $0.00 |
| 5-Year Total Cost of Ownership | $630 – $1,625 | $315 – $770 |
Airflow Capabilities: Calculating CFM and Attic Volume
Air volume moving through a ventilation fan is measured in Cubic Feet per Minute (CFM). Understanding airflow specifications is critical because under-sizing an attic fan leaves thermal energy trapped inside your roof frame.
The CFM Gap Between Solar and Electric Motors
Hardwired electric fans deliver substantial, sustained air volume because they draw continuous power from your household grid. A standard 1/10 HP AC motor easily moves 1,000 to 1,600 CFM continuously, maintaining high air movement across expansive attics.
Solar fans run on limited wattage. Smaller 15-watt solar units produce between 500 and 800 CFM under direct overhead sun. Larger premium units featuring 40-watt to 50-watt panels and brushless DC motors can reach 1,200 to 1,500 CFM in direct sunlight, but their output drops when clouds pass or sun angles steepen in late afternoon.
Sizing Math: Calculating Required CFM for Your Roof
To calculate your home’s exact attic ventilation capacity requirement, follow this practical sizing procedure:
Step 1: Calculate Base Floor Square Footage
Multiply attic floor length by width (e.g., 50 feet × 30 feet = 1,500 square feet).
Step 2: Apply the Standard CFM Multiplier
The standard HVAC engineering guideline calls for 0.7 CFM of fan capacity per square foot of attic floor space.
1,500 sq. ft. × 0.7 = 1,050 CFM baseline requirement.
Step 3: Adjust for Roof Pitch and Dark Shingle Material
- Steep Roof Pitch (7:12 or greater): Add 15% to account for the larger air volume inside high roof cavities.
- Dark Shingles in Hot Southern Climates: Add 15% to compensate for increased solar absorption.
Sizing Example: For a 1,500 sq. ft. attic space with a steep 8:12 roof pitch and dark asphalt shingles in Texas or Florida, calculate: 1,050 CFM × 1.30 = 1,365 CFM required. Fulfilling this requirement with hardwired electric power requires a single medium-sized unit. Accomplishing it with solar power may require two medium-sized solar fans placed strategically across the ridge line or one high-capacity 50W unit with ideal sun exposure.
The Critical Intake Balance: Net Free Vent Area (NFVA)
Installing a powerful powered attic fan without adequate intake venting is one of the most common and damaging mistakes in residential roofing. Powered exhaust fans do not work in isolation; they push hot air out only as effectively as fresh outdoor air is drawn in through lower eaves.
Calculating Net Free Vent Area Requirements
Building codes typically mandate a minimum 1:150 or 1:300 ratio for attic ventilation openings. When operating powered exhaust fans, ensure you have 1 square foot of Net Free Vent Area (NFVA) for every 300 CFM of fan output.
If a 1,200 CFM electric or solar fan runs in an attic with sealed or blocked soffit vents, the fan generates negative air pressure inside the attic cavity. Attic depressurization creates two major performance problems:
- Conditioned Air Drafts: Negative pressure pulls cool, air-conditioned air out of your home through ceiling light fixtures, attic access doors, and drywall gaps, increasing home cooling costs.
- Flue Gas Backdrafting: Strong negative pressure can pull toxic exhaust gases (carbon monoxide) downward through natural-draft gas water heater flues or furnace chimneys located in attic framing or utility closets.
Before mounting any powered fan, clear clogged eave vents and install rafter baffles to maintain free air movement from intake to exhaust.
Peak Sun vs. Peak Heat: The Timing Problem
A key operational difference between solar and electric fans lies in timing patterns. Solar generation tracks direct solar intensity, whereas attic heat accumulation exhibits thermal lag.
The Thermal Mass Lag Effect
Solar radiation reaches maximum intensity around solar noon (between 12:00 PM and 1:00 PM). However, peak attic air temperatures typically occur hours later—between 3:30 PM and 6:30 PM. Plywood roof decking, heavy rafters, and asphalt shingles store heat slowly and re-radiate thermal energy into the attic long after midday.
A basic solar fan slows down in late afternoon as sun angles drop and shadows lengthen across your roof shingles. Right when attic wood frames are radiating their highest thermal load, a basic solar fan’s output drops.
How Modern Solar Technology Solves the Timing Problem
Manufacturers solve this timing gap through two smart equipment configurations:
- AC/DC Hybrid Smart Adapters: High-end solar fans can be wired to a low-voltage transformer connected to an attic junction box. The fan uses zero-cost solar power whenever sunlight is adequate. When sunlight falls and the attic thermostat remains above 90°F, an automated switch draws minimal grid electricity to keep the fan running at full speed.
- Integrated LiFePO4 Battery Systems: Solar fans equipped with internal lithium iron phosphate batteries charge during peak midday light and power the motor for 2 to 4 additional hours after dusk, maintaining high airflow through late afternoon temperature peaks.
Adding hybrid adapters or battery storage increases initial equipment costs by $150 to $280, but it bridges the performance gap between solar reliance and round-the-clock thermal protection.
Climate Zone Suitability: Where Solar Succeeds and Where Electric Wins
Geographic region, climate conditions, and local weather patterns determine whether solar or electric ventilation delivers better performance for your property.
Ideal Environments for Solar Attic Fans
Solar attic fans are exceptionally well suited for these scenarios:
- Sun Belt States: Areas with high sunny-day counts (such as Texas, Arizona, Florida, Nevada, and California) provide continuous solar exposure that keeps fans operating at peak CFM during hot afternoons.
- Homes Without Existing Attic Wiring: Older homes where running continuous AC electrical lines to the roof framing requires cutting into drywall or upgrading the breaker box.
- Unshaded South- and West-Facing Roof Planes: Roof surfaces with unobstructed sunlight during afternoon hours.
Ideal Environments for Hardwired Electric Fans
Hardwired electric fans excel in these situations:
- Cloud-Prone Northern Regions: Areas in the Pacific Northwest, Midwest, and Northeast that experience frequent summer cloud cover, high humidity, and long twilight heat retention benefit from the steady power of electric units.
- Large Attics (Over 1,800 Square Feet): Sprawling ranch homes or complex hip-roof structures that need maximum CFM turnover to control heat buildup.
- Shaded Rooflines: Homes surrounded by mature tree canopies, taller neighboring structures, or northern roof slopes where solar panels cannot receive direct light.
How Attic Fans Affect Summer Cooling Costs
Understanding how attic fans affect monthly energy bills helps establish realistic expectations for financial payback.
An attic fan cools the attic space, not your living area directly. Lowering attic temperature from 145°F down to 105°F reduces heat conduction down through your top-floor ceiling. If your ceiling insulation is light or degraded (e.g., R-11 or R-19 fiberglass batts), an attic fan noticeably lowers second-floor temperatures and eases central air conditioner workload.
However, if your attic floor is already insulated to current building standards (R-49 to R-60 blown cellulose or spray foam), heat conduction into the house is already minimal. In well-insulated homes, the fan’s main benefits are protecting shingle backings from excess heat aging and cooling HVAC ductwork running through the attic space.
Estimated Air Conditioner Savings
In hot southern climates, active attic ventilation reduces central air conditioner power consumption by 3% to 8% during peak summer months. For a household spending $250 monthly on summer cooling, that equals roughly $7.50 to $20.00 in monthly AC savings. Because a hardwired fan draws grid power, its electrical operating cost can offset these AC savings. A solar attic fan avoids this electrical penalty entirely, allowing you to retain all direct air conditioning savings.
Installation Steps, Safety, and Common Mistakes
Proper installation techniques ensure long-term, leak-free operation and prevent structural ventilation problems.
Key Installation Steps
- Waterproof Roof Flashing: When installing roof-mounted fans, cut opening holes cleanly between rafter framing. Slip top and side flashing edges under upper shingle courses and apply generous beads of polyurethane roofing sealant along flashing margins and exposed nail heads.
- Solar Panel Placement: Mount solar panels on south or southwest roof slopes to maximize sunlight capture during warm afternoon hours. Avoid placing panels behind chimneys, dormers, or high tree branches.
- Thermostat Settings: Set electric fan thermostats between 95°F and 100°F. Setting thermostats too low (such as 80°F) keeps the motor running continuously, wasting electricity without offering additional thermal relief.
Critical Mistakes to Avoid
- Combining Powered Fans with Continuous Ridge Vents: Never install a powered fan right next to a continuous ridge vent. The fan will draw outdoor air directly from the nearby ridge vent rather than pulling hot air up from low soffit vents, creating a short-circuit ventilation pattern that leaves lower attic spaces hot.
- Neglecting Humidistat Controls: Damp air accumulating during shoulder seasons can cause fungal growth on timber framing. Ensure your electric fan features an integrated humidistat (set to 60%–65% relative humidity) or choose a solar fan with automated humidity monitoring.
- Omitting Thermal Cutoff Switches: Hardwired attic fans must include a thermal fuse safety switch. In an attic fire, this switch cuts power to the fan motor, preventing it from pulling flames and combustion oxygen into the roof cavity.
Step-by-Step Selection Framework
Follow this practical decision process to select the ideal attic ventilation fan for your home:
Step 1: Calculate Attic Area and Target CFM
Multiply attic floor length by width, apply the 0.7 CFM per sq. ft. factor, and adjust for dark shingles or steep pitch.
Step 2: Inspect Intake Venting Capacity
Check soffit vents to ensure you have 1 square foot of open Net Free Vent Area per 300 CFM of planned exhaust fan capacity. Clear away loose blown-in insulation with rafter baffles.
Step 3: Evaluate Solar Panel Exposure
Inspect your roofline between 1:00 PM and 5:00 PM. If south and west roof slopes receive direct, unobstructed sunlight, solar power is a strong option. If heavy tree shade blocks direct sun, choose a hardwired electric unit.
Step 4: Compare Total Installed Costs
Gather quotes from roofers and electricians. Subtract the 30% federal solar tax credit from eligible solar fan quotes to compare net out-of-pocket costs accurately against hardwired installations.
Verdict: Choosing the Right Fan for Your Home
Choosing between a solar attic fan and a hardwired electric attic fan comes down to balancing your roof layout, climate conditions, upfront budget, and direct maintenance expectations.
Choose a Solar Attic Fan If:
- You live in a sunny climate with minimal tree shade on your south- or west-facing roof.
- You want to avoid complex electrical wiring runs, breaker panel work, and electrician fees.
- You want zero operational utility costs and wish to take advantage of the 30% federal solar tax credit.
- Your attic area is under 1,600 square feet, or you are willing to install two solar units for larger roof footprints.
Choose a Hardwired Electric Attic Fan If:
- You live in an area with frequent clouds, high humidity, or heavy tree shading across your roofline.
- You have a large attic (over 1,800 square feet) requiring continuous, high-volume CFM airflow.
- Your attic already features accessible 120-volt wiring, keeping professional electrician labor low.
- You need reliable exhaust performance that operates at maximum speed into late evening hours after sunset.
By calculating your exact CFM needs, balancing intake ventilation, and factoring in total installation costs after tax incentives, you can install an attic ventilation system that lowers indoor temperatures, protects your roof structure, and curbs summer cooling expenses for years to come.



