
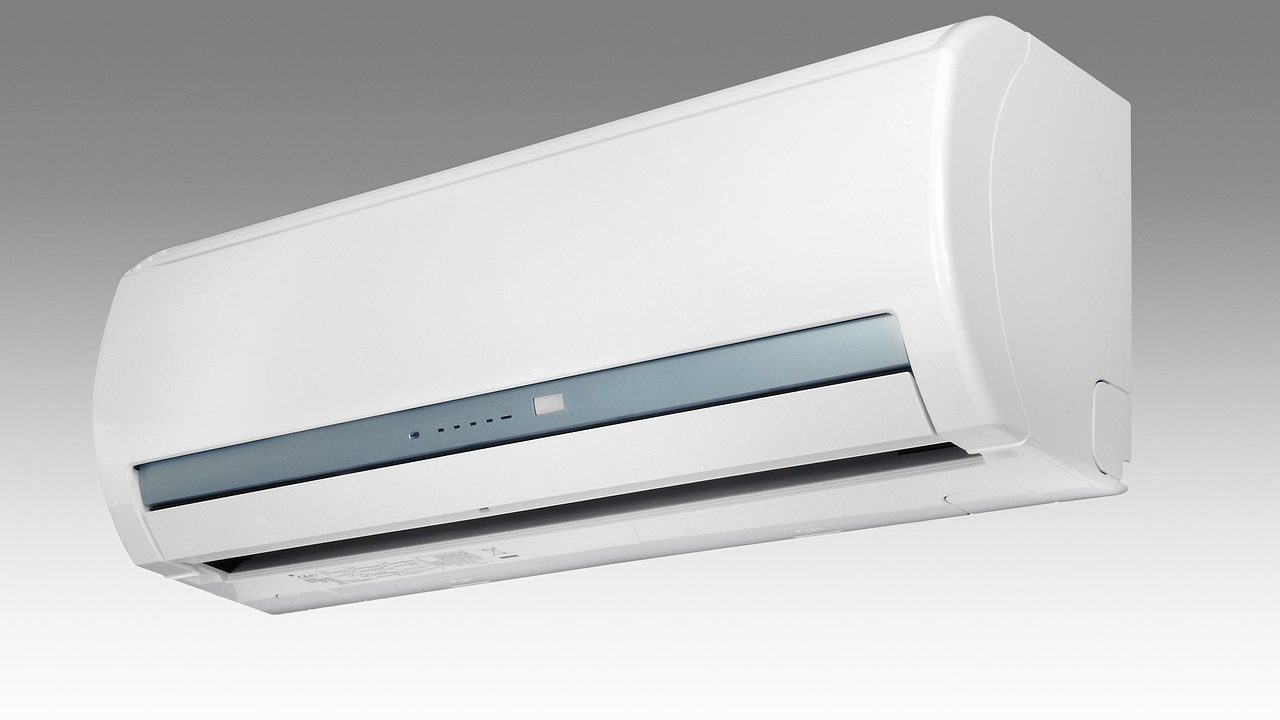
Ductless mini-split heat pumps provide exceptional zone-by-zone heating and cooling efficiency for residential homes. However, because these systems continuously pull indoor air across damp aluminum evaporator fins and spin it through a cylindrical blower wheel, they create an ideal microclimate for mold, mildew, dust, and biological growth. When organic debris accumulates inside the unit, you may notice musty odors when the system starts, reduced airflow, uneven room temperatures, or even water leaking from the bottom of the indoor air handler. Sticking to a routine mini split evaporator coil cleaning guide ensures your equipment runs efficiently, protects indoor air quality, and prevents expensive compressor failures caused by restricted airflow.
While professional HVAC service calls can become costly over time, performing a thorough interior cleaning is an achievable DIY project for homeowners comfortable with basic hand tools and electrical safety precautions. This guide outlines the exact tools, safety steps, disassembly techniques, cleaning chemicals, and reassembly procedures required to restore your ductless heat pump to factory-fresh condition. By dedicating a weekend morning to this preventive maintenance task, you extend the operational lifespan of your equipment and guarantee that the air circulating through your living spaces remains fresh, clean, and free from harmful biological contaminants.
Understanding Why Mini-Splits Accumulate Mold and Debris
To understand why ductless units require such careful attention, it helps to look at their internal design. Traditional central HVAC systems house their evaporator coils and blower motors inside a remote garage, attic, or utility closet, hiding the dust and grime from daily view. In contrast, a mini-split indoor air handler mounts directly on your living room, bedroom, or home office wall, making it an intimate part of your indoor environment.
Every time your heat pump runs in cooling mode, moisture condenses out of the warm room air as it passes over the freezing cold aluminum evaporator fins. This water drips into a collection pan and flows out through a condensate drain tube. While the system is designed to handle this moisture, microscopic airborne dust particles, cooking oils, pet dander, aerosol sprays, and pollen mix with the water droplets. Over a single cooling season, this organic sludge coats the evaporator fins and cakes onto the complex blades of the cross-flow blower wheel.
Left unchecked, this buildup restricts heat transfer, forcing the compressor to work harder and longer to reach your thermostat setpoint. Furthermore, the dark, damp environment inside the blower housing becomes a breeding ground for mold colonies, which then disperse spores into your living space every time the fan engages. Establishing a regular preventive maintenance routine stops this cycle before it impacts your health or your utility bills. Understanding this continuous cycle of condensation and particulate capture underscores why surface vacuuming of the mesh filters is simply not enough to keep a ductless unit truly clean.
Essential Tools and Safety Supplies
Before you touch a single screw on your mini-split system, assemble the proper equipment. Improvised tools can damage delicate aluminum fins, crack aged plastic tabs, or create dangerous electrical hazards. Make sure you have the following items ready and laid out in your work area:
- Personal Protective Equipment: Safety glasses, rubber gloves, and an N95 mask or respirator to protect against mold spores and chemical overspray during high-pressure washing.
- Electrical Safety: A non-contact voltage tester to verify power is completely disconnected at both the unit and the breaker panel.
- Hand Tools: A set of precision screwdrivers (Phillips and flathead) and a non-marring plastic trim removal tool set to pop clips without scratching plastic.
- Cleaning Shield: A mini-split cleaning wash bib or bag equipped with a flexible drainage hose to capture wastewater and direct it securely into a bucket.
- Chemicals: A dedicated, non-acidic foaming evaporator coil cleaner and a pump-style garden sprayer filled with clean, lukewarm water.
- Blower Cleaning: A long-handled soft-bristle brush, plastic scraper, or a specialized mini-split blower wheel cleaning wand designed to reach between tight curved blades.
- Fin Comb: An aluminum fin comb matched to your unit’s fin density to straighten any accidentally bent coils.
- Protection: Heavy-duty plastic drop cloths, painter’s tape, and old towels to protect your flooring, walls, and surrounding furniture from rogue splashes.
Step 1: Disconnecting Power and Preparing the Work Area
Safety is always the primary concern when servicing electrical appliances containing water and high-voltage circuitry. Mini-split indoor units are powered by high voltage supplied either from an outdoor condenser unit disconnect box or directly from your home’s main electrical breaker panel.
Locate the specific circuit breaker dedicated to your mini-split system and switch it firmly to the OFF position. Use your non-contact voltage tester directly against the wires inside the indoor unit’s terminal block once you open the wiring cover, ensuring zero electrical current is present before proceeding with any disassembly. Never rely solely on turning the system off via the hand-held infrared remote control, as this only puts the unit into standby mode and leaves internal circuitry fully energized.
Once power is positively cut, clear away any furniture, rugs, or electronic devices located directly beneath the wall unit. Lay down large plastic drop cloths and secure them with painter’s tape against the baseboard. Preparing your workspace meticulously prevents accidental water damage to hardwood floors or carpets during the intensive washing phases.
Step 2: Removing the Plastic Casing and Louvers
Disassembling a wall-mounted mini-split housing requires patience and a gentle touch. Plastics become brittle over years of temperature fluctuations, and forcing a clipped panel can snap alignment tabs permanently, leading to rattling noises when the unit runs later.
Start by lifting the front decorative access cover completely off its hinges and setting it aside. Next, locate the screw covers on the front face of the unit, usually hidden beneath small rubber plugs near the bottom edge or behind the swing louvers. Remove these retaining screws and store them in a small cup so they do not get lost.
Carefully release the bottom clips of the outer shell by pulling forward firmly yet gently with your fingertips. Work your way upward, releasing the upper locking tabs along the top edge of the chassis. Once the main plastic shroud is loose, support the vertical and horizontal air-direction louvers. Some models require you to gently unclip the motorized louver arm from its track. Set the plastic casing aside in a safe location where it will not be stepped on, warped, or scratched by tools.
Step 3: Protecting Electronics and Installing the Wash Bib
With the casing removed, you will see the exposed electronic control board (PCB) on the right side of the air handler, containing sensitive microchips and low-voltage connections. Water and electronic components do not mix. Cover the entire electrical housing and display panel securely with heavy-duty plastic wrap, sealing the edges tightly with painter’s tape to create a waterproof barrier against overspray.
Next, install your mini-split cleaning bag (often called a service bag or wash bib). This flexible plastic funnel wraps entirely around the bottom and sides of the wall unit, featuring an elastic cord that hugs the chassis contour. Position a large five-gallon bucket beneath the drain port of the bag to capture all the dirty runoff water, cleaning chemicals, and loosened debris as you wash the interior components.
Step 4: Applying Coil Cleaner to Evaporator Coils
The evaporator coil is the A-shaped or flat matrix of copper tubing laced with thin aluminum fins located directly beneath the air filters. These delicate fins bend easily under direct pressure, so treat them with care throughout the washing process.
Spray your non-acidic foaming evaporator coil cleaner evenly across the entire surface of the coils, starting from the top and working your way down in smooth, horizontal passes. Allow the foaming solution to dwell for five to ten minutes. As it bubbles, the chemical breaks down grease, nicotine film, dust, and organic contaminants trapped between the tight fin spaces.
Do not use harsh industrial degreasers, bleach, or highly acidic cleaners, as these aggressive chemicals corrode aluminum fins and degrade copper piping over time, leading to eventual refrigerant leaks. Once the foaming action subsides, use your pump sprayer filled with clean water to thoroughly rinse the coils. The dirty water will cascade down into the drain pan and safely empty through your wash bib into the collection bucket below.
Step 5: Deep-Cleaning the Blower Wheel
While cleaning the coils is vital, neglecting the cylindrical blower wheel leaves the primary source of mold and musty odors untouched. The blower wheel resembles a metal or hard plastic hamster wheel with dozens of curved blades designed to push air forward efficiently.
Inspect the individual blades closely under a bright flashlight. You will likely see a thick layer of black mold and lint packed tightly into the concave curve of each blade. This biological weight unbalances the wheel, causing the blower to wobble, vibrate noisily, and move a fraction of its rated airflow.
Spray a specialized coil cleaner or a mild dish soap solution directly onto the blower wheel blades. Allow it to soften the caked-on organic matter for a few minutes. Because reaching every angle of the wheel is difficult, use a specialized soft-bristle brush or a long-handled plastic tool designed to slide between the blades. Gently scrub each section while turning the wheel by hand. Rinse the wheel thoroughly with your pump sprayer, ensuring all loosened debris washes down into the collection bucket. Take care not to bend the delicate metal balancing clips attached to the wheel blades.
Step 6: Flushing and Clearing the Condensate Drain Line
The condensate drain pan sits directly beneath the evaporator coil and blower assembly, collecting all the moisture pulled from the air during operation. If the drain line clogs with algae, slime, or dust, water will overflow the pan and leak down your interior walls, causing costly drywall damage.
Locate the drain outlet where the flexible drain hose exits the bottom of the indoor unit or runs outside your home to daylight. Use a wet/dry shop vacuum on the outdoor termination point to pull out any clogs or biological blockages. Alternatively, pour a mixture of warm water and distilled white vinegar down the indoor drain trough to sanitize the line and break up nascent algae colonies. Verify that water poured directly into the drain pan flows freely through the system and exits outside without pooling in the tray.

Step 7: Drying, Reassembly, and System Testing
Before putting everything back together, carefully inspect your work. Wipe down any remaining accessible interior surfaces with a clean microfiber cloth. Ensure no standing water remains in the electrical compartment or bottom tray.
Carefully peel away the plastic wrap protecting the electronic control board, taking care not to drip any trapped moisture onto the board. Reinstall the plastic outer casing by aligning the top hooks with the metal mounting bracket, then pressing firmly downward and inward until all snap clips engage securely. Replace any securing screws and snap the rubber screw covers back into place. Re-attach the front louver assembly and drop the clean mesh air filters back into their designated slots.
Return to your main electrical breaker panel and switch the power back on. Turn on the mini-split via the remote control, setting it to fan mode first for at least ten minutes to blow out any residual moisture from the vents. Listen carefully for any unusual scraping or rattling noises that would indicate an improperly seated blower wheel or rubbing louver. Finally, switch the unit to cooling mode and verify that cold air begins flowing evenly across all zones.
Preventive Habits to Maintain Clean Air Handlers
To minimize how often you need to perform a deep teardown, establish simple housekeeping habits between annual services:
- Wash Filters Bi-Weekly: Clean the mesh air filters every two weeks during heavy cooling or heating seasons by vacuuming loose dust and rinsing them with warm water.
- Maintain Clearance: Keep furniture, curtains, and shelving at least three feet away from the indoor air handler to ensure unobstructed airflow and proper room air entrainment.
- Control Indoor Humidity: Use whole-house ventilation or dehumidification when outdoor humidity spikes to reduce the moisture load on the indoor coils.
When to Call a Professional HVAC Technician
While DIY cleaning handles surface grime, mold, and standard buildup, certain situations require professional intervention. Call a licensed HVAC technician immediately if you encounter:
- Frayed wiring, burnt electrical terminals, or persistent burning odors when the unit runs.
- A refrigerant leak, indicated by ice forming on the evaporator coils or a noticeable loss of cooling capacity.
- Severe mold infestation that has penetrated deep inside the sealed blower motor housing or insulated duct adapters.
- Refrigerant pressure checks or deep system flushing that require EPA Section 608 certification and specialized manifold gauges.
By investing a couple of hours into routine preventive maintenance each year, you protect your heating and cooling investment, lower your monthly energy consumption, and ensure your home enjoys clean, healthy air year-round.
Frequently Asked Questions About Mini-Split Maintenance
How often should I clean my mini-split coils and blower wheel? For most residential homes, a thorough deep cleaning should be performed once a year, ideally right before the heavy cooling season begins. However, homes with pets, high dust levels, or damp climates may require semi-annual servicing.
Can I use standard household bleach to kill mold on the blower wheel? No. Bleach is highly corrosive to aluminum fins and copper tubing. It can also degrade plastic components and emit harsh fumes when the system restarts. Always use a dedicated, non-acidic HVAC coil cleaner.
What causes a mini-split to leak water inside the house? The most common cause is a clogged condensate drain line or a blocked drain pan caused by algae and slime buildup. Regular flushing with vinegar prevents this issue.



