When you join a high-stakes client call, the physical angle of your camera dictates how you are perceived. Built-in laptop webcams sit far too low, forcing viewers to look up your nose while creating a slouching posture that looks disengaged or defensive. Achieving an external webcam eye level setup instantly changes that dynamic, establishing natural eye contact, professional authority, and physical comfort over hours of back-to-back virtual meetings.
Fixing this issue is not simply a matter of sticking any camera on top of your screen. Achieving a broadcast-quality look requires balancing lens height, focal length, desk ergonomics, and supplementary lighting. This guide breaks down the physical hardware, mounting mechanics, and alignment principles needed to transform your home office video feed.
The Psychology of Eye Contact in Virtual Client Meetings
In face-to-face communication, eye contact builds trust, signals active listening, and establishes psychological safety. On video calls, true eye contact is mechanically impossible because the camera lens and the caller’s face on your screen occupy two different physical locations. However, you can come remarkably close by minimizing the vertical and horizontal offset between your eyes and the lens.
When your camera sits below your eye line, clients look down at you, which can feel submissive or awkward. Conversely, if the camera points down from too high up, it minimizes your presence. An ergonomic setup places the center of the webcam lens level with your eyes, or slightly above, angled straight ahead rather than tilted downward. This alignment creates a neutral, peer-to-peer perspective that mimics an in-person conference room conversation.
Beyond physical positioning, psychological comfort plays a massive role in how you present yourself on screen. When your camera is correctly aligned, you do not have to consciously adjust your posture or crane your neck to remain in frame. This eliminates micro-distractions that sap your cognitive energy during critical negotiations. Over the course of a day filled with client pitches, structural alignment translates directly into sustained mental endurance and clear, confident communication.
Furthermore, when clients look at a screen where the speaker’s eyes are aligned with the lens, cognitive processing becomes smoother. The human brain naturally searches for eye contact to gauge trustworthiness. A lower camera angle forces your eyes upward, which viewers subconsciously register as looking away or evasive. By correcting this vector geometry with an eye-level configuration, you remove these subtle visual barriers, allowing the substance of your presentation to take center stage without interference from hardware limitations.
Evaluating Your Workspace and Ergonomic Baseline
Before buying mounting hardware, evaluate your existing desk setup, monitor configuration, and seating posture. Your camera position is inextricably linked to your chair height and desk ergonomics. If you slouch because your chair is too low, no camera mount will save your video frame.
Sit comfortably in your task chair with your feet flat on the floor and your elbows bent at a 90-degree angle. Your primary monitor’s top third should align roughly with your eye level. If you use an external ultra-wide monitor or a dual-screen array, your webcam placement strategy shifts depending on which screen you use for primary video conferencing.
- Single Monitor Setup: The webcam belongs dead center on the top bezel of your primary display.
- Dual Monitor Setup: The webcam belongs above the seam between monitors if you work across both, or dead center on your main screen if you rarely look at the secondary display.
- Laptop on Riser Setup: If you use your laptop on a stand with an external keyboard, an external webcam is mandatory to bridge the height gap.
Taking time to audit your seating posture ensures that when you adjust your camera to eye level, your body naturally falls into a supportive, open posture. Slouching or leaning forward ruins the geometry of the shot, placing your face too close to the lens or cutting off the top of your head.
Consider also how your desk surface interacts with your peripheral equipment. If you use a mechanical keyboard with deep key travel, vibrations can travel through the desktop and up your monitor stand, causing your webcam to micro-jitter. Identifying these mechanical bottlenecks during your initial workspace evaluation allows you to choose mounting solutions that isolate the camera from environmental disturbances.
Hardware Anatomy: Selecting the Right Mounting System
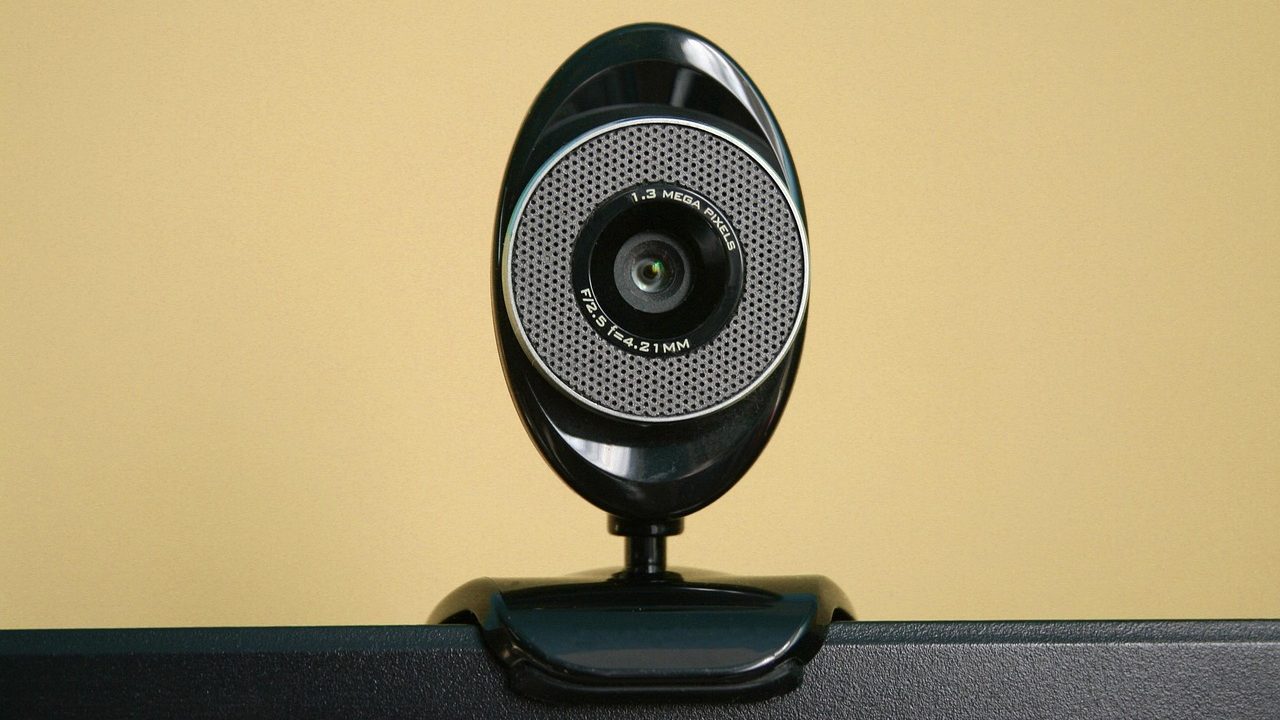
Achieving stable positioning requires the right physical hardware. Flimsy clip-on mounts wobble every time you type, creating a distracting experience for your clients. When building an external webcam eye level setup, look at three primary mounting categories.
Display Mount Clamps
The standard monitor mount uses a friction clamp that grips the top bezel of your monitor. These work well for thin-bezel LED monitors. Look for models with rubberized pads to protect your screen and a screw-tightening mechanism rather than simple spring tension, which can loosen over time.
Articulated Desk Arms and C-Clamps
For ultimate flexibility, desktop mounting arms clamp directly to the back edge of your desk, holding the webcam on a ball head or mini boom arm independent of your monitor. This prevents monitor vibrations from shaking your camera and allows you to position the lens closer to you than the monitor allows.
Freestanding Tripods and Weighted Stands
If you have a standing desk converter or a complex multi-monitor array where monitor clamps fail, a weighted desktop tripod works well. Ensure the base is heavy enough to prevent tipping, and check that the maximum height extension matches your eye level when standing.
When evaluating these options, consider the frequency with which you adjust your workspace. If you transition between sitting and standing modes throughout the day, an articulated arm mounted directly to the desk surface moves with your body, keeping your camera registration consistent regardless of desk height.
It is also worth evaluating the thread standard on your hardware. Most professional webcams and mounting arms utilize a standard 1/4″-20 screw thread, identical to photography tripods. This universal standard opens up a vast ecosystem of modular camera gear, letting you swap out cheap plastic ball heads for robust metal mounts that lock down securely without slipping.
Step-by-Step Installation and Height Calibration
Once you have selected your mounting hardware, installation requires patience and fine-tuning. Do not tighten anything permanently until you have tested the frame in your video software of choice.
- Position your chair and monitor to your ergonomic sweet spot before touching the camera.
- Attach your webcam to the mount loosely, ensuring the USB cable can reach your computer without pulling tight.
- Place the camera mount on your monitor or desk arm, aligning the lens with your horizontal eye line.
- Open your video conferencing application’s preview window (such as Zoom or Microsoft Teams) to check your framing.
- Adjust the tilt so that the top of your head has a small, natural amount of headroom, and your shoulders and upper chest are clearly visible.
- Secure all thumbscrews, clamps, and joints to lock the position in place.
Calibration is not a one-time event. Whenever you adjust your office chair, change your footwear height, or alter your monitor tilt, take sixty seconds to re-verify your camera framing. Small deviations accumulate over time, leading back to awkward downward angles or chopped-off foreheads.
During this calibration phase, pay close attention to your horizontal centering. If your webcam is offset to the side of your monitor rather than centered above the active window, your clients will see you looking slightly sideways whenever you read documents on your screen. While a minor offset is sometimes unavoidable with multi-monitor arrays, minimizing it preserves the illusion of direct eye contact.
Lighting Angles That Complement Your Camera Position
Even the best camera placement fails if lighting is poor. A proper remote meeting camera angle relies heavily on how light falls across your face. Overhead architectural lighting creates harsh shadows under your eyes, nose, and chin, while side lighting leaves half your face in darkness.
Position your primary light source—whether a softbox, LED panel, or ring light—directly behind or slightly above your webcam, pointing toward your face. This front-facing illumination fills in facial shadows and catches in your eyes, creating a bright, engaged look. If you work in a room with a window, position your desk so the window is to the side or front, never directly behind you, which turns you into a heavy silhouette.
Color temperature also matters for professional credibility. Aim for a daylight-balanced output between 4500K and 5600K. Overly warm yellow light can make your office look dingy, while harsh blue light creates an artificial, clinical appearance. Diffusing your light source through a softbox or frosted panel eliminates glare and softens skin tones, making your video feed look effortless and refined.
When working with artificial panels, pay attention to the Color Rendering Index (CRI). Lights with a CRI of 95 or higher render skin tones and office backgrounds accurately, preventing the washed-out or greenish tint common with cheap LED rings. Combining proper diffusion with correct height placement ensures your face is uniformly lit from the same plane as your camera lens.
Integrating External Microphones and Audio Setup
Video quality is only half the battle on client calls; audio clarity seals your professional reputation. When adjusting your webcam position, consider how it interacts with your microphone placement. Many webcams feature built-in stereo microphones, but desk-mounted USB condenser microphones or headset mics deliver vastly superior sound isolation.
If you use a desktop USB microphone on a boom arm, ensure it sits below the bottom of your video frame so it does not block your mouth or create a visual obstruction on screen. Keep the mic capsule roughly 6 to 12 inches from your mouth, positioned just out of camera view.
Good acoustic management complements your visual setup. Hard wood floors, bare walls, and uncurtained windows create echo and reverberation that make you sound distant and unprofessional. Adding soft furnishings, a desk mat, or acoustic panels behind your monitor dampens reflections and ensures your voice sounds rich and intimate to your clients.
Additionally, route your microphone cable away from your webcam USB line to avoid electromagnetic interference, which can introduce a high-pitched whine into your audio stream. Clean cable management not only looks professional if any wire slips into view, but it also protects your signal integrity during critical conversations.
Software Optimization, Sensor Resolution, and Focal Calibration
Hardware placement is only part of the equation; software settings dictate how well your sensor performs. Many users plug in a 4K or 1080p webcam and leave it on default auto-exposure, letting the camera hunt for light levels dynamically. This can cause distracting brightness shifts whenever you move your hands.
Open your webcam’s proprietary utility software (such as Logitech Logi Options+, OBS Studio, or native OS camera settings) and lock your exposure and white balance manually once your lighting is dialed in. If your camera supports adjustable Field of View (FOV), narrow it down slightly from the ultra-wide default setting. An ultra-wide 90-degree field of view distorts facial features near the edges and captures too much of your home office background, whereas a tighter 65 to 78-degree crop focuses attention squarely on you.
Frame rate is another critical setting. While 4K at 30 frames per second provides high resolution, dropping down to 1080p at 60 frames per second often results in a smoother, more natural motion blur during fast gestures. Test both settings in your primary conferencing app to see which balances network bandwidth and visual fluidity best.
Common Setup Mistakes to Avoid
Even experienced remote professionals occasionally fall into common traps when upgrading their video hardware. Watch out for these pitfalls during your installation:
- The Upward Nostril Angle: Placing the camera on the desk surface pointing up. Always elevate the lens.
- The Off-Center Gaze: Mounting the camera on the far left or right of a large monitor, making you look sideways while talking to clients.
- Over-Tightening Mounts: Cracking modern thin-bezel displays by over-tightening spring or screw clamps. Use only enough pressure to hold the device steady.
- Ignoring Cable Strain: Allowing heavy braided USB cables to pull down on the webcam mount, slowly tilting the lens downward throughout the day.
Another frequent oversight is neglecting software-level focal adjustments. Many modern webcams feature digital pan-tilt-zoom capabilities. Relying entirely on digital zoom degrades image resolution rapidly. Whenever possible, position your physical camera at the correct distance from your face so you capture your framing optically rather than digitally.
Maintaining Your Setup Over Time
A pristine workspace requires periodic maintenance. Dust accumulates quickly on exposed camera lenses and monitor bezels, softening your image and confusing autofocus mechanisms. Once a week, wipe your webcam lens with a clean microfiber cloth. Avoid household glass cleaners, which can strip anti-reflective optical coatings off glass or plastic lenses.
Additionally, check your software settings periodically. Operating system updates frequently reset default webcam exposure, white balance, and resolution limits. Lock in manual exposure settings within your camera utility software if available, preventing the sensor from hunting for light every time you move your hands.
Summary Checklist for Professional Client Calls
Before launching your next major client presentation, run through this quick hardware verification:
- Lens Height: Center of the lens is perfectly level with your eyes.
- Distance: Camera is close enough to capture upper torso without distorting facial features.
- Stability: Typing on your keyboard does not cause the video feed to shake.
- Lighting: Soft, even light illuminates your face from the front with zero harsh shadows.
- Framing: Natural headroom with neutral, direct gaze toward the lens when speaking.
Investing twenty minutes into perfecting your physical video hardware pays dividends in client trust and personal comfort. When your physical setup disappears into the background, you can focus entirely on the conversation, projecting confidence and executive presence from the first minute to the last.