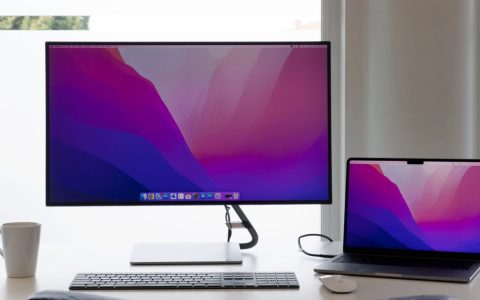
When you spend eight to ten hours a day at a home workstation, your physical environment dictates your physical comfort. Transitioning from laptop screens or standalone desk stands to a dual monitor mount desk setup guide fundamentally changes how you interact with your workspace. Beyond simply freeing up valuable square inches of desktop real estate, a properly engineered dual arm system allows you to position two displays precisely where your eyes and hands naturally fall, mitigating the postural fatigue that plagues remote knowledge workers.
However, clamping two expensive displays onto a single mechanical arm involves more than simply tightening a few hex screws. Weight distribution, VESA plate compatibility, desk material strength, and cable management all dictate whether your upgrade feels like an ergonomic sanctuary or a wobbly, frustrating distraction. This guide walks you through every phase of evaluating, installing, and fine-tuning a dual display workstation arm.
Evaluating Your Hardware: Weight Capacities and VESA Standards
Before buying or installing any hardware, you must audit the physical specifications of your monitors and your desk. The single most common failure point in ergonomic arm installations is mismatching the weight capacity of the mount with the combined mass of the displays, especially when dealing with ultrawide monitors or older, heavier panels.
Check the manufacturer specifications for each monitor, noting the weight both with and without the original factory stand. Most standard 24-inch to 27-inch monitors weigh between 8 and 15 pounds, but heavier gaming panels or professional color-grading displays can easily exceed 20 pounds per unit. A dual monitor arm specifies its weight capacity per arm, not as a combined total. If your arm is rated for 17.6 pounds per arm, hanging a 20-pound monitor on it will cause the gas-spring cylinder to fail, dropping the display instantly.
Next, verify your mounting standard. The vast majority of modern computer monitors adhere to the Video Electronics Standards Association (VESA) mounting interface. Check the back of your displays for a square pattern of four threaded screw holes, typically measuring either 75x75mm or 100x100mm. If your monitor lacks VESA holes—a common design choice in consumer-grade or ultra-thin screens—you will need to source a manufacturer-approved VESA adapter bracket before proceeding with any desk arm installation.
Furthermore, consider the physical dimensions of your displays relative to the arm span. Two 27-inch monitors mounted side-by-side require significant horizontal clearance. If your desk is positioned in a corner or against a narrow wall flanked by bookshelves, wide monitors may overhang the desk edges or collide with surrounding furniture when rotated into portrait orientation.
Choosing Between Mechanical Gas-Spring and Articulating Arms
Dual monitor arms generally fall into two mechanical categories: gas-spring tension arms and manual jointed articulating arms. Understanding the distinction helps you select the right tool for your specific workflow habits.
Gas-spring arms utilize an internal pneumatic cylinder filled with nitrogen gas, counterbalancing the weight of the monitor and allowing you to adjust vertical height with a gentle touch of your hand. They provide a sleek, floating aesthetic and make frequent height adjustments effortless. However, gas springs have a finite lifespan, and if you swap your 24-inch monitor for a heavier 32-inch model down the line, the internal tension may no longer hold the display in place.
Manual articulating arms, by contrast, use friction joints and locking collars. To change the height, you typically loosen a collar or bolt, slide the mounting block up or down a vertical pole, and retighten it. While they lack the instantaneous, floating adjustment of gas springs, they offer exceptional structural stability, higher overall weight limits, and zero risk of pneumatic seal failure over years of continuous use.
When deciding between these two mechanical designs, consider how often you actually adjust your monitor positions. If you share a workstation with a partner or frequently shift between sitting and standing postures with differing eye-level needs, the fluid movement of gas springs is a major asset. If your setup is strictly personal and once-adjusted screens remain static for months, a sturdy pole-mounted articulating system offers robust, maintenance-free reliability.

Preparing Your Desk Surface and Edge Clearance
The structural integrity of your desk dictates whether a heavy-duty arm can safely support two suspended displays. Modern home office desks are constructed from a wide variety of materials, ranging from solid hardwood and thick butcher block to hollow-core particle board and honeycomb cardboard structures, such as inexpensive utility tables.
Inspect the rear edge of your desktop where the mount will attach. You need at least two to three inches of flat, unobstructed clearance underneath the desk overhang. Avoid desks with deep beveled edges, decorative trim, or metal frames right at the back lip, as these prevent the clamp from making uniform contact with the surface.
If your desk is made of solid wood, plywood, or high-density fiberboard (MDF), a standard heavy-duty C-clamp provides more than enough holding power. However, if your desk features a hollow core or lightweight particle board, tightening a C-clamp too aggressively will crush the internal structure of the desk, causing the mount to lean forward or tear completely through the surface. For vulnerable desk materials, distribute the downward clamping pressure by placing a thick steel reinforcing plate—often called a desk mounting reinforcement bracket—on both the top and bottom surfaces of the desktop before tightening the clamp.
Alternatively, if your desk features a pre-drilled cable management grommet hole near the center-rear, you can utilize a grommet mount installation. This method passes a heavy steel bolt straight down through the desktop, offering supreme stability without relying solely on edge friction.
It is also worth noting the weight distribution of the arm itself. Because dual arms extend outward on two separate joints, they create a considerable leverage force acting on the center clamp. Even a sturdy desk can experience localized bowing if the clamping surface is too thin or unsupported over a long span.
Step-by-Step Installation of the Base and Arms
With your desk checked and your hardware verified, you are ready to begin the physical installation. Having a second person assist you during the monitor-mounting phase prevents accidental drops and makes aligning heavy panels much safer.
Start by securing the base clamp or grommet bolt to the desk. Tighten the hand-screws firmly, then use the included hex wrench to finish securing any secondary locking bolts. Give the base a firm shake; if the entire desk moves slightly, that is acceptable, but the clamp itself must not slip, rock, or lift off the desktop surface.
Next, slide the lower articulating arm segments onto the central pole or base pivot. Pay attention to rotation stop-screws if your arm includes them. Many modern arms feature a 180-degree rotation limiter that prevents the arms from swinging backward and colliding with a wall or window behind your desk. If your desk is pushed directly against a drywall partition, engaging this stop-screw protects your walls from scuffs and prevents cables from getting crushed.
Attach the VESA quick-release plates to the back of each monitor while the panels are still lying face-down on a soft, protective surface like a clean towel or blanket. Drive the screws in straight, ensuring you do not overtighten and strip the internal threads in the monitor chassis. Once the plates are secure, lift each monitor and slide or click them into the mounting heads of the arms, locking any security tabs or set screws immediately so the display cannot slide off the bracket.
During this phase, keep all adjustment tools—such as Allen wrenches and torque keys—close at hand. You will likely need to fine-tune joint tension immediately after hanging the displays to prevent them from drooping under their own weight.
Achieving Neutral Eye-Level Vertical Alignment
Once both monitors are mounted and hanging securely, the real ergonomic tuning begins. Improper monitor height is the primary driver of neck flexion, shoulder shrugging, and upper back tension among remote workers.
Sit upright in your desk chair with your feet flat on the floor and your shoulders relaxed. Close your eyes, look straight ahead, and then open them. Your natural line of sight should intersect the upper third of your primary monitor screen. If you have to tilt your chin upward to read the top of the display, or slouch downward to see the center, your height is misaligned.
Adjust the gas spring tension or pole height so that the top bezel of your primary monitor sits roughly at or slightly below eye level. The tilt angle of the screen should be angled backward slightly—around 10 to 20 degrees—so that light from overhead fixtures reflects away from your eyes rather than directly into them.
When configuring a dual display arrangement, decide which monitor serves as your primary focal point and which acts as your secondary reference screen. If you split your work evenly between both displays, align them side-by-side at identical heights and center the seam directly in front of your chest so your head turns equally to both sides. If one monitor is your daily driver for writing or coding, position that screen directly in front of you, and place the secondary monitor off to the side, angled inward toward your face to minimize extreme neck rotation.
Pay attention to bezel alignment as well. Even minor vertical misalignments between two monitors can force your eyes to constantly refocus as you drag windows back and forth, leading to digital eye strain and headaches by the end of the workday.
Managing Cable Clearance and Arm Articulation
One of the most overlooked aspects of setting up a dual monitor arm is managing the tension and slack of your power cords and video cables. Because articulating arms move freely when you adjust your posture or reposition your displays, poorly routed cables will quickly bind, pull, or unplug themselves.
Begin by plugging in your power supplies, HDMI, DisplayPort, and USB cables to both monitors, leaving a generous loop of slack—approximately 12 to 18 inches—directly behind each VESA mount. This slack acts as a service loop, providing enough give for the arm to extend to its maximum reach without putting lateral strain on the input ports.
Route the cables down the integrated cable management channels built into the underside of the arm segments. Most quality dual arms feature plastic clips, snap-on covers, or hook-and-loop pathways designed to conceal wires along the spine of the metal structure. Secure the cables loosely inside these channels; if you zip-tie or clamp them down with absolute rigidity, the arm will resist movement and fail to articulate smoothly.
Once the cables are routed along the arms, guide them down the back of the central desk clamp toward a power strip or cable tray mounted beneath your desk surface. Test the range of motion by gently pushing the arms outward, pulling them inward, and rotating both monitors from landscape to portrait orientation. Watch the cable slack carefully at every pivot point. If any cord pulls taut during movement, re-adjust the service loop immediately to prevent port damage.
Taking the extra ten minutes to organize these cable pathways not only protects your hardware connections but also eliminates the visual clutter that often detracts from a clean, professional remote work environment.
Troubleshooting Common Mounting Issues
Even with careful installation, minor issues often arise during the first few days of using a new dual display setup. Knowing how to diagnose and correct these common quirks saves you frustration.
If one of your monitors slowly sinks downward on its own, your gas-spring tension is set too low for that specific monitor’s weight. Locate the tension adjustment screw—usually marked with a large plus and minus icon near the primary joint of the arm—and turn it clockwise using the appropriate hex key until the arm holds its position firmly at any height. Conversely, if the monitor aggressively springs upward on its own and refuses to stay lowered, turn the adjustment screw counter-clockwise to reduce the internal spring tension.
If your monitors wobble excessively every time you type aggressively on your keyboard, check two structural points. First, ensure the desk clamp is tightened down to maximum torque. Second, verify whether your desk itself is prone to oscillation. Lightweight laminate desks with slender metal legs naturally amplify vibrations. Moving your desk an inch away from the wall so it doesn’t make direct contact with the baseboard can often eliminate wall-transmitted desk shake entirely.
Finally, if you notice your dual monitors refuse to sit flush against one another without a gap or vertical offset, look for micro-adjustment screws on the VESA mounting head. Many premium mounts feature independent leveling screws that allow you to lift or tilt one corner of a single monitor by a few millimeters, ensuring your dual screens line up into a seamless, unified visual workspace.
By maintaining a methodical approach to weight limits, desk strength, ergonomic alignment, and cable slack, your dual monitor workstation will provide a stable, comfortable, and productive foundation for years of remote work.