When winter storms threaten, a reliable two-stage snow blower can save your back and clear a driveway in minutes. However, buying brand-new commercial-grade power equipment often requires a steep financial investment. That is why many suburban homeowners turn to the secondhand market. Navigating the secondary market requires a clear framework. When you are buying a used snow blower guide in hand is not enough; you need a methodical approach to separate well-maintained machines from neglected lemons that will leave you stranded in a blizzard.
A used two-stage snow thrower is a complex assembly of belts, gears, friction plates, and small engines. Unlike a lawnmower, which operates under relatively clean conditions, a snow blower works in freezing temperatures, wet heavy slush, and corrosive road salt environments. Evaluating one requires looking past a fresh coat of spray paint to assess the core mechanical health of the unit. This guide breaks down the exact inspection steps, mechanical tests, and pricing realities you need to know before buying a pre-owned machine.
Understanding the Anatomy of a Two-Stage Snow Blower
Before inspecting any machine, it helps to understand what separates a single-stage snow thrower from a two-stage workhorse. Single-stage machines use a rubber paddle auger that contacts the pavement directly to scoop and throw snow through a chute. They are lightweight and ideal for small concrete patios or short walkways, but they struggle with heavy plow ridges and gravel drives.
Two-stage snow blowers, by contrast, use a serrated metal auger to pull snow into the housing and a high-speed impeller fan to blast it out through the discharge chute. Because the metal auger does not touch the ground, these machines handle gravel driveways, deep drifts, and dense, wet snow with ease. They are heavier, self-propelled via a transmission, and feature a gearbox that transfers power from the engine crankshaft to the horizontal auger shaft. When evaluating a used model, your focus must center on this gearbox, the drive friction disc, the belts, and the engine.
Furthermore, within the two-stage category, you will encounter variations such as wheel-drive versus track-drive models. Wheel-drive units are agile, easy to turn, and handle flat to moderately sloped suburban driveways efficiently. Track-drive units, which resemble miniature bulldozer treads, offer exceptional traction on steep hills, icy inclines, and gravel paths where wheels tend to slip. However, track systems have more moving parts—including bogie wheels, adjustment tracks, and locking levers—that require inspection for rust, seized pins, and rubber degradation.
The Cold-Start Test: Evaluating Engine Health
Never buy a snow blower that is already running when you arrive to inspect it. A warm engine can hide a multitude of starting sins, including weak compression, sticky automatic chokes, and failing ignition coils. Always insist on performing a cold start.
Check the engine oil first. Pull the dipstick and look at the color and consistency of the oil. Honey-colored or light brown oil indicates recent maintenance. Black oil suggests it is overdue for a change, while milky, frothy oil indicates a blown head gasket or a cracked block where water has mixed into the crankcase—a dealbreaker.
Next, examine the fuel tank. Open the gas cap and smell the fuel. Stale gasoline smells sour or varnish-like and leaves a gummy residue inside the carburetor jet. If the machine has old gas sitting in it from the previous winter, expect to clean or rebuild the carburetor. Turn the fuel valve on, set the choke, and pull the starter cord or plug in the electric starter. A healthy engine should fire within two or three pulls once fuel reaches the combustion chamber. Listen closely for mechanical knocks, excessive valve clatter, or surging RPMs, which point to governor or carburetor tuning issues. If the unit features an electric starter plug, verify that the starter motor engages cleanly without grinding or slipping off the flywheel ring gear.
Checking Engine Compression Without Fancy Tools
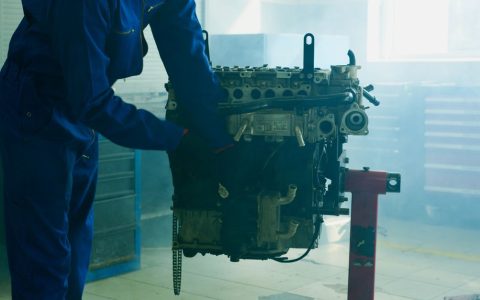
Engine compression is the lifeblood of any small engine. While professional mechanics use a threaded compression gauge to record exact PSI numbers, you can perform a reliable field test with basic tactile feedback.
With the spark plug wire disconnected for safety, slowly pull the recoil starter rope. You should feel distinct resistance peaks as the piston rises on the compression stroke. If the cord pulls out with almost zero resistance, or if it feels spongy and continuous, the engine lacks compression. This can be caused by a stuck or burned valve, worn piston rings, a scored cylinder wall, or a loose cylinder head. On older overhead-valve (OHV) engines, a lack of compression can sometimes simply mean the valve clearance is too tight, but rebuilding a small engine often costs more than the used snow blower is worth.
If you do carry a portable mechanical compression tester, thread it into the spark plug hole and pull the recoil cord briskly several times until the gauge needle stops climbing. Most small winter utility engines should register between 90 and 110 PSI or higher. Anything under 75 PSI points to internal wear that will make starting the machine nearly impossible when sub-freezing temperatures arrive.
Evaluating Auger Gearbox Wear and Shear Pins
The auger gearbox is the most expensive single component on a two-stage snow blower. Replacing a blown aluminum or cast-iron gearbox often costs several hundred dollars in parts alone, frequently exceeding the resale value of an older machine. Testing its condition requires a hands-on examination.
Reach into the auger housing and attempt to rotate the metal auger blades back and forth. There should be a very slight amount of rotational play, but excessive slop or grinding noises indicate worn internal bronze worm gears or stripped teeth. Look closely at the gearbox housing for any signs of cracking, oil leaks, or grease seepage. A dry gearbox that has lost all its lubrication will quickly fail under the heavy load of a major snowstorm.
Inspect the shear pins holding the auger to the drive shaft. Shear pins are designed to snap intentionally if the auger strikes a hidden rock or solid chunk of ice, protecting the gearbox from catastrophic shock. Check whether the previous owner has replaced proper OEM shear pins with standard steel hardware-store bolts. Using hardened grade-8 bolts instead of soft shear pins completely defeats the safety design, meaning a hidden obstacle could have previously subjected the gearbox to damaging stress. Always look at the auger shaft surrounding the pin holes; elongated or egg-shaped holes indicate that a hardened bolt was previously used and allowed to bash against the shaft under heavy load.
Assessing Friction Disc Drive Life
Most popular consumer two-stage snow blowers use a disc-a-plate friction drive system to transfer power from the engine to the wheels or tracks. This system consists of a metal drive plate mounted to the engine shaft and a rubber-faced friction wheel that moves across the faceplate when you select different forward and reverse speeds.
Over years of use, the rubber ring on the friction disc wears down, hardens, or becomes glazed with oil and belt dust. When this happens, the machine will lose traction, fail to propel itself forward, or refuse to reverse entirely.
To test the drive system, tilt the snow blower back or safely prop it up to inspect the underside belly pan. Remove the protective plastic or metal cover to expose the friction disc and drive plate. Look at the rubber outer rim of the friction disc. It should have a clean, square edge with substantial thickness. If the rubber is worn flat, cracked, or contaminated with grease leaking from the axle bearings, the machine will require a new friction disc. While replacing a friction disc is a common and relatively inexpensive DIY repair, knowing its condition gives you strong leverage when negotiating the purchase price. Also test the shift linkage lever from first gear through all forward speeds and into reverse to ensure the selector fork engages the friction assembly cleanly without slipping out of alignment.
Inspecting Belts, Pulleys, and Idler Arms
Power is transmitted from the engine crankshaft to the auger and drive systems via rubber V-belts. Open the belt cover shield located near the front of the engine to inspect these critical components.
Healthy belts should be pliable, free of deep cracks, and properly tensioned. Grab the belts and check their deflection; they should not feel loose or overly stretched. Look for rubber dust accumulating inside the belt housing, which indicates that a pulley is misaligned or a belt is rubbing constantly against a stationary guide. Check the idler pulley bearings by spinning them by hand; they should turn smoothly without any gritty resistance, squealing, or side-to-side wobble. Replacing belts is standard maintenance, but frayed or snapped belts on a machine presented as “ready to go” signal deferred upkeep.
Pay close attention to the belt fingers or guides mounted near the engine pulleys. These small metal brackets prevent the belt from slipping off the pulley when disengaged. If a belt guide is missing or bent out of shape, the snow blower may constantly throw belts or fail to disengage the auger when you release the control handle, creating a serious safety hazard.
Chute Control, Skids, and Scraper Bar Integrity
Beyond the engine and drivetrain, several exterior wear items dictate how pleasant a snow blower is to operate. Examine the scraper bar located at the very bottom of the auger housing. This heavy steel blade scrapes packed snow off your driveway surface. If the scraper bar is worn down flush with the housing sides, the metal housing itself will begin grinding against the pavement, causing permanent damage.
Check the adjustable skid shoes mounted on the sides of the auger housing. These metal or composite runners dictate the height of the scraper bar above the ground. If you have a gravel driveway, the skids should be adjusted downward to keep the intake clear of loose stones. Unevenly worn skids indicate the machine was operated at an angle or stored improperly. Flip-reversible skids that show wear on only one side are a good sign, whereas completely worn-through steel skids mean you will need an immediate replacement set.
Test the chute rotation mechanism. Whether it features a manual hand crank, a joystick, or a remote electric chute control, the gears and cables should move freely without binding. A rusted or seized chute control makes directing snow placement frustrating during high winds. Check plastic chute deflectors for stress fractures or brittle areas caused by prolonged ultraviolet sun exposure over multiple summers.
Brand Reputation, Parts Availability, and Resale Value
Not all snow blowers are created equal. When shopping the pre-owned market, sticking with established industry-standard brands ensures you can easily source replacement parts, shear pins, belts, and carburetor kits when maintenance is required.
Top-tier legacy brands with robust parts availability include Ariens, Toro, Honda, and older Cub Cadet or Simplicity models. These manufacturers maintain detailed parts diagrams online and supply components decades after a model is discontinued. Conversely, obscure big-box store house brands or cheap import models can become impossible to repair when a proprietary drive cable or custom gear snaps.
When reviewing pricing, remember that power equipment depreciates quickly during the summer months and commands a premium during the first major winter storm warning. Shopping in October or November often yields better bargains than scrambling for a machine in January when demand peaks. Check local online marketplace listings against historical depreciation curves: a well-maintained machine from a premium brand typically retains roughly half to sixty percent of its original retail value after three to five years of careful use.
Red Flags: When to Walk Away from a Used Deal
Even if a machine is priced attractively, certain structural defects mean you should politely decline the offer and keep looking. Watch out for these dealbreakers during your inspection:
- Cracked Engine Block: Visible welds, oil leaks from the crankcase seam, or freeze cracks mean the engine is trash.
- Severe Frame Rust: Surface rust is normal, but deep structural corrosion that has eaten through the auger housing or handle mounts compromises safety and rigidity.
- Modified Components: Improvised wiring, welded-solid auger shafts, or bypassed safety interlock switches indicate poor maintenance practices.
- Unwillingness to Test Start: If a seller claims the machine “just needs fresh gas” but refuses to let you try starting it from cold, assume it has a major mechanical defect.
- Excessive Blue or White Smoke: Heavy blue exhaust smoke indicates burning oil due to worn piston rings or valve guides, while dense white smoke can signify moisture in the combustion chamber or failed gaskets.
Summary Checklist for Your Pre-Owned Inspection
Before you hand over your cash or load the machine into your truck, run through this final quick-reference checklist:
- Verify the engine oil level and look for milky contamination or a burnt smell.
- Perform a cold-start test using the recoil or electric starter.
- Check engine compression for firm, consistent resistance on the pull cord.
- Inspect the auger gearbox for external leaks, cracks, and excessive rotational play.
- Verify that correct soft shear pins are installed rather than hardened bolts.
- Check the friction disc and drive plate for rubber wear and oil contamination.
- Inspect drive and auger belts for cracking, fraying, and proper tension.
- Examine the scraper bar and skid shoes for excessive ground wear.
- Test the discharge chute rotation and cable controls.
- Confirm parts availability for the specific brand and model year.
Buying a used snow blower is one of the smartest ways to secure heavy-duty winter performance without paying retail prices. By taking a methodical approach to evaluating compression, gearboxes, belts, and drive components, you can bypass worn-out equipment and find a dependable machine that will clear your driveway for winters to come.
Frequently Asked Questions About Buying Used Snow Blowers
How many years can a well-maintained two-stage snow blower last?
A commercial-grade or high-end residential two-stage snow blower from a reputable manufacturer can easily last between 15 to 25 years if it receives regular seasonal oil changes, proper off-season storage, and timely belt replacements. Engine life is often determined by operating hours and maintenance frequency rather than calendar age alone.
Is it difficult to replace a friction disc myself?
Replacing a friction disc is a standard DIY project that typically requires basic hand tools, a set of wrenches, and about one to two hours of time. You will need to tilt the machine forward or rest it on its handles, remove the lower belly pan, and unbolt the carrier assembly. It is an ideal weekend project that saves considerable money compared to taking the machine to a small engine repair shop.
What should I do immediately after bringing a used snow blower home?
Even if the seller stated the machine was recently serviced, it is always best practice to perform your own baseline maintenance. Drain any remaining old fuel, change the engine oil with fresh winter-weight oil (such as 5W-30), grease all zerk fittings on the auger shaft, inspect the spark plug, and check tire pressure if your model uses pneumatic tires.