When homeowners think about routine property upkeep, the crawlspace is often the last place on the list. Tucked out of sight beneath floor joists, this low-clearance zone can easily become a silent vulnerability. A compromised ground cover allows ambient moisture, musty odors, and sub-surface soil gases to migrate upward into living spaces. Executing a regular crawlspace vapor barrier maintenance guide routine protects your home’s indoor air quality, structural timber, and foundation stability before seasonal wet weather sets in.
Understanding how your home’s subfloor environment functions is the first step toward effective prevention. Most raised foundations rely on a thick polyethylene sheet laid across the bare earth, paired with perimeter ventilation or a sealed encapsulation system. Over time, ground shifting, animal activity, plumbing repairs, and normal wear can compromise this protective layer. By establishing a methodical inspection routine, you can catch minor tears, unsealed seams, and failing sump pumps before they escalate into costly structural damage.
Understanding Your Crawlspace Subfloor Ecosystem
The earth beneath a residential structure is rarely static. Soil naturally contains moisture and gases like radon, which naturally seek the path of least resistance upward. In a home with a raised foundation, the subfloor acts as a large thermal chimney. Warm air inside the house rises, drawing air from the crawlspace upward through floor penetrations, wall cavities, and electrical chases. Modern building science demonstrates that this convective loop constantly pulls subfloor air into the primary living zones.
If the ground cover is damaged, this stack effect pulls humid air and soil gases directly into the living areas. A high-performance polyethylene sheet acts as a vital separator, blocking moisture vapor diffusion and containing soil gases so that passive or active extraction systems can safely vent them outdoors. Maintaining the physical integrity of this barrier is essential for year-round indoor air health. Furthermore, understanding the thermodynamic interplay between outdoor relative humidity, soil temperature, and indoor HVAC operation helps clarify why maintaining a continuous vapor retarder matters so much during transitional spring and autumn seasons.
Subfloor environments also host complex microclimates. When ground moisture evaporates unhindered, relative humidity levels in an unsealed or poorly sealed crawlspace frequently exceed 85 to 90 percent during damp seasons. This persistent saturation creates a welcoming haven for wood-boring insects, mold colonies, and wood-decay fungi such as white rot and brown rot. Over years, unchecked high humidity softens floor joists, weakens subfloor decking, and leads to expensive structural remediation projects that far exceed the cost of regular minor maintenance.
Preparing for Your Crawlspace Inspection
Before you crawl beneath your home, gather the proper safety gear and diagnostic tools. Crawlspaces present unique hazards, ranging from cramped quarters and sharp debris to exposed wiring and occasional pests. Preparation ensures a thorough, safe assessment without risking personal injury or equipment damage.
- Personal Protective Equipment: Wear a well-fitting N95 or P100 respirator mask, durable coveralls, safety glasses, thick work gloves, and sturdy rubber-soled boots.
- Illumination: Bring a high-lumen headlamp and a secondary portable utility light to illuminate dark corners and foundation walls.
- Diagnostic Tools: Pack a 25-foot tape measure, a moisture meter for checking joists, a utility knife, and a roll of approved vapor barrier repair tape.
Start your inspection during a dry period when you can clearly distinguish between active plumbing leaks and historical ground dampness. Walk the entire perimeter of the house first, noting any exterior grading issues, blocked foundation vents, or gutter downspouts discharging too close to the foundation wall. Ensuring positive drainage away from the house exterior drastically reduces the hydraulic load placed on your crawlspace ground cover and interior drainage sumps.
Safety should remain your absolute priority throughout the inspection process. Never enter a crawlspace if you smell natural gas or suspect a major sewage leak from broken subfloor waste pipes. If you encounter frayed electrical wiring, dangling junction boxes, or standing water that contacts live circuits, retreat immediately and contact a licensed electrician before proceeding with your barrier assessment.
Inspecting the Polyethylene Vapor Barrier
Once inside the crawlspace, conduct a systematic sweep of the entire polyethylene sheet. Look closely for punctures, thinning areas, pulled anchors, and gaps around support piers and interior walls. A standard builder-grade vapor barrier is often six-mil thick, which can easily tear if someone previously entered the space to run cables, service ductwork, or inspect floor insulation.
Examine how the barrier meets the foundation walls and interior support posts. Code requirements and best practices dictate that the plastic should extend up foundation walls by several inches and be securely sealed with appropriate mastic or specialized tape. If you notice pooling water sitting directly on top of the plastic, it indicates either a localized leak from above, a rising water table, or improper exterior site drainage pushing water beneath the liner.
Document every irregularity you find using a notepad or smartphone camera. Measure the approximate length of tears or missing sections so you can purchase adequate replacement material and tape before starting repairs. Pay particular attention to high-traffic pathways where HVAC technicians or plumbers may have walked across the plastic during past service calls, as these areas represent the highest statistical probability of puncture damage.
Techniques for Crawlspace Plastic Liner Repair
Finding minor rips or pulled seams during your inspection is common. Fortunately, repairing a damaged polyethylene sheet does not require replacing the entire installation. However, standard household duct tape will fail rapidly in the high-humidity, damp environment of a subfloor due to moisture degradation of its adhesive matrix.
To execute a lasting fix, use crawlspace plastic liner repair techniques that rely on heavy-duty, reinforced polyethylene tape or specialized butyl adhesive sealums. First, wipe the damaged area clean of all dust, dirt, and moisture using a dry rag. If the plastic is wet, the adhesive will not bond. Cut a patch of new polyethylene sheeting that extends at least six inches past the edges of the tear in every direction. Press the patch firmly into place, rolling out any air bubbles to ensure complete contact across the surface.
For larger tears or degraded sections spanning several feet, consider cutting away the compromised plastic entirely and installing a clean rectangular patch. Secure all four edges with continuous strips of waterproof adhesive tape, pressing down firmly with a hand roller to activate the pressure-sensitive adhesive. Taking your time during this preparation and application phase guarantees a permanent fix that withstands seasonal temperature swings and shifting ground pressures.
Checking Vapor Barrier Seam Tape Integrity
Individual sheets of polyethylene cannot cover an entire crawlspace as a single piece; they must be overlapped and joined. Over time, shifting soil and humidity can cause these seams to curl, lift, or peel apart. Evaluating vapor barrier seam tape check points is a critical part of your annual maintenance routine.
Gently tug on the edges of taped seams throughout the crawlspace. If the tape lifts easily or feels gummy and degraded, remove the failing section entirely, clean the underlying plastic, and re-apply fresh, exterior-grade seam tape. Pay special attention to seams running near drainage sumps or low points, where moisture accumulation places the highest demand on the adhesive bond.
When selecting replacement tape, always verify that the product is rated for below-grade applications and polyethylene substrates. Standard packaging tape or indoor masking tape lacks the necessary UV inhibitors and moisture-resistant backing. A quality waterproofing tape creates a mechanical bond that resists vapor transmission just as effectively as the solid sheeting material itself.
Verifying Subfloor Moisture Sealing and Drainage
A vapor barrier is only as good as the ground drainage system supporting it. If groundwater collects underneath the plastic, hydrostatic pressure can balloon the sheeting upward and force moisture through minute gaps. Effective subfloor moisture sealing requires verifying that the underlying ground slopes properly toward extraction points or perimeter French drains.
Inspect any interior perimeter trenches or gravel beds beneath the liner. Ensure that water can flow freely toward the designated collection basin without becoming trapped by low spots in the earth. If you spot stagnant water trapped in pockets beneath the plastic, you may need to pull back the liner temporarily, regrade the soil slightly with a shovel, and reinstall the barrier.
In addition to surface grading, evaluate the general condition of perimeter foundation vents. While traditional building codes mandated open crawlspace ventilation, modern building science often recommends sealing foundation vents in humid climates to prevent outdoor summer air from condensing against cool subfloor framing. Assess whether your home utilizes an open or closed crawlspace design, and ensure your maintenance practices align with that specific engineering strategy.
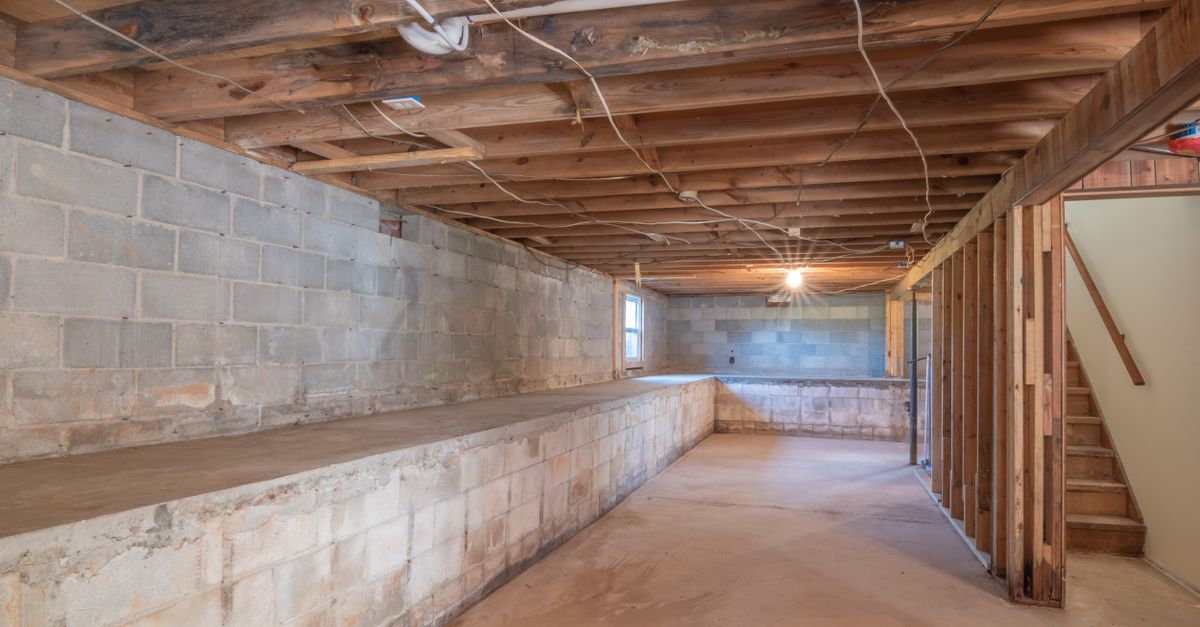
Testing Whole-House Radon Extraction Sumps
Homes equipped with active sub-slab depressurization or crawlspace radon extraction systems rely on sealed sumps to maintain negative pressure beneath the barrier. If your crawlspace features a radon extraction sump pit, inspect the lid seal, the manometer, and the extraction fan operation.
Check the clear viewing tube or U-tube manometer attached to the radon piping to ensure the fluid levels indicate proper system suction. Inspect the airtight seal around the sump lid where electrical cords and extraction PVC piping penetrate the cover. A degraded rubber gasket or loose bolt can compromise the entire radon mitigation system, allowing soil gas to bypass the extraction fan and enter the subfloor atmosphere.
If the manometer fluid indicates a loss of suction, or if the exterior inline extraction fan makes unusual grinding noises, consult a certified radon mitigation professional immediately. Never attempt to modify radon extraction piping yourself, as proper system balancing is required to maintain safe indoor radon concentrations below EPA action levels.
Evaluating Sump Pump Mechanics and Discharge Lines
In addition to radon extraction, many crawlspaces utilize active sump pumps to expel accumulated groundwater during heavy storms. A failure here can quickly flood your subfloor, ruining insulation, electrical lines, and the vapor barrier system itself.
Test the sump pump by manually pouring a five-gallon bucket of clean water into the basin. Verify that the float switch activates the pump smoothly without sticking against the basin walls or discharge pipe. Confirm that water discharges completely away from the foundation exterior, ideally terminating at least ten feet downstream or into a dedicated municipal storm drain. Check the discharge line’s check valve to ensure water does not flow backward into the basin once the pump cycle ends.
Consider installing a battery backup sump pump system if your area experiences frequent power outages during severe thunderstorms. A secondary pump provides essential redundancy, protecting your crawlspace from flooding even when municipal grid power fails during the worst weather events.
Addressing Common Maintenance Mistakes
Avoiding typical errors saves homeowners time, money, and frustration during crawlspace maintenance. One frequent mistake is installing thin, non-rated plastic sheeting that degrades under ultraviolet light or punctures easily under foot traffic. Always upgrade to puncture-resistant, reinforced materials if you are replacing sections.
Another common error is applying seam tape to dirty, wet plastic. Adhesives require a clean, dry substrate to achieve structural bond strength. Taking the extra time to wipe down surfaces and dry them thoroughly prevents premature tape failure. Finally, never block crawlspace vents unless you have transitioned the space into a fully conditioned, closed-loop encapsulation system with a dedicated dehumidifier.
Homeowners also frequently make the mistake of ignoring minor animal incursions. Rodents, raccoons, and domestic pets can burrow beneath or tear through polyethylene liners. Always inspect foundation screen integrity and seal any exterior gaps where pests might enter the subfloor before repairing the vapor barrier itself.
Frequently Asked Questions About Crawlspace Maintenance
To help clarify common uncertainties regarding subfloor care, here are answers to frequently asked questions about crawlspace vapor barriers, drainage, and radon mitigation systems.
How thick should a residential crawlspace vapor barrier be? While basic building codes often permit 6-mil polyethylene sheeting, service professionals and modern building guidelines recommend upgrading to at least 10-mil or 20-mil reinforced polyethylene. Thicker liners resist punctures from tools, storage items, and routine foot traffic significantly better than thin builder-grade plastic.
Can I use standard duct tape to repair my vapor barrier? No. Standard cloth duct tape degrades rapidly when exposed to high relative humidity and alkaline soil conditions. Always use specialized, exterior-grade waterproof seam tape or butyl tape engineered specifically for polyethylene sheeting.
How often should I inspect my crawlspace? Inspect your crawlspace at least twice a year—ideally in the spring after winter storms clear and in the late autumn before freezing temperatures set in. Regular visual checks allow you to catch small tears or failing sump pumps before they cause major structural damage.
Establishing an Annual Inspection Schedule
Consistency is the ultimate key to crawlspace longevity. Integrate your barrier and sump inspection into your seasonal home maintenance calendar. Schedule your primary check in the late spring after heavy winter rains have subsided, and a secondary follow-up in the late autumn before freezing temperatures or severe storm seasons begin.
By keeping a detailed log of repairs, tape replacements, and sump pump tests, you create a valuable history of your home’s structural health. Protecting your crawlspace environment ultimately safeguards the comfort, air quality, and value of your entire property for years to come.