When you start a dishwashing cycle, press the start button, and hear the drain pump purge leftover water, the next sound should be a steady, rushing stream of freshwater entering the tub. When that water never arrives—or enters as a weak trickle—the cycle stalls out, leaving your dishes dirty and your detergent door unopened. Facing a dishwasher not filling water inlet valve replacement US homeowners often assume the main control board has failed, but the actual fault almost always lies in two far simpler, inexpensive components: the water inlet solenoid valve or the float switch safety assembly.
Understanding how your dishwasher manages its water intake allows you to diagnose the exact failure point in less than twenty minutes using basic hand tools and a digital multimeter. This guide walks you through the step-by-step mechanical and electrical diagnostic procedure, explains how to safely replace a faulty water inlet valve, and outlines the simple checks that prevent misdiagnosing a perfectly good component.
How a Dishwasher Water Fill Cycle Works
Modern residential dishwashers do not draw water directly using an internal suction pump. Instead, they rely entirely on your home’s existing municipal or well water pressure—typically between 20 and 120 pounds per square inch (PSI)—to push water into the tub. The dishwasher merely opens an electronic gate to let that pressurized water flow in for a calculated amount of time.
That electronic gate is the water inlet valve, an electro-mechanical device located behind the lower toe-kick panel at the bottom front of the machine. The sequence operates through a few tightly coordinated steps:
- Cycle Initialization: The drain pump runs for roughly 30 to 60 seconds to clear any standing fluid. Once cleared, the main control board or mechanical timer sends 120 volts AC to the coils on the water inlet valve.
- Solenoid Activation: Electrical current creates a magnetic field inside the valve coil, lifting a spring-loaded plunger off its internal rubber seat.
- Water Inflow: Municipal pressure forces hot water through a fine mesh sediment screen inside the valve fitting, past the rubber diaphragm, and through an internal fill hose into the side or bottom of the wash tub.
- Timed Fill vs. Level Control: Most dishwashers fill for a predetermined duration—usually around 90 to 120 seconds. They rely on a mechanical flow restrictor washer built into the valve to maintain a consistent flow rate regardless of minor home pressure fluctuations.
- Safety Monitoring: A float assembly inside the tub monitors the water height. If water rises too high before the timed fill finishes, the float lifts a plastic stem that physically trips a microswitch beneath the tub, immediately cutting high-voltage power to the water inlet valve to prevent a home flood.
If any link in this logical chain breaks—whether from a mechanical clog, a seized spring, an electrical break in the solenoid coil, or an interrupted float switch—the machine will refuse to take in water. Knowing how these components interact makes a dishwasher not filling water inlet valve replacement US repair manageable and reliable.
Common Symptoms of Water Intake Failures
Different component failures produce distinct audible and visual clues. Before pulling out tools, pay close attention to what your machine does immediately after the initial drain pump routine ends.
1. Total Silence After the Drain Cycle
If the dishwasher drains normally for 30 to 60 seconds, pauses, and then sits in complete silence while the cycle timer ticks forward, the electrical signal is either not reaching the valve solenoid, or the solenoid coil has suffered an electrical open circuit. The valve is receiving no magnetic pulse to open the internal plunger.
2. A Low Buzzing or Humming Sound with No Water
If you hear a distinct 60Hz electrical hum coming from beneath the door, high voltage is actively reaching the inlet valve solenoid. However, water is still not entering the tub. This indicates that either the main water shutoff valve beneath your kitchen sink is turned off, the valve’s inlet filter screen is completely choked with hard water mineral scale, or the mechanical internal plunger is rusted shut.
3. Dishwasher Fills Extremely Slowly or Low Water Levels
If the dishwasher completes its cycle but leaves food residue baked onto dishes, check the water level at the end of the fill portion. Open the door mid-cycle; water should submerge the exposed heating element at the tub bottom (or reach the base of the float dome in hidden-element models). If there is only a shallow puddle, the inlet valve’s internal rubber diaphragm may be hardened by age, or the inlet screen is partially obstructed.
4. Continuous Filling or Overfilling onto the Kitchen Floor
If water continuously flows into the unit even when the machine is turned off or unpowered, small particles of sand or mineral scale have wedged the internal valve seat open mechanically. In this scenario, the valve must be replaced immediately, and the home’s main supply shutoff valve closed to prevent water damage.
Tools and Diagnostic Equipment Required
Diagnosing and repairing a kitchen appliance troubleshooting issue does not require specialized trade equipment. You can complete the entire job with a few standard household items:
- Digital Multimeter: Essential for checking electrical continuity and AC voltage. An inexpensive meter capable of measuring resistance (Ohms) and AC Volts up to 200V is sufficient.
- 1/4-inch and 5/16-inch Nut Drivers: Standard size socket drivers used to remove the lower toe-kick screws, junction box covers, and valve mounting bracket bolts on American dishwashers (Whirlpool, GE, Maytag, Kenmore, Frigidaire).
- Phillips and Flat-Head Screwdrivers: For door panels, harness retainers, and hose clamp connections.
- Channel-Lock Pliers or Adjustable Wrench: Needed to unscrew the braided stainless steel or copper water supply line fitting from the valve’s brass elbow.
- T-20 Torx Driver: Frequently required for European-style units or newer domestic models (Bosch, KitchenAid).
- Shallow Towels and Drain Pan: To capture the cup or two of residual water trapped inside the supply line and internal fill hose.

Step-by-Step Electrical and Mechanical Diagnostics
Before buying a replacement part for your dishwasher not filling water inlet valve replacement US project, systematically rule out external causes and verify whether the valve or float switch is the genuine point of failure.
Step 1: Check Home Water Supply and Water Pressure
It sounds obvious, but professional appliance technicians regularly arrive at service calls only to discover the dual shut-off valve under the kitchen sink was accidentally turned off during recent plumbing work or trash can movements. Locate the braided flex hose running from your hot water line under the sink through the cabinet wall. Ensure the stop valve is fully open (counter-clockwise).
Verify that your home’s hot water supply delivers at least 20 PSI. If household water pressure is abnormally low, the spring inside the inlet valve cannot be overcome by fluid pressure, preventing the internal diaphragm from flexing upward.
Step 2: Inspect and Test the Overfill Float Switch
Inside the wash tub, on the bottom left or right front corner, sits a plastic dome or cylinder called the overfill float. As water fills the tub, this float rises. If water gets too deep, the top of the float lifts an actuating rod underneath the tub floor, pushing down on a tiny microswitch that immediately breaks the circuit powering the inlet valve.
Perform these manual checks:
- Reach into the empty tub and lift the plastic float dome up and down. You should hear an audible, crisp metallic switch click each time you drop it.
- If the float feels sticky or heavy, lift off the plastic cover. String, dropped silverware, pet hair, or hardened detergent residue often gets wedged beneath the float dome, locking it in the lifted “full” position. Clean away all debris.
- If the float moves freely but does not click, shut off the breaker, remove the bottom toe-kick panel, and visually inspect the microswitch assembly beneath the tub floor. Re-seat any loose wire spade terminals.
Step 3: Disconnect Power and Safely Access Components
Safety is non-negotiable when working on appliances where water and 120-volt electricity exist inches apart.
- Switch off the dedicated circuit breaker powering the dishwasher at your home’s main breaker panel.
- If your unit plugs into a wall outlet beneath the sink, unplug it directly.
- Remove the two screws anchoring the lower metal toe-kick access panel (and access sound insulation pad) near the floor. Set them aside.
- Confirm power is off using a non-contact voltage tester at the junction box or terminal block before touching exposed wiring.
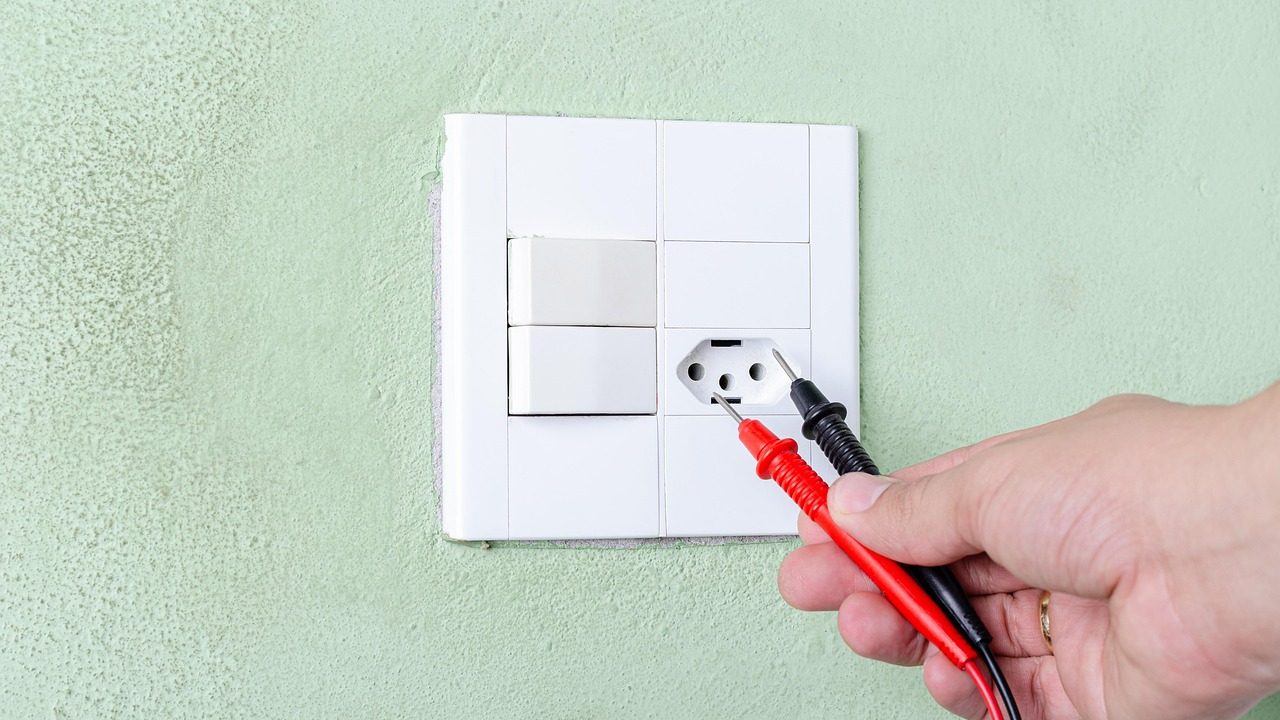
Step 4: Conduct a Multimeter Continuity Test on the Valve Solenoid
The water inlet valve features two electrical terminals connected to a magnetic coil. To determine if the wire coil inside the valve has burned out or broken internally, you will perform a resistance/continuity test.
| Multimeter Reading | Component Status | Required Action |
|---|---|---|
| 500 Ω to 1,500 Ω (Typical) | Solenoid Coil Intact | Valve is electrically good; check for mechanical blockage or bad control board output. |
| Infinite Resistance (O.L. or Open) | Solenoid Coil Burned Out | Replace the water inlet valve assembly immediately. |
| 0 Ω (Zero Resistance / Shorted) | Solenoid Coil Shorted | Replace the water inlet valve assembly immediately. |
To perform this test:
- Disconnect the two wire harness spade connectors pulled directly off the valve terminals. Pull on the plastic connector housings, never on the wires themselves.
- Set your digital multimeter to the lowest Ohms (Ω) scale or setting.
- Place one meter probe on each of the two bare metal spade terminals on the valve.
- Read the display. A healthy valve test will yield a stable reading between 500 and 1,500 ohms of resistance (check specific manufacturer specifications, though most standard domestic solenoids fall squarely in this range).
- If the meter reads “O.L.” (Over Limit) or shows infinite resistance, the tiny copper wiring inside the coil has snapped. Electric current cannot pass through it, and the valve must be replaced.
Step 5: Inspect the Fine Mesh Inlet Strainer Screen
If the solenoid passes the electrical test with proper resistance, the issue is likely a physical blockage. Shut off the hot water stop valve under the sink. Use an adjustable wrench to unthread the water supply line from the valve inlet port.
Shine a flashlight directly into the threaded entrance port of the valve. You will see a fine metal or plastic mesh filter screen seated inside. Over years of operation, sediment, rust flakes, and hard water minerals build up against this screen, completely blocking water flow. Never poke holes through this screen to bypass a clog; doing so allows sediment directly into the rubber valve seat, guaranteeing the valve will fail to shut off later and flood your kitchen. If the screen is packed with debris and cannot be brushed clean externally, replace the entire valve assembly.

Step-by-Step Water Inlet Valve Replacement Procedure
Once diagnostics confirm the inlet valve is electrically open, mechanically clogged, or leaking around its plastic housing, replacement is the safest and most reliable resolution. Attempting to repair individual internal diaphragms or re-wind coils is unsafe and non-cost-effective.
1. Source the Correct Direct-Fit Replacement Part
Always order a replacement valve matched directly to your machine’s exact model number (found on a sticker along the inner door rim or frame). Avoid universal, unbranded aftermarket valves that lack proper bracket mounts or match incorrect flow-rate restrictors. An incorrect flow rate can cause overflow or severe under-filling during standard timed cycles.
2. Disconnect Water Lines and Internal Rubber Tubing
- Place a shallow pan or old shop towel beneath the valve assembly to catch residual water.
- Ensure the water shut-off under the sink is fully closed. Unthread the flexible braided supply line from the brass elbow or valve body using your adjustable wrench.
- Locate the thick outlet hose leading from the valve up into the tub fill funnel. Using pliers, squeeze the spring clamp tension tabs together and slide the clamp several inches back along the rubber hose.
- Twist and gently pull the rubber outlet hose off the barbed valve nipple. If stuck, warm the rubber slightly with a hair dryer to soften it—do not gouge the hose with sharp tools.
3. Remove Mounting Brackets and Wire Harnesses
- Disconnect the two electrical spade terminals if you haven’t already. Note their orientation (AC solenoids do not have polarity, but keeping wiring neat prevents chafing against metal frames).
- Unbolt the single or double mounting screws securing the metal valve bracket to the lower dishwasher frame using a 1/4-inch nut driver.
- Carefully lower the old valve assembly out from beneath the machine chassis.
4. Transfer Fittings and Install the New Valve
- If your existing valve utilizes a 90-degree brass elbow fitting attached to its inlet, carefully unscrew this fitting using two wrenches (one holding the valve body, one turning the brass fitting).
- Clean the brass threads thoroughly. Apply fresh plumber’s PTFE thread tape (2 to 3 wraps clockwise) to the male threads on the brass elbow before threading it into the new valve’s ports. Avoid using pipe dope compound, which can degrade plastic valve housings.
- Position the new valve assembly into the frame slot, and thread the mounting bracket screws tightly by hand before securing them with your nut driver.
- Slide the rubber internal outlet hose fully over the new valve’s barbed outlet nipple. Position the spring tension clamp squarely over the barbed junction to prevent high-pressure blowoffs.
- Thread the flexible main water supply line onto the brass elbow fitting. Hand-tighten the fitting first to ensure you do not cross-thread the connection, then tighten an additional 1/4 to 1/2 turn with an adjustable wrench. Do not overtighten, which can slice the internal rubber washer.
5. Pressurize and Perform Leak Testing
- Before restoring electrical power or reattaching the lower kickplate, slowly turn on the main water supply valve beneath the sink.
- Inspect all threaded connections and rubber hose joints for at least two full minutes using a dry paper towel. Any tiny moisture droplet will show immediately on dry paper.
- Restore electrical power at the circuit breaker.
- Run a quick express or diagnostic cycle. Watch the replacement valve energize, listen for smooth water flow into the tub, and confirm that the fill terminates cleanly when the control board cuts power.
- Reattach the toe-kick insulation panel and metal access plate once you have confirmed dry operation through a full fill and drain cycle.
Testing and Replacing the Float Switch Assembly
If your inlet valve tests completely fine for resistance and water pressure is strong, but no voltage reaches the valve terminals when the cycle begins, the float switch assembly is your next stop in this dishwasher not filling water inlet valve replacement US troubleshooting sequence.
The float switch operates as a normally-closed (NC) safety contact in series with the water valve circuit. When the tub is empty, the switch stays closed, allowing power to pass directly to the inlet valve solenoid. When the float lifts, it pushes the internal contacts open, severing the path for current.
How to Test Microswitch Continuity
- Shut off circuit breaker power to the machine.
- Locate the float microswitch mounted directly under the plastic float stem, visible beneath the tub frame behind the toe-kick.
- Pull the two wire leads off the terminal posts of the microswitch.
- Set your multimeter to the Resistance (Ω) or Continuity (audible beep) setting.
- Touch the meter probes to the two switch terminals while the internal plastic float rests flat inside the empty tub. The meter should display 0 Ω (or beep continuously), confirming a closed circuit.
- Manually lift the float rod upward from inside the tub. The multimeter should instantly jump to “O.L.” (open circuit) and the beep should stop.
If the switch remains open (“O.L.”) when the float is fully resting down at the tub bottom, the internal switch spring or contact point has failed. Replace the microswitch assembly by releasing its plastic retaining clip, pulling it off the mounting post, and snapping a matching new switch into position.
Preventative Maintenance and Long-Term Reliability
Replacing a failed water inlet valve restores function, but addressing environmental conditions prevents premature failure of your replacement part:
- Address Hard Water Mineral Scale: Severe scale deposits shorten the life of rubber valve diaphragms. If your home has hard water, consider installing a whole-home water softening system or regularly running a citric-acid-based dishwasher cleaner through empty maintenance cycles to reduce buildup.
- Replace Aging Flexible Supply Hoses: If your braided stainless steel or vinyl inlet hose is over five years old, replace it alongside the inlet valve. Aged hoses can shed internal rubber lining particles directly into your brand-new valve screen.
- Maintain Hot Water Temperature Settings: Ensure your home’s water heater delivers water between 120°F and 125°F at the kitchen tap. Excessively hot water (above 140°F) softens internal valve plastic and degrades rubber diaphragms prematurely, while cold incoming water causes poor washing performance and detergent clumping.
- Flush Lines After Plumbing Work: Whenever municipal water main maintenance or home plumbing work occurs, flush your kitchen sink faucet for several minutes before running the dishwasher. This purges trapped air and loose pipe scale down the faucet drain rather than forcing it straight into your dishwasher’s sensitive inlet screen.
By taking a systematic approach—verifying water supply, inspecting the mechanical float, testing electrical continuity, and replacing worn component assemblies—you can successfully fix a dishwasher not filling water inlet valve replacement US fault safely and efficiently without paying for unnecessary control board replacements or expensive service calls.