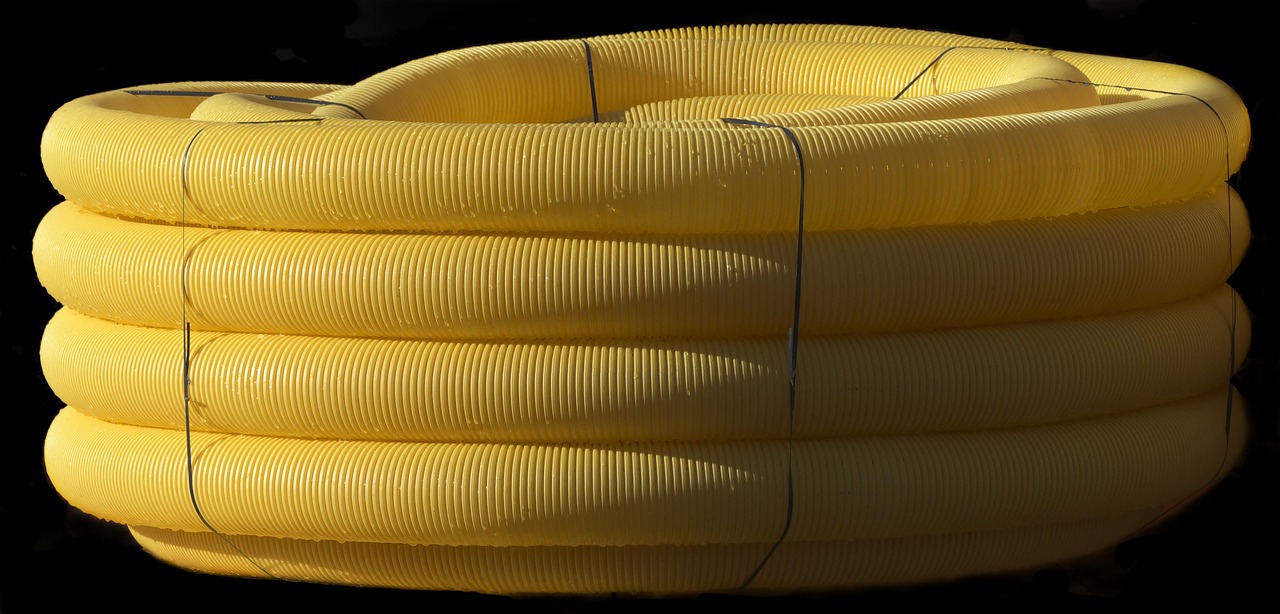
When heavy rain strikes, an underground drainage system is your foundation’s primary defense against water intrusion. However, out-of-sight infrastructure often suffers from deferred upkeep until water pools against the foundation or backs up into window wells. Mastering french drain maintenance and clog removal US homeowners face each season is the most reliable way to ensure runoff moves safely away from your crawl space or basement.
Whether your property relies on a classic gravel-and-perforated-pipe trench, a network of smooth PVC collection runs, or corrugated yard basins, subsurface lines naturally accumulate silt, pine needles, roof shingle granules, and encroaching tree roots. Left unchecked, a partial restriction can quickly turn into a solid plug during a severe thunderstorm. This guide walks you through diagnosing sluggish flow, performing an exterior catch basin cleaning, clearing stubborn blockages, and setting a seasonal schedule that keeps your property dry year-round.
Understanding How Exterior Drainage Systems Fail
To clear a clogged system effectively, it helps to understand what type of installation you have and how water moves through it. Residential yard drainage generally falls into two distinct categories: infiltration systems (traditional French drains) and conveyance systems (solid-pipe downspout runs and catch basin networks).
A true French drain uses perforated pipe embedded in washed aggregate, wrapped in permeable geotextile filter fabric. It handles groundwater by letting subsurface water seep through the perforations along its entire run to relieve hydrostatic pressure in saturated soil. In contrast, catch basins and downspout lines use solid-wall pipe to carry surface water directly to a daylight exit, curb cut, dry well, or municipal storm tie-in.
Both designs fail when debris prevents water from escaping as fast as it enters. The most frequent structural and environmental points of failure include:
- Fine silt and organic decay: Dirt washes through catch basin grates or gravel trenches, settling in low spots along the pipe. Over months, this material compacts into a heavy, clay-like barrier that resists standard water pressure.
- Roof shingle granules: When downspouts connect directly into underground lines without inline filters, asphalt shingle grit accumulates in the bottom of horizontal runs. This grit is dense, non-biodegradable, and creates high friction.
- Root penetration: Perforations in French drain lines and unglued slip-fit joints in corrugated pipe attract thirsty tree and shrub roots, forming dense fibrous mats that trap leaves and debris.
- Pipe crushing or settlement: Heavy lawnmowers, landscaping equipment, or vehicular traffic can collapse flexible black corrugated pipe (HDPE), creating a severe pinch point where floating debris snags.
- Mechanical jam at discharge points: Pop-up emitters become stuck under heavy turf thatch or get choked with lawn clippings, compacted dirt, and mulch.
Signs Your Drainage Lines Are Backing Up
Drainage failures rarely happen without warning. Watching for subtle signs of slow drainage allows you to address blockages before water reaches your foundation footings or creates soggy zones in your yard.
During moderate rainfall, walk your property and observe key checkpoints. If you notice standing water over a buried French drain trench more than two hours after rainfall stops, the fabric or surrounding aggregate may be clogged with silt (a condition known as blinding), or the pipe interior is blocked.
Another clear indicator is water bubbling up through catch basin grates rather than swirling down into them. If your downspout adapters overflow while the gutters themselves are clean, the subsurface line leading away from the house has lost its gravity slope or is choked with debris. Indoors, sudden dampness along basement cove joints or unexpected short-cycling of an interior sump pump often points to exterior lines holding hydrostatic pressure against foundation walls.
Essential Tools and Materials for Drainage Maintenance
Most routine inspection and clearing tasks require basic household and plumbing tools. Before opening cleanouts or digging out grates, assemble the following gear:
- Heavy-duty rubber-coated work gloves and eye protection
- Flathead and Phillips screwdrivers (for grate fasteners and cleanout plugs)
- Small trenching trowel or wet/dry shop vacuum with extension wands
- Standard 5/8-inch or 3/4-inch heavy-duty commercial garden hose
- Brass high-pressure twist nozzle or sewer jetter attachment
- Expanding rubber drain-cleaning bladder (sized specifically for 3-inch or 4-inch pipe)
- Manual drum auger (plumbing snake) with at least 25 to 50 feet of cable
- Five-gallon bucket for sediment collection and disposal
- High-lumen flashlight or portable LED work light
- Marking flags or stepping stones to identify buried cleanout locations
Step 1: Inspecting and Cleaning Exterior Catch Basins
An exterior catch basin cleaning is the starting point of any yard maintenance routine. Catch basins are engineered with an integrated collection sump—a reservoir area at the bottom of the plastic box that sits below the invert of the outlet pipe. This sump is designed to catch heavy sand, gravel, and decaying leaves before they enter the horizontal pipe run. However, once the sump fills to the level of the outlet pipe, every incoming rush of water pushes debris directly into your underground lines.
Follow these practical steps to service your catch basins properly:
- Remove the grate: Unscrew any retaining fasteners and lift the grate off the basin. Clear away grass clippings, matting roots, and mulch caught in the slots. Inspect the plastic grate for UV brittleness or cracks.
- Scoop the sump: Using a hand trowel or a wet/dry shop vacuum, remove all standing water, mud, decayed leaves, and gravel from the bottom of the box. Do not flush this muck down the outlet pipe; deposit it into a garden bucket or wheelbarrow for disposal in yard waste.
- Inspect pipe connections: Examine where the solid or corrugated pipe joins the basin walls. Look for gaps where surrounding soil might be washing in around the exterior of the pipe hub. If you find gaps, seal them with exterior polyurethane masonry sealant or expanding closed-cell foam rated for exterior water contact.
- Wipe down the lip: Clean the recessed ledge where the grate rests so it sits flush with the lawn, preventing lawnmower blades from catching the plastic edge.
Step 2: Performing a Subsurface Drainage Pipe Flush
Once the collection points are clear of standing debris, conduct a complete subsurface drainage pipe flush to test velocity and dislodge loose silt from the line. Gravity-fed drainage pipes require adequate water volume and velocity to stay self-scouring.
Begin by locating the cleanout port or the uppermost catch basin in the line. Insert a garden hose equipped with a high-pressure nozzle into the pipe entrance. Have a helper turn the outdoor spigot on full blast. Watch the downstream discharge point—whether it is a daylight pipe at a retaining wall, a street curb outlet, or a pop-up emitter.
If water emerges at the discharge point with steady volume and carries only a brief puff of cloudy sediment before running clear, your line maintains a good slope and has no significant obstructions. If water backs up around your hose at the upstream inlet, or if only a weak trickle escapes downstream, you have an accumulated silt dam or an obstruction that requires mechanical assistance.
Step 3: Clearing Stubborn Clogs with a Drain Bladder or Jetter
When high-pressure hose spraying fails to break through a clog, an expanding rubber drain bladder (often sold as a drain flusher) is the most effective DIY tool for 3-inch and 4-inch residential pipes. These devices screw onto the end of a standard garden hose. When water turns on, the bladder expands laterally to lock tightly against the inner pipe walls, sealing off backflow while pulsing a focused, concentrated stream of water forward.
| Clearing Method | Best For | Risk / Limitation |
|---|---|---|
| High-Pressure Hose Nozzle | Light dust, leaf debris, routine seasonal flushing | Lacks hydraulic seal; water splashes backward if pipe is blocked |
| Expanding Drain Bladder | Packed sand, compacted silt, organic mud plugs | Should not be used in damaged or heavily fractured thin-wall pipe |
| Manual / Power Plumbing Snake | Tree root hair, compacted twigs, fabric obstructions | Can puncture thin single-wall corrugated pipe if operated aggressively |
| Pressure Washer Sewer Jetter | Long runs, heavy grease/mud, severe silt buildup | Requires pressure washer unit; rear-facing jets can propel dirty water back |
To use an expanding bladder safely:
- Feed the deflated bladder at least 3 to 5 feet into the cleanout or pipe opening so it is securely inside the rigid pipe run before turning on the water. Never activate the bladder in an open catch basin box.
- Turn the cold water supply on fully. Allow the bladder to swell and lock into place. You will hear the hydraulic pressure build behind the blockage.
- Let the line run under pressure for 5 to 10 minutes. The sustained hydrostatic thrust will usually push compacted silt dams downstream toward the discharge point.
- Turn off the water and allow the bladder to completely deflate before pulling it backward out of the pipe to prevent tearing the rubber casing against pipe edges.
Step 4: Inspecting and Servicing Pop-Up Emitters
Pop-up emitters are spring-loaded or counter-weighted valves placed at the terminal end of an underground discharge run. When the line fills with water, hydraulic pressure lifts the green plastic cap, allowing water to disperse smoothly across turfgrass. When flow ceases, the lid drops back down, keeping rodents, leaves, and lawn clippings out of your pipes.
Because they sit level with the soil, pop-up emitters frequently malfunction due to grass encroachment or sediment accumulation in the elbow below the lid. When practicing thorough french drain maintenance and clog removal US property owners should inspect these terminal points regularly:
- Check manual movement: Press down on the emitter lid with your hand. It should move downward smoothly and spring back up (or drop freely back down on gravity-hinge models) without binding against overgrown grass or compacted dirt.
- Trim surrounding turf: Use a manual edging tool or grass shears to cut back turfgrass and thatch within a 4-inch radius around the perimeter of the lid.
- Clean the discharge elbow: Most pop-up tops snap into an underlying elbow or adapter. Unclip the top cap and reach inside the vertical elbow to remove accumulated sand and decaying organic material.
- Verify weep holes: Many discharge elbows have a small 1/4-inch drainage hole drilled into the bottom curve to let residual standing water soak into an underlying bed of gravel. Clear this hole with a screwdriver so water does not sit and freeze inside the elbow during winter.
Testing Sump Pump Exterior Discharge Lines
Many homes route their interior basement sump pump discharge into an exterior subsurface line that leads away from the foundation. If this exterior line clogs or freezes, your sump pump can overheat, burn out its motor, or push water backward into your basement through unsealed check valves.
To verify the integrity of an exterior sump discharge line:
- Locate the transition point where the rigid PVC pipe exits the home’s exterior wall and ties into the underground yard pipe. Ensure the freeze-relief fitting or air gap is clear of insect nests, spiderwebs, and leaves.
- Fill your interior sump pit with water from a bucket or hose until the float switch activates the pump.
- Walk outside immediately to watch the pump cycle. Confirm that water discharges freely from the exterior daylight end or pop-up without leaking back out of the transition fitting against the foundation.
- Listen for unusual strain or prolonged pumping cycles. If the pump takes twice as long to empty the basin when connected to the exterior line compared to an open test, downstream friction or a partial clog is restricting flow.
Handling Root Intrusion in Drainage Runs
Tree roots present a persistent challenge for subsurface drainage lines. Single-wall black corrugated pipe is especially susceptible to root invasion because thin joints and factory perforations offer easy entry points for root hairs seeking moisture and nutrients. Once inside, roots branch out into dense, broom-like structures that catch passing debris and create impassable blockages.
If a plumbing snake encounters springy, spongy resistance that stops the cable without breaking free, root masses are the likely cause. For moderate root infiltration in rigid PVC lines (Schedule 40 or SDR 35), you can rent a commercial drain-cleaning machine equipped with a rotating C-cutter or root-saw blade sized slightly smaller than the pipe diameter.
Caution: Never run aggressive mechanical root-cutting blades through flexible, thin-walled corrugated pipe. The spinning steel blades can catch on the interior ridges, tearing the pipe walls apart and creating an expensive underground collapse that requires excavation. If corrugated pipes suffer heavy root intrusion, replacement with smooth-wall, solvent-welded PVC pipe is generally the most durable long-term remedy.
Differences Between Corrugated and PVC Pipe Maintenance
The material used in your yard drainage system directly dictates which clearing methods are safe and effective. Understanding these differences prevents accidental pipe destruction during maintenance:
| Feature / Method | Black Corrugated Pipe (HDPE) | Smooth-Wall PVC (Schedule 40 / SDR 35) |
|---|---|---|
| Internal Flow Resistance | High; corrugated ridges trap silt and reduce flow velocity | Low; slick internal walls promote self-scouring velocity |
| Mechanical Snaking Safety | High risk of catching or puncturing pipe ribs; use bulb head only | Completely safe for mechanical cutting heads and augers |
| Hydro-Jetting Tolerance | Low to moderate; requires low-pressure, forward-gliding nozzles | High; can withstand standard commercial jetter pressures (3000+ PSI) |
| Joint Integrity | Snap fittings allow root and soil intrusion over time | Glued solvent-weld or gasketed joints form root-proof seals |
Seasonal Drainage Maintenance Schedule
Executing consistent french drain maintenance and clog removal US yards require is straightforward when integrated into your spring and fall home maintenance routines. Use this seasonal checklist to maintain unobstructed flow year after year:
Spring Checklist (Post-Thaw)
- Clear winter debris, dead leaves, and sand from all catch basin grates and gutters.
- Inspect pop-up emitters to confirm winter freeze-thaw cycles haven’t pushed the assemblies out of alignment.
- Perform a 5-minute garden hose flush through all downspout adapters to clear winter silt before heavy spring rains arrive.
- Check the basement sump discharge point to ensure the pipe outlet is clear of soil settlement or rodent nests.
Fall Checklist (Pre-Winter)
- Empty all catch basin sumps of fallen leaves and organic sludge before sub-freezing temperatures arrive.
- Ensure low-point weep holes in pop-up elbows are draining properly so trapped water does not freeze and crack the fittings.
- Clear roof gutters and install gutter screens or downspout strainers to minimize leaf volume entering underground pipes.
- Inspect daylight outlets at curbs or slopes to remove animal nests or leaf packs that obstruct flow.
When to Call a Professional Drainage Contractor
While most sediment blockages and surface grate issues can be resolved with DIY methods, certain structural drainage failures require specialized equipment and professional expertise. Consider hiring a licensed drainage specialist or plumbing professional under the following circumstances:
- Repeated clogs despite flushing: If a line backs up every few weeks despite thorough flushing, the pipe may have lost its grade, developed a low belly that traps water, or collapsed underground.
- Deep root intrusion in inaccessible runs: Long runs under concrete patios, driveways, or mature landscaping often require closed-circuit television (CCTV) camera inspection to locate exact blockage points without digging up the entire yard.
- Geotextile fabric blinding: If the perforated pipe in a French drain is clean internally but surface water still refuses to sink into the gravel trench, the underground filter fabric surrounding the rock bed has likely silted over. This condition requires excavating and replacing the gravel and filter envelope.
- Hydro-jetting requirements: Severe silt and clay blockages in long PVC runs can be cleared quickly by professional contractors using truck-mounted hydro-jetters operating at controlled, high-volume flow rates.
Common Drainage Maintenance Mistakes to Avoid
Avoiding a few common operational errors will save you time and protect your underground pipes from unintended damage:
- Using harsh chemical drain cleaners: Never pour caustic lye or acid-based drain openers into exterior yard lines. These chemicals kill lawn turf, harm local wildlife and waterways, and can soften thin pipe walls without breaking down leaf and silt blockages.
- Directing downspouts into perforated French drains without inline filters: Tying downspout lines carrying roof grit directly into perforated French drain trenches without an inline catch basin or cleanout filter causes aggregate beds to clog quickly.
- Neglecting cleanout access caps: Buried cleanout caps often get covered by sod over time. Mark cleanouts with a small stepping stone or keep them slightly above grade to ensure easy access when clearing lines.
- Excessive pressure on corrugated pipe: Using high-output commercial pressure washer tips right against thin corrugated plastic can slice through the sidewalls. Use rounded sewer jetter tips specifically designed to glide along pipe corrugations.
Frequently Asked Questions
How often should exterior catch basins be cleaned?
Exterior catch basins should be inspected and cleaned at least twice a year—once in late spring and once in late autumn after trees have shed their leaves. If your property is surrounded by heavy tree canopies (such as pines or oaks), check the basin sumps monthly during the rainy season to keep sediment from reaching the outlet pipes.
Can I use a pressure washer to clear a French drain?
You can use a pressure washer if it is fitted with a specialized sewer jetter hose and a rounded, forward-gliding nozzle. Standard high-pressure spray wands should never be inserted directly into underground drainage pipes, especially thin-walled black corrugated HDPE, as the concentrated spray can puncture the plastic.
Why does water stand in my catch basin after a storm?
A few inches of standing water in the bottom of a catch basin is normal and intentional. The bottom of the basin sits lower than the outlet pipe to create a sump that traps heavy sediment. As long as the water level does not rise above the bottom edge of the outlet pipe, the system is working as designed.
Keeping Your Yard and Foundation Protected
A well-maintained residential drainage network operates quietly out of sight, moving thousands of gallons of stormwater away from your foundation footings. By conducting regular catch basin cleanouts, flushing subsurface lines annually, and checking pop-up emitters after lawn mowing, you prevent water damage and costly excavation repairs. Proactive french drain maintenance and clog removal US homeowners perform each season ensures that your yard remains usable, your basement stays dry, and your property value remains protected against the destructive effects of excess stormwater.