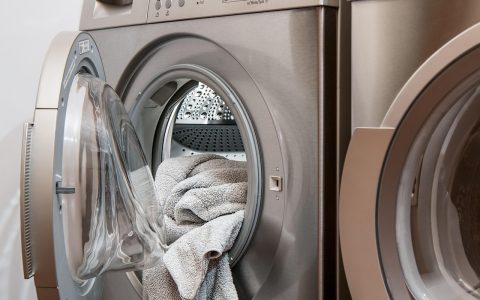
Opening your washing machine only to be hit by a wave of sour, damp air is a frustrating reality for millions of home laundry managers across North America. When clean laundry comes out smelling like a damp basement, the standard suspect is almost always the flexible rubber door boot seal surrounding the drum opening. Implementing a definitive front load washer mold gasket cleaning fix US households can count on requires going far beyond quick surface wiping to eradicate deeply embedded fungal colonies and clear hidden drainage pathways.
Front-load washing machines deliver outstanding water and energy efficiency, but their watertight design creates an ideal environment for mold and mildew. Water, lint, hair, and undissolved detergent gather inside the deep folds of the rubber boot. Once black mold takes root in this porous elastomer, ordinary laundry cycles will not wash it away. This comprehensive guide walks you through diagnosing gasket contamination, executing an aggressive chemical deep-cleaning protocol, clearing blocked internal drain ports, and establishing daily operational habits that keep mold from returning.
Why Front-Load Washer Gaskets Grow Mold and Trap Odors
To stop gasket mold permanently, it helps to understand why front-load machines are far more vulnerable than traditional top-loaders. Top-loading washers feature a loose-fitting lid that permits continuous air exchange, allowing the wash tub to dry out naturally between cycles. In contrast, front-loading machines rely on an airtight, watertight door seal to keep gallons of water from leaking onto your floor during high-speed wash and spin cycles.
The rubber door boot—known in the appliance industry as the door bellows or gasket—serves as the flexible seal between the stationary outer frame and the spinning inner stainless steel tub. To accommodate intense tub movement during 1,200 RPM spin cycles, this gasket is molded with deep, convoluted folds. Every time you run a load, water containing suspended soil, body oils, pet hair, and laundry chemicals splashes directly into these bellows.
| Factor | Mechanism of Accumulation | Impact on Gasket Health |
|---|---|---|
| Airtight Door Seal | Traps atmospheric moisture inside when the door is shut between cycles. | Maintains high humidity, accelerating fungal spore germination within 24–48 hours. |
| Deep Rubber Bellows | Folds trap water, lint, coin debris, and small items like socks. | Creates stagnant pools where microbial biofilms settle out of sight. |
| Cold-Water Washing | Low water temperatures fail to dissolve heavy fats, waxes, and detergent fillers. | Leaves a slick film (scrud) on rubber surfaces that feeds mold colonies. |
| Overdosing Liquid Fabric Softener | Silicone and tallow compounds coat internal rubber surfaces. | Provides a nutrient substrate for black mold spore attachment. |
When moisture remains trapped inside the elastomer folds alongside organic residue, opportunistic micro-organisms like Cladosporium, Penicillium, and Aspergillus establish colonies. As these organisms feed on leftover detergent film, they form a slimy protective matrix known as biofilm. Over time, this biofilm hardens and penetrates into the outer microscopic layers of the rubber, turning into unsightly black spots and emitting volatile organic compounds that impart a heavy musty smell to your clothing.
Safety Precautions and Essential Cleaning Supplies
Before beginning a gasket restoration project, gather the proper personal protective equipment and chemical supplies. Working with concentrated cleaning solutions inside an enclosed washer drum requires adequate ventilation and personal safety measures to avoid respiratory irritation or chemical burns.
Required Safety Gear
- Heavy-duty nitrile or rubber gloves: Protects skin from harsh chemicals, mold spores, and sharp metallic edges along the drum rim.
- Safety glasses or goggles: Prevents chemical splashes or dislodged debris from entering your eyes while scrubbing under rubber folds.
- Room ventilation: Open windows, turn on the laundry room exhaust fan, or position a portable fan pointing out of the doorway when using chlorine bleach.
Recommended Tools and Chemicals
- Liquid Chlorine Bleach (6%–7.5% sodium hypochlorite): The standard chemical for sanitizing non-porous surfaces and lightening dark mold stains.
- 3% Hydrogen Peroxide: A safe, non-toxic alternative for homeowners sensitive to chlorine fumes or those using septic systems.
- Distilled White Vinegar (5% acidity): Useful for descaling hard water mineral deposits during separate cleaning phases. Warning: Never mix bleach and vinegar together, as this produces deadly chlorine gas.
- Soft-bristled detail brush: An old toothbrush or a specialized grout brush with nylon bristles. Avoid wire brushes, which scratch and tear rubber seals.
- Microfiber cleaning cloths: Absorbent towels that lift and hold dislodged debris without shedding lint into the machine.
- Unflavored, heavy-duty paper towels or cotton coil: Used for soaking chemical solutions directly against stubborn mold patches.
- Flexible wire or pipe cleaner: Essential for unclogging narrow rubber drain holes located at the bottom of the seal.

Step-by-Step Deep-Cleaning Protocol for Moldy Gaskets
If your door boot seal exhibits black spots or emits a strong musty odor when pulled back, follow this systematic chemical treatment process. This procedure treats both the visible outer rubber surfaces and the hidden channel grooves where liquid collects.
Step 1: Perform an Initial Manual Debris Removal
Put on your protective gloves and pull back the flexible lip of the rubber door gasket with your fingers. Work your way around the entire circumference, carefully inspecting the bottom fold where liquid settles. Use a dry paper towel to sweep out trapped hair, coins, buttons, lint wads, and residual slime. Throw these solids directly into the trash rather than pushing them down into the drain ports.
Step 2: Apply the Bleach or Peroxide Soak Compress
Wiping alone rarely kills deeply rooted mold because liquid runs off the vertical curves of the rubber before achieving sufficient contact time. The solution is creating a chemical compress that holds the active chemical directly against the spores.
- Mix a solution of 1 part liquid chlorine bleach to 1 part warm water (or use undiluted 3% hydrogen peroxide if avoiding bleach).
- Soak long strips of heavy-duty paper towels, cotton coil, or thin microfiber rags in the solution until fully saturated.
- Tuck the saturated rags directly into the deep groove beneath the rubber fold at the bottom half of the door boot. Press the material firmly against the stained rubber surfaces so it stays in place.
- Lay additional soaked towels along the bottom interior edge where the gasket meets the stainless steel drum.
- Close the washer door gently to reduce evaporation, and allow the chemical compress to sit undisturbed for 1 to 2 hours (for peroxide) or up to 3 to 4 hours (for stubborn bleach treatments).
Step 3: Scrub the Rubber Bellows
After letting the compress sit, open the door and remove the soaked towels. Discard disposable paper products into a closed trash bag. You should notice that many black spots have lightened significantly or dissolved into loose residue.
Dip your soft nylon scrub brush into warm, soapy water mixed with a few drops of grease-cutting liquid dish soap. Fold back the rubber seal section by section and scrub vigorously inside all grooves, upper ridges, and exterior faces. Pay close attention to the hard plastic-to-rubber junctions where seal lips press against the cabinet frame, as grime routinely builds up in these tight tolerances. Rinse your brush frequently in clean water as you work.
Step 4: Wipe Down and Inspect
Take a fresh, dry microfiber cloth and thoroughly wipe down every fold and crease of the gasket. Dry the entire interior ring until no standing water remains. Inspect the rubber surface closely. If dark gray or black stains remain, recognize that prolonged mold exposure can permanently stain synthetic elastomer compounds even after the living fungus has been destroyed. If the surface is smooth, clean to the touch, and free of slimy feel or foul odor, the mold spores have been destroyed.
How to Locate and Unclog Gasket Drainage Holes
A major design flaw contributing to repeat gasket mold is the clogging of the small drainage ports engineered into the bottom fold of the rubber boot. Most modern front-loaders feature between two and four small oval or round holes situated in the lowest recess of the rubber seal. These holes allow water thrown into the door fold during spin cycles to drain into the outer tub and out through the drain pump.
Identifying the Drain Ports
Reach down to the six o’clock position on your front-load gasket and peel back the outermost lip of rubber. Look directly into the lowest point of the internal groove. You will find tiny perforated holes or slitted channels molded into the rubber body. Over time, laundry lint, pet hair, coin wrappers, and coagulated detergent paste form an impenetrable plug over these tiny drains.
Clearing the Obstruction
When these holes clog, water remains trapped inside the rubber fold permanently, guaranteeing rapid mold growth even if you clean the seal daily. Here is how to restore proper drainage:
- Locate each individual drain hole using a flashlight or bright headlamp.
- Gently insert a flexible pipe cleaner, a plastic zip-tie, or a blunt piece of insulated wire into the hole. Avoid using sharp metal picks, screwdrivers, or unbent coat hangers, which easily puncture or tear soft rubber gaskets.
- Push the flexible wire gently through the hole until you feel it clear the rubber wall thickness (typically 1/2 inch to 1 inch deep). Move the tool in a gentle swirling motion to dislodge trapped lint plugs.
- Flush the cleared hole by pouring half a cup of warm water directly into the bottom gasket fold. Observe whether the water quickly drains away out of sight. If the water holds still, repeat the wire clearing until drainage flows freely into the drain sump.
Chemical Treatments Compared: Bleach, Peroxide, Vinegar, and Commercial Cleaners
Homeowners often struggle to choose the right cleaning agent for washer maintenance. Different chemicals possess distinct trade-offs regarding material compatibility, spore-killing efficacy, and user safety. Selecting the right compound for your situation prevents accidental machine damage while ensuring complete odor control.
| Chemical Agent | Mold Elimination Power | Rubber Safety & Longevity | Pros | Cons & Limitations |
|---|---|---|---|---|
| Chlorine Bleach | Very High (Destroys spores & lightens stains) | Good (If rinsed thoroughly; degrades rubber with chronic exposure) | Fast-acting, inexpensive, highly effective on dark black mold stains. | Strong fumes; can damage clothing if not fully rinsed; toxic to septic bacteria in excess. |
| 3% Hydrogen Peroxide | High (Kills fungi and bacteria) | Excellent (Non-corrosive to ethylene propylene rubber) | Odorless, non-toxic, safe for colors, environmentally benign. | |
| 5% White Vinegar | Moderate (Kills ~82% of mold species) | Fair (Acidic nature can degrade internal rubber seals over long exposure) | Removes hard water scale; cheap; environmentally friendly. | Cannot be mixed with bleach; less effective against dense black mold colonies; mild acid odor. |
| Oxygenated Cleaners (Sodium Percarbonate) | Moderate to High | Excellent | Safe for machine parts; excellent for maintenance washes. | Requires hot water to activate fully; slower action than liquid chlorine bleach. |
| Commercial Washer Cleaners (Tabs/Powders) | High (Formulated for biofilm breakdown) | Excellent (Engineered specifically for washer materials) | Contains surfactants and anti-foaming agents; easy to use. | More expensive per treatment; less effective on vertical surface mold without manual scrubbing. |
Crucial Chemical Safety Rule
Never mix chlorine bleach with vinegar, ammonia, or acid-based descaling products. Combining bleach with acids instantly generates toxic chloramine and chlorine gases, which cause severe respiratory injury. Always complete a full high-temperature rinse and drain cycle between using different chemical agents inside your washing machine.
Running Hot Maintenance and Descaling Cycles
Cleaning the visible rubber seal addresses only half the problem. Fungal growth and soapy biofilm thrive on the unseen exterior of the stainless steel inner basket and the inner walls of the plastic outer tub. If you clean the door seal but leave the outer tub coated in biofilm, mold spores will immediately re-contaminate your fresh rubber gasket during subsequent wash cycles.
Executing a Sanitizing Maintenance Cycle
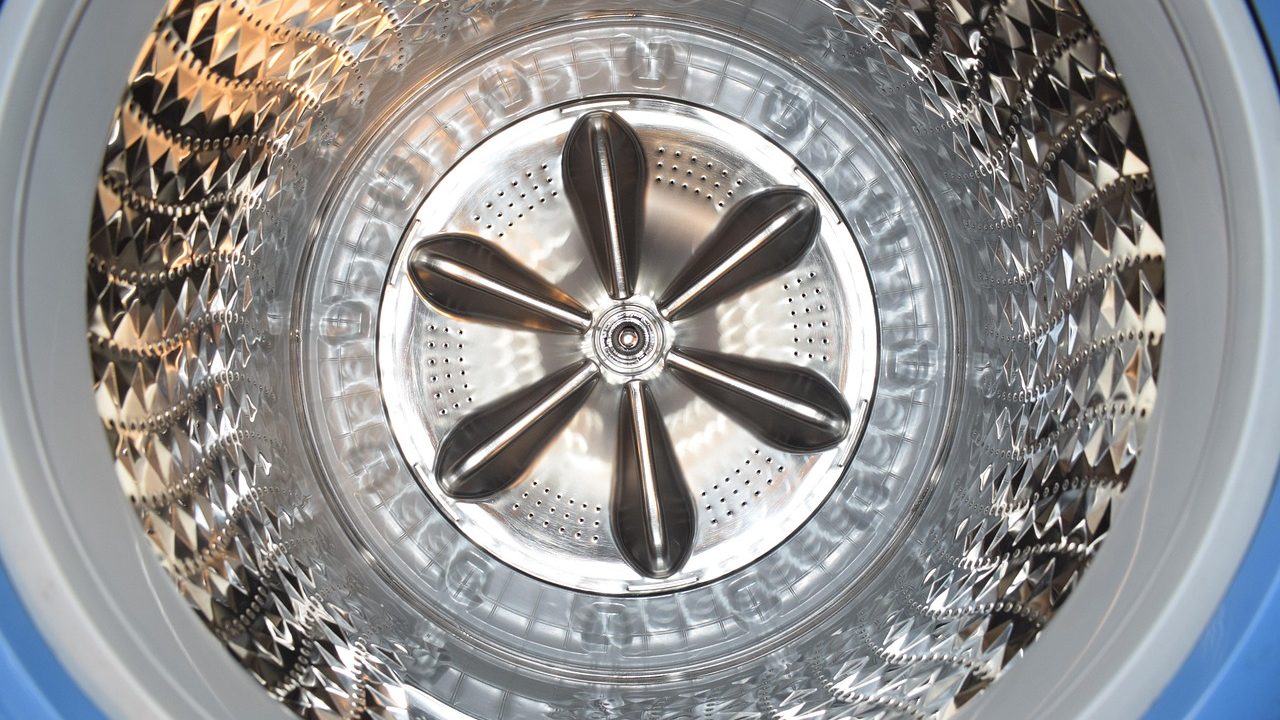
Most modern washers include a dedicated Maintenance, Clean Washer, or Tub Clean cycle. This cycle is programmed to run at maximum water volume and elevated temperatures, sloshing water high against the upper bellows and tub walls.
- Ensure the wash drum is completely empty of clothing.
- Add 1 cup of liquid chlorine bleach directly to the main detergent wash compartment (or place two commercial washer cleaner tablets directly into the stainless drum bottom).
- Select the Sanitize, Tub Clean, or highest temperature heavy-duty cycle available on your control panel. Turn on extra rinse options if available.
- Allow the cycle to complete fully, ensuring high-temperature water neutralizes hidden biofilm deposits behind the front lip.
Descaling Hard Water Deposits
In regions across the United States with hard tap water, calcium and magnesium minerals precipitate onto internal washer components, creating a rough, chalky scale. This mineral scale acts like sandpaper, catching lint and body oils to create an anchor point for fungal colonies. Once every three to six months, run a dedicated descaling cycle using 2 cups of white vinegar or a commercial citric acid descaler run on hot water (without bleach) to strip away hard water scale from the drum backboard and rubber surfaces.
When to Clean vs. When to Replace the Gasket
While most moldy door gaskets can be successfully sanitized and restored, there are instances where chemical cleaning is no longer effective or economical. Rubber is a synthetic polymer that eventually degrades, cracks, and loses elasticity over time.
Signs Your Gasket Can Be Saved by Cleaning
- The mold consists of surface slime, speckled gray patches, or light black spots.
- The rubber remains supple, smooth, flexible, and free of physical tears or cracks.
- Water drains normally through the bottom drainage ports once cleared of debris.
- The musty odor dissipates completely after running a bleach soak and hot sanitizing cycle.
Signs It Is Time to Replace the Gasket
- Deep Elastomer Infiltration: Black mold has penetrated deep into the molecular structure of the synthetic rubber, causing dark blotches that do not lighten even after a 6-hour bleach compress treatment.
- Physical Punctures or Tears: Small rips, punctures from unzipped zippers, or split rubber folds allow wash water to leak behind the door frame, dripping onto internal cabinet wiring or subflooring.
- Loss of Elasticity or Warping: The outer lip of the gasket has stretched, bowed, or hardened, preventing a watertight seal against the glass door panel during operation.
- Persistent Odor After Tub Clean: The machine continues to produce a strong sewage or rot smell despite repeated manual scrubbing and deep chemical maintenance washes, signaling severe hidden mold mats trapped behind the tub assembly.
Replacing a door boot gasket requires basic mechanical aptitude, removing the washer’s outer retaining spring clamp, disconnecting internal drain hoses, and setting a fresh rubber boot into the tub lip channel. DIY replacement gaskets typically range in cost based on brand and model, offering a cost-effective alternative to calling a service technician.
Habits to Prevent Washer Mold Recurrence Permanently
Once you have eliminated black mold and cleared your gasket drain holes, adopting disciplined post-wash habits prevents fungal spores from establishing new colonies. Prevention relies on controlling moisture and removing organic food sources.
1. Leave the Washer Door Ajar
The single most effective habit is leaving the washing machine door cracked open 2 to 3 inches whenever the machine is not in use. This simple action allows ambient airflow to evaporate standing moisture inside the drum and gasket folds, dropping humidity levels below the threshold required for mold germination.
2. Wipe Down the Rubber Bellows Daily
Keep a dedicated microfiber towel near your laundry basket. At the end of your final wash load of the day, take ten seconds to pull back the rubber seal fold, wipe out standing water, and pull out trapped lint or stray socks. Leaving the bottom groove bone-dry stops microbial growth in its tracks.
3. Switch to High-Efficiency (HE) Powder or Liquid Detergent
Modern front-load washers use significantly less water than older top-load machines. Standard non-HE laundry detergents produce excess suds that do not rinse away completely, leaving behind a gummy soap film known as scrud. Always use high-efficiency (HE) detergents formulated to suppress suds. Crucially, measure your detergent carefully using a measuring cup; using more than 2 tablespoons per regular load leads to rapid detergent buildup on internal rubber parts.
4. Eliminate Liquid Fabric Softeners
Liquid fabric softeners contain animal fats (tallow) and silicone compounds designed to coat fabric fibers. Inside a front-load washer, these hydrophobic fats coat the hidden exterior of the outer plastic tub and rubber seal, creating the primary food source for black mold. Replace liquid fabric softeners with distilled white vinegar placed in the softener compartment or switch to wool dryer balls in your dryer.
5. Run Weekly Hot Loads
Cold-water washing conserves energy, but continuous low-temperature washing fails to melt accumulated fats and soaps inside your machine. Schedule at least one hot water load every week—such as washing white towels, bed linens, or cotton socks with bleach—to naturally sanitize the inner drum and gasket without needing extra maintenance cycles.
Frequently Asked Questions
Why does my laundry still smell musty after cleaning the rubber seal?
If your clothes smell musty after thoroughly deep-cleaning the rubber gasket, mold is likely thriving out of sight on the rear face of the stainless steel spin basket, inside the detergent dispenser drawer housing, or within the lower drain pump filter. Clean the detergent dispenser drawer completely, remove and clean the drain pump filter debris catch, and run two consecutive high-temperature sanitizing cycles using commercial washer cleaner tablets.
Is it safe to use pure bleach on rubber door seals?
Using liquid chlorine bleach occasionally for deep cleaning and monthly sanitizing cycles is safe for synthetic washer door seals (such as ethylene propylene rubber). However, soaking rubber in undiluted, concentrated bleach for extended days or using bleach daily will cause rubber compounds to dry out, harden, and crack over time. Always dilute bleach 1:1 with water for compresses, and rinse the area thoroughly with clean water or run a rinse cycle after cleaning.
How often should I clean my front load washer gasket?
Inspect and dry the bottom rubber fold weekly. Perform a quick wipe-down with a damp soapy cloth monthly. Complete a comprehensive deep-cleaning compress treatment alongside a hot maintenance cycle every three to six months, or immediately if you notice black speckles or sour odors developing.
Can I use baking soda and vinegar together to clean gasket mold?
While baking soda and vinegar are popular natural cleaners, mixing them together causes an immediate acid-base neutralization reaction that converts them into basic saltwater and carbon dioxide gas, stripping away their cleaning power. Instead, use baking soda as a mild abrasive scrub during manual cleaning, rinse it away completely, and use vinegar during a hot wash cycle for descaling mineral deposits.
Final Checklist for a Fresh, Mold-Free Washer
Eradicating front-load washer odor requires a dual strategy: aggressive mechanical cleaning paired with persistent moisture management. By systematically clearing organic debris, treating rubber bellows with targeted chemical compresses, opening clogged drain holes, and adopting smart daily operating habits, you can eliminate stubborn mold, protect your appliance investment, and ensure your laundry comes out smelling truly clean every time.
- [ ] Pull back gasket folds and remove physical debris and lint plugs manually.
- [ ] Apply a bleach or hydrogen peroxide compress to stained areas for 1–3 hours.
- [ ] Scrub interior grooves and cabinet mating surfaces with a soft nylon brush.
- [ ] Unclog bottom rubber drain ports using a flexible pipe cleaner or zip-tie.
- [ ] Run an empty hot Sanitizing or Tub Clean cycle with bleach or commercial washer cleaner.
- [ ] Pull out detergent drawer and clean residual soap scum from internal housing.
- [ ] Adopt daily habits: leave door ajar 2 inches, dry rubber folds after laundry days, and eliminate liquid fabric softeners.