
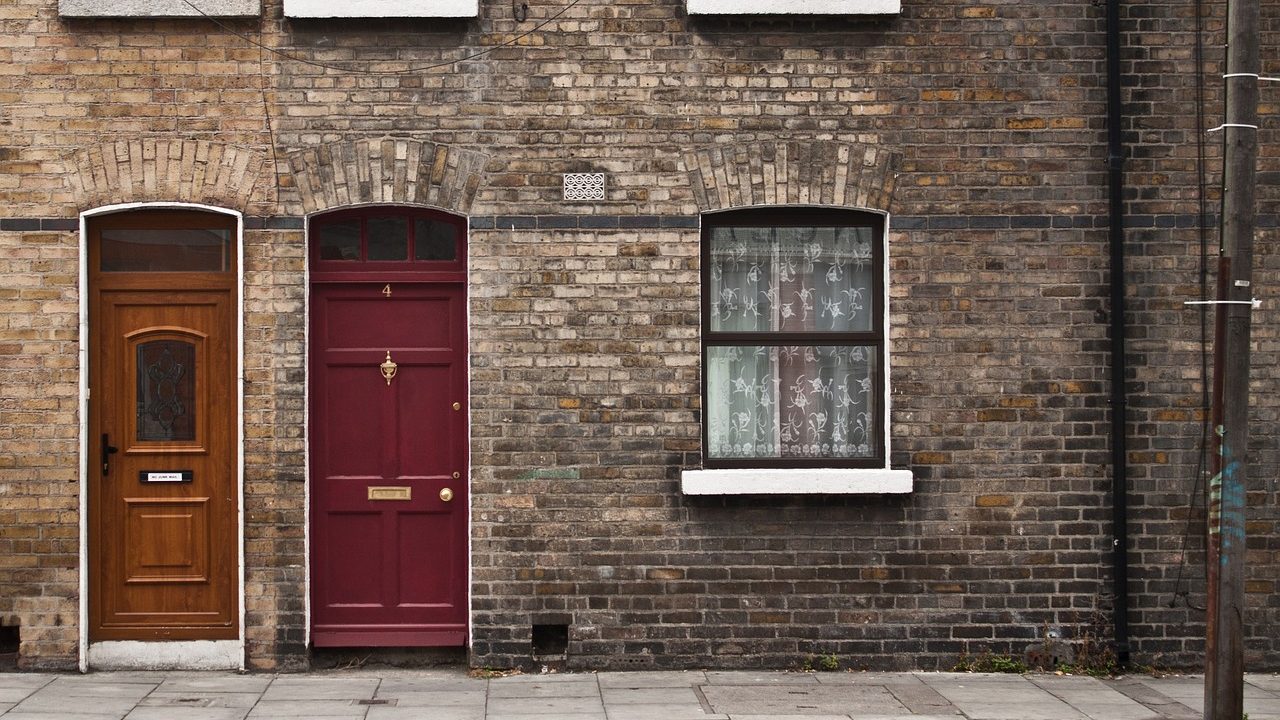
When winter winds blow or summer heatwaves hit, learning how to seal drafty exterior doors energy savings US homeowners desire becomes a top weekend priority. A drafty entryway is far more than a minor domestic inconvenience—it represents an ongoing financial drain on your utility budget. Cold air leaking under a front door or hot, humid air creeping past flattened perimeter gaskets forces your central heating and cooling systems to work overtime, inflating monthly electric and gas bills while causing room temperatures to fluctuate uncomfortably.
Many homeowners assume that fixing an uncomfortably breezy entry door requires spending thousands of dollars on a complete replacement unit. However, the underlying structure of a door frame and slab often remains perfectly sound even when its sealing components have failed. Over time, original factory weatherstripping degrades due to UV exposure, constant compression, and seasonal movement. By taking a systematic approach to identifying thermal leaks, selecting professional-grade rubber or silicone gaskets, fine-tuning threshold height screws, and realigning worn hardware, you can restore a tight weather seal and capture significant home efficiency gains without hiring a contractor.
Diagnosing Air Leaks Around Exterior Doors
Before purchasing replacement seals or removing existing hardware, you must map out precisely where thermal breaches occur around your entryway. Drafts rarely distribute evenly across a door frame. Foundation settling, warping door slabs, and worn hinges usually create localized air gaps that require specific mechanical or material remedies rather than a single blanket fix.
The Visual Light Inspection
The simplest way to spot severe perimeter gaps is from inside your home during bright daylight hours. Turn off interior hallway and entryway lights, close the exterior door completely, and engage the deadbolt to pull the door slab into its fully latched position. Stand inside and trace the perimeter margin where the door edge meets the frame stop molding.
If bright sunlight shines through any gap between the door and the frame, you have identified a direct pathway for wind intrusion and conditioned air loss. Mark these specific locations with small pieces of blue painter’s tape so you know exactly where extra seal compression or frame adjustment will be required later.
The Dollar Bill Resistance Test
While visual daylight indicates large, obvious gaps, smaller thermal leaks can exist even where no daylight appears visible. The dollar bill or paper strip test checks whether existing weatherstripping retains sufficient spring elasticity to create a true compression barrier.
- Open the entry door and place a crisp dollar bill or strip of printer paper flat across the jamb weatherstripping.
- Close and latch the door over the bill.
- Grasp the exposed end of the paper and pull it slowly toward yourself.
If the paper slides out effortlessly with minimal or zero resistance, the weatherstripping in that spot has flattened and lost its memory, allowing air infiltration. If the paper tears or requires firm, steady force to pull free, the weatherstripping is compressing correctly. Repeat this test every 12 inches along the top header, latch jamb, hinge jamb, and lower threshold.
The Smoke and Thermal Movement Test
On windy or unusually cold days, trace subtle air currents using a simple smoke indicator or incense stick. Hold the smoking tip roughly one inch away from the closed door seam and move it slowly around the frame perimeter, including the bottom corners and deadbolt lock area. Where air penetrates the house, the smoke trail will flicker wildly or flatten horizontally into the room. If you prefer a mess-free digital approach, an inexpensive infrared thermal leak detector or point-and-shoot laser thermometer can quickly reveal cold spots along floor sills and jamb joints.
Choosing the Right Weatherstripping Materials
Home improvement stores carry dozens of sealing profiles made from various synthetic materials. Understanding the physical differences between cheap temporary tapes and long-lasting elastomeric compounds ensures your project provides lasting protection rather than requiring an annual redo.
| Material Profile | Expected Service Life | Best Primary Application | Performance Advantages & Drawbacks |
|---|---|---|---|
| Open-Cell Foam Tape | 1–2 Years | Temporary stopgaps, low-traffic interior access doors | Extremely cheap and easy to apply; compresses permanently within months and absorbs moisture. |
| Closed-Cell Vinyl / EPDM Foam | 3–5 Years | Secondary garage access doors, side entryways | Resists water penetration well; stiffens in extreme cold temperatures and slowly loses memory. |
| Tubular EPDM Rubber | 7–10 Years | Main exterior entry doors, high-traffic wood/composite doors | Exceptional resilience and elasticity; handles wide temperature swings but requires firm latching force. |
| Kerf-In Silicone Gaskets | 10–15+ Years | Modern pre-hung fiberglass, steel, and solid wood doors | Superior thermal memory, impervious to UV light; snaps directly into pre-milled frame channels. |
| Spring Bronze Flange | 20+ Years | Historic homes, high-end solid hardwood exterior doors | Nearly indestructible with classic period aesthetics; requires precise nail fastening and alignment. |
Kerf-Inserted vs. Surface-Mounted Weatherstripping
Most modern residential exterior doors feature pre-milled narrow channels called kerfs along the indoor frame stops. Kerf weatherstripping consists of a rigid plastic or vinyl spine attached to a flexible foam or tubular silicone bulb. To replace it, you simply pull out the old degraded strip and push the new spine into the existing groove—no adhesives, brad nails, or staples required.
If your home features older custom wood doors or flat-faced frames without pre-cut grooves, you must install surface-mounted weatherstripping. These assemblies consist of rigid aluminum, wood, or vinyl carrier strips fitted with an integrated rubber or silicone bulb. Surface-mounted strips screw directly into the face of the door stop, granting you the ability to fine-tune the compression depth against the door face during installation.

Step-by-Step: Replacing Jamb Weatherstripping
Replacing worn jamb seals requires systematic measuring, thorough frame preparation, and precise corner trimming to form a continuous air barrier around the top and side margins of the door.
1. Remove Old Seals and Prepare the Frame Channel
Open the door wide to gain unrestricted access to the jamb rebate. Grasp the top edge of the old kerf weatherstripping and pull it steadily out of the frame slot. If you are dealing with old surface-mounted aluminum strips, back out the retention screws using a drill driver or pull old tack nails with end-cutting pliers.
Once removed, inspect the kerf slot or door stop wood carefully. Paint drips, dried wood glue, and dirt buildup prevent new weatherstripping from seating fully. Run the tip of a stiff putty knife or small flathead screwdriver through the kerf groove to clear out debris. Wipe down the entire wooden or composite frame surface using a cloth dampened with isopropyl rubbing alcohol to eliminate oil and grime, then allow it to air dry completely.
2. Measure and Cut the New Gasket Profiles
Always measure the top horizontal head jamb first, taking the exact distance from inside corner to inside corner. Cut the head seal profile slightly long using sharp utility shears or an anvil cutter. Next, measure both vertical side jambs from the head jamb down to the top surface of the lower threshold. Always measure the left and right vertical sides independently; structural settling frequently causes opposite sides of an exterior frame to differ in length by up to a quarter of an inch.
3. Join Corner Joints Correctly
Square butt joints at the top left and right corners often leave micro-gaps where air creeps through. To create an airtight seal, cut the top horizontal header seal at a 45-degree miter at both ends using your shears. Miter the top ends of the vertical side pieces to match, ensuring the flexible rubber bulbs meet snugly without buckling or leaving exposed voids.
4. Install the Gaskets Without Stretching
Starting with the horizontal head piece, press the rigid plastic barb firmly into the top kerf slot using your thumb or a small wooden block. Work progressively from one corner across to the other. Next, press the vertical side strips into place from top to bottom. Avoid pulling or stretching flexible rubber or silicone profiles during installation. Stretched rubber acts like a rubber band—over time, it snaps back toward its relaxed state, pulling loose at the top corners and leaving open draft gaps.
Evaluating and Adjusting the Door Threshold
The boundary between the bottom edge of an exterior door slab and the floor sill represents one of the largest single thermal leak points in residential buildings. Homeowners often install thick bottom sweeps when an easy mechanical adjustment to the existing floor threshold would fix the draft in minutes.
Understanding Integrated Jack Screws
Most modern residential entryways utilize an anodized aluminum threshold assembly featuring an elevated central wooden or composite cap. Look closely along the top surface of this threshold cap—you will generally see four or five large phillips-head or slotted screws spaced evenly across its length. These are integrated jack screws designed to raise or lower the threshold cap to maintain a dynamic seal as floor sills settle and doors expand or contract.
Step-by-Step Threshold Adjustment Procedure
- Sweep away dirt, grit, and small pebbles from around the threshold cap and screw heads.
- Insert a large hand screwdriver (Phillips #3 or heavy slotted) into the first adjustment screw. Avoid using high-torque power drivers, which easily strip soft brass, vinyl, or aluminum screw heads.
- Turn each screw counterclockwise one full rotation. This turns the jack threads upward, lifting the threshold cap closer to the bottom sweep of the closed door.
- Work across the sill from left to right, raising each screw by an equal amount to keep the cap level.
- Close the entry door and perform the paper resistance test across the bottom edge.
- If the door drags so heavily that it resists closing or causes the rubber sweep blade to fold under itself, turn the screws clockwise in quarter-turn increments until the door latches smoothly while maintaining firm friction against the paper.
Selecting and Installing Door Sweeps
When an adjustable threshold cap cannot bridge a wide gap—or if your doorway features an older flat wooden threshold sill—installing a heavy-duty surface-mounted door sweep is mandatory for draft protection.
Comparing Door Sweep Types
Choosing the correct sweep style depends heavily on your flooring material, threshold design, and exposure to rain and wind:
- Heavy-Duty Aluminum with Neoprene/Silicone Blade: The gold standard for direct outdoor exposure. A rigid, corrosion-resistant aluminum mounting bar holds a durable rubber sheet that wipes tightly against the threshold cap, repelling water and stopping strong wind gusts.
- Nylon Brush Sweeps: Engineered with thousands of dense nylon filaments. Best for irregular floors, slate entry tiles, or inward-swinging doors that must cross thick indoor entry rugs without snagging.
- Automatic Drop Sweeps: Designed for high-end interior-swinging entry doors where traditional sweeps scrape against floor mats. An internal spring mechanism lowers the rubber seal firmly against the sill only when the door latches shut, retracting it automatically when the door opens.
- Slide-On U-Channel Sweeps: Vinyl or aluminum strips featuring dual fins that slip over the bottom edge of the door slab. Excellent overall coverage, but requires removing the door slab from its hinges to trim or adjust.

Installing a Surface-Mounted Aluminum Sweep
For standard DIY exterior weatherproofing, a surface-mounted aluminum sweep with a flexible silicone or rubber blade offers unmatched long-term durability and quick installation.
Measure the exact width of the door slab along its interior bottom face while closed. Mark this dimension onto the aluminum sweep housing. Slide the flexible rubber insert blade out of the metal channel, then trim the aluminum housing to length using a hacksaw or fine-tooth metal blade. File away sharp metal burrs with a flat hand file. Trim the rubber insert separately using a utility knife, leaving it roughly 1/8-inch wider than the metal carrier on both ends to prevent edge air gaps.
Close and latch the door fully. Position the sweep assembly along the bottom face of the door (the interior face for inward-swinging doors; the exterior face for outward-swinging doors). Press the flexible blade down until it rests completely flat across the threshold cap without bending double or curling backward under the door slab. Mark the center of the slotted mounting holes onto the door surface using a center punch or pencil.
Drill shallow pilot holes into the door slab using a drill bit sized slightly smaller than the provided mounting screws. Place the sweep back over the holes and drive the mounting screws in lightly by hand. The slotted mounting holes permit vertical adjustment—tap the aluminum housing up or down with a rubber mallet until you establish uniform compression across the entire floor sill, then tighten all mounting screws firmly into place.
Addressing Hinge Sag and Frame Alignment
Fresh weatherstripping cannot seal a door frame if the door slab itself sits crooked inside its opening. Over years of daily opening and closing, heavy solid wood, fiberglass, or steel insulated door slabs exert continuous leverage on the top hinge screws, causing them to loosen and pull away from the jamb framing.
Identifying Hinge Misalignment
When a door sags due to loose hinges, it creates a characteristic uneven reveal: the gap between the top of the door slab and the head jamb becomes wide on the latch side while pinching tightly near the top hinge. Consequently, the latch edge drops, causing the bottom sweep to drag heavily against the threshold on one side while leaving a wide, unsealed wedge draft on the other.
The 3-Inch Screw Framing Fix
Standard door installations often rely on short 3/4-inch screws that secure hinges only to the thin finish jamb wood rather than the structural wall framing behind it. You can permanently correct door sag using a simple structural screw swap:
- Open the door wide and support the bottom latch corner with a wooden shim or wedge to relieve weight from the hinges.
- Remove two of the short factory screws from the jamb side of the top hinge leaf (leave the hinge leaf attached to the door slab intact).
- Drive two 3-inch, heavy-duty stainless steel or hardened framing screws into the vacant screw holes.
- As the long screws penetrate through the finished jamb wood and bite deep into the solid rough opening wall studs behind, they draw the sagging top hinge back tight against the framing.
- Remove the support shim and test the door operation. Drawing the top hinge back lifts the latch edge of the door, restoring square alignment within the frame instantly.
Fine-Tuning Frame Alignment with Hinge Shims
If drawing back the top hinge causes the door to rub against the stop molding, or if a gap persists along the middle hinge line, adjust the frame clearance using cardboard or commercial plastic hinge shims. Unscrew the target hinge leaf from the jamb, insert a thin shim into the mortise pocket behind the leaf, and re-fasten the screws. Shimming the bottom hinge pushes the lower latch edge outward, while shimming the middle hinge corrects bowed vertical jambs.
Sealing the Frame-to-Wall Perimeter
A common mistake homeowners make during energy sealing projects is focusing entirely on the moving door slab while overlooking the stationary structural frame surrounding it. Cold outdoor air frequently bypasses the door entirely, entering hollow wall cavities around the exterior brickmold or behind interior decorative trim casings.
Exterior Brickmold Caulking
Walk outside and inspect the exterior perimeter seam where the wooden or composite door trim (brickmold) meets your home’s exterior siding, brick veneer, or stucco. Sunlight, rain, and temperature shifts cause exterior caulk to dry out, crack, and pull away from building surfaces over time.
Scrape away old, brittle sealant using a rigid putty knife or caulk removal tool. Clean away dust, dirt, and mold with a wire brush and wipe the surface dry. Apply a continuous, smooth bead of high-grade, 100% elastomeric polymer or exterior silicone sealant along the entire perimeter joint. Tool the bead smooth using a wet finger or sealant tool to create a watertight, windproof seal capable of handling thermal expansion down to sub-zero temperatures.
Insulating Interior Frame Cavities
If strong drafts persist along interior door trim despite installing fresh jamb weatherstripping, air is likely moving through the uninsulated rough opening gap behind your drywall. To fix this concealed leak:
- Carefully pry off the interior decorative casing trim using a wide putty knife, flat pry bar, and a thin wood block to protect the drywall surface.
- Examine the rough gap between the wooden door jamb box and the wall framing studs. In many homes, this 1/2-inch to 1-inch space is left completely hollow or loosely stuffed with fiberglass insulation, which allows wind to blow right through it.
- Fill this gap completely using high-density minimal-expansion spray foam engineered specifically for door and window frames.
Caution: Never use standard high-expansion spray foams designed for deep wall cavities around door frames. Standard foam expands with sufficient hydraulic force to bow thin wooden door jambs inward, permanently jamming the door slab shut. Once minimal-expansion foam cures fully, trim excess flush with a serrated bread knife and re-attach the decorative interior casing trim with brad nails.
Corner Seal Pads: The Missing Link
Even after installing top-tier kerf weatherstripping and adjusting lower thresholds, homeowners frequently detect a persistent needle-thin cold draft at the extreme bottom corners of the door frame. This happens because flexible bulb weatherstripping cannot fold tightly into a sharp 90-degree angle where the vertical jamb stop meets the horizontal floor sill.
The solution to this universal sealing flaw is installing a set of self-adhesive corner seal pads (often called jamb pads). These inexpensive components consist of a dense, wedge-shaped foam pad covered in water-resistant fabric with a peel-and-stick adhesive backing.
To install corner pads:
- Thoroughly clean the lower 3 inches of the vertical door stop jamb on both sides using isopropyl alcohol.
- Peel the protective backing off the adhesive backing of the corner pad.
- Position the pad with its thickest edge facing toward the bottom floor sill, tucked snugly into the corner directly behind the vertical weatherstripping leg.
- Press the pad firmly against the wood stop for 30 seconds to establish a strong bond.
When the entry door swings shut, the lower corner edge of the door slab compresses tightly against this dense wedge pad, sealing the microscopic corner void where wind, rain, and insects commonly penetrate.
Maintenance and Seasonal Fine-Tuning
Sealing exterior entryways effectively is an ongoing home maintenance task rather than a single permanent repair. Natural solid wood, composite materials, and house framing contract during dry, freezing winter conditions and expand during warm, humid summer months.
Bi-Annual Maintenance Routine
Perform a quick ten-minute entryway check every autumn before turning on central heat, and every spring before turning on air conditioning:
- Clean Gaskets: Wipe down rubber and silicone bulb seals with a damp microfiber cloth to remove dust, grit, and road salt. Avoid applying harsh chemical solvents, petroleum jelly, or WD-40 to synthetic rubber, as hydrocarbon solvents cause natural and synthetic elastomers to soften, swell, and decompose.
- Apply Silicone Conditioning Spray: Spray a small amount of 100% pure silicone lubricant onto a rag and wipe down flexible rubber bulbs. This keeps the material supple, prevents dry rotting, and stops rubber seals from freezing and tearing against painted door surfaces during sub-zero winter weather.
- Inspect Mounting Fasteners: Check that surface-mounted sweep screws, hinge fasteners, and threshold jack screws remain snug. Tighten any fasteners that have vibrated loose from daily door slamming.
Seasonal Threshold Adjustments
If your front door operates stiffly or becomes difficult to latch during humid summer months, lower the threshold jack screws by a quarter-turn counterclockwise to accommodate seasonal door swelling. In winter, when cold air causes materials to contract slightly, raise the threshold cap a quarter-turn clockwise to maintain continuous compression against bottom sweeps. These micro-adjustments preserve maximum thermal envelope performance year-round without placing destructive leverage on door latches, deadbolts, or hinges.
Frequently Asked Questions
How much money can sealing exterior doors actually save on energy bills?
While exact household savings vary based on climate zone, HVAC efficiency, and overall building insulation, stopping entryway air leaks yields substantial utility savings. According to building science data, unsealed exterior doors and drafty floor sills can account for up to 11% of total residential heating and cooling loss. Sealing these air leaks with quality weatherstripping and door sweeps typically yields an ROI within the first heating season, reducing overall heating and cooling energy use while keeping indoor floors significantly warmer.
Can I install weatherstripping on a door frame that is warped?
Yes, but severe warping requires specialized material selection. If the top or bottom corner of a door slab bows outward by 1/4 inch or more, standard thin weatherstripping will not maintain contact across the bowed section. Use surface-mounted aluminum carrier strips fitted with wide silicone bulb gaskets, or install oversized closed-cell foam memory seals that compress deeply on the tight side while expanding sufficiently to seal the wider gap. For severe structural warping, the door slab may require mechanical straightening or full replacement.
Should door sweeps be installed on the inside or outside of the door?
For standard inward-swinging residential entry doors, surface-mounted door sweeps are typically installed along the bottom interior face of the door slab. This keeps the sweep housing protected from severe outdoor weather, driving rain, and UV degradation. However, drip-cap style sweeps or specialized exterior sweeps are installed on the lower exterior face of outward-swinging doors, storm doors, or doors highly exposed to rain to shed water away from the sill.
Why does my door require excessive force to latch after installing new weatherstripping?
This common issue occurs when new gaskets have not yet taken a compression set, or when the gasket thickness exceeds the gap between the door slab and jamb stop. First, verify that the weatherstripping spine is pushed fully into the kerf slot. Next, check whether the metal deadbolt or latch strike plate needs minor repositioning. Adjusting the strike plate 1/16th of an inch outward toward the stop molding allows the door latch to engage smoothly while compressing the new rubber seal effectively.



