
When autumn arrives across much of the United States, homeowners naturally focus on clearing gutters, raking leaves, and packing away patio furniture. Yet one of the most critical structural tasks often gets overlooked until the first heavy downpour reveals a stained ceiling: checking the roof envelope. A successful roof flashing inspection and maintenance routine can mean the difference between a dry attic and thousands of dollars in hidden water damage.
Roof flashings are the thin metal strips—typically galvanized steel, aluminum, or copper—installed at vulnerable joints and intersections where your roof plane meets a vertical wall, a chimney, a skylight, or plumbing vent pipes. Shingles alone are designed to shed water down a continuous slope, but wherever that slope is interrupted, flashing acts as the primary line of defense, directing water away from seams and safely down toward the gutters.
Over time, seasonal temperature swings, wind buffeting, and ice expansion cause these metal components, along with their underlying sealants, to degrade. Nails pop, caulk cracks, and rust takes hold. Performing a methodical inspection and completing minor repairs before winter storms hit is one of the most cost-effective proactive measures a homeowner can take.
Gathering Safety Gear and Essential Tools
Before you even think about climbing a ladder, safety must be your top priority. Working on a pitched roof carries inherent risks, and rushing preparation is the leading cause of residential ladder accidents. Start by assessing the weather: never climb onto a roof during high winds, active rain, frost, or damp morning dew when asphalt shingles become slick.
Equip yourself with the right gear. You will need a sturdy, OSHA-compliant extension ladder that is rated for your weight plus your tools. Wear footwear with soft, high-traction rubber soles—such as dedicated roofing shoes or clean-tread cross-trainers—to grip the granular surface of asphalt shingles. Never wear smooth-soled dress shoes, flip-flops, or worn-out sneakers.
Gather your inspection and maintenance toolkit before ascending:
- A clipboard and waterproof marker or a smartphone for photographing problem areas.
- A stiff-bristled nylon utility brush and a hand broom for clearing valley debris.
- A heavy-duty putty knife and a wire brush for scraping away old, cracked caulk and surface rust.
- A tube of high-grade, exterior-grade polyurethane roof sealant (avoid cheap acrylic latex caulks that fail quickly under UV exposure).
- A caulking gun.
- Replacement step flashing pieces and roofing nails (hot-dipped galvanized or aluminum) if you discover rusted-through metal.
- A clean rag and mineral spirits for wiping down metal surfaces before applying fresh sealant.
How to Safely Access and Walk a Pitched Roof
Setting up your ladder correctly is vital. Extend the top of the ladder at least three feet above the edge of the roofline to provide a secure handhold when transitioning on and off the rungs. Ensure the ladder is set at a proper 75-degree angle—the simple rule of thumb is to place the base one foot away from the wall for every four feet of height up to the roofline.
If possible, have a helper hold the base of the ladder while you climb. Once you reach the roof edge, step onto the surface deliberately, keeping your center of gravity low and your body close to the roof plane. Avoid walking on roofs with a pitch steeper than 6-in-12 (meaning the roof rises six inches for every twelve inches of horizontal run) unless you are using professional roof jacks, toe boards, and a safety harness tied off to a certified anchor.
Move slowly, testing the footing of each shingle. Never step on curled, brittle, or frost-covered shingles, as they can break or slide out from under your boots. Keep your hands free while moving; use a tool belt rather than carrying loose tools or cans of sealant in your hands.
Inspecting Chimney Flashing Systems
The chimney is historically the most vulnerable penetration on any residential roof. Because chimneys are masonry structures that expand and contract at a different rate than wood-framed roof decks, the flashing assembly experiences continuous mechanical stress. A complete inspection requires evaluating both the step flashing and the counter flashing.
Step flashing consists of individual L-shaped metal pieces woven into each course of asphalt shingles along the sides of the chimney. Counter flashing is a separate set of metal pieces embedded into the mortar joints of the chimney and folded down over the top of the step flashing, shielding the upper edge from direct water runoff.
Look closely at the mortar joints holding the counter flashing in place. If the mortar is crumbling, cracked, or missing, water will find its way behind the metal. Inspect the corner joints where the front apron meets the roof slope; this is a common pooling point for pine needles and leaves that trap moisture against the metal. Check for rusted pinholes in older galvanized steel flashings, which indicate the metal has oxidized from the underside outward and must be replaced entirely.
Evaluating Plumbing Vent Boots and Pipe Collars
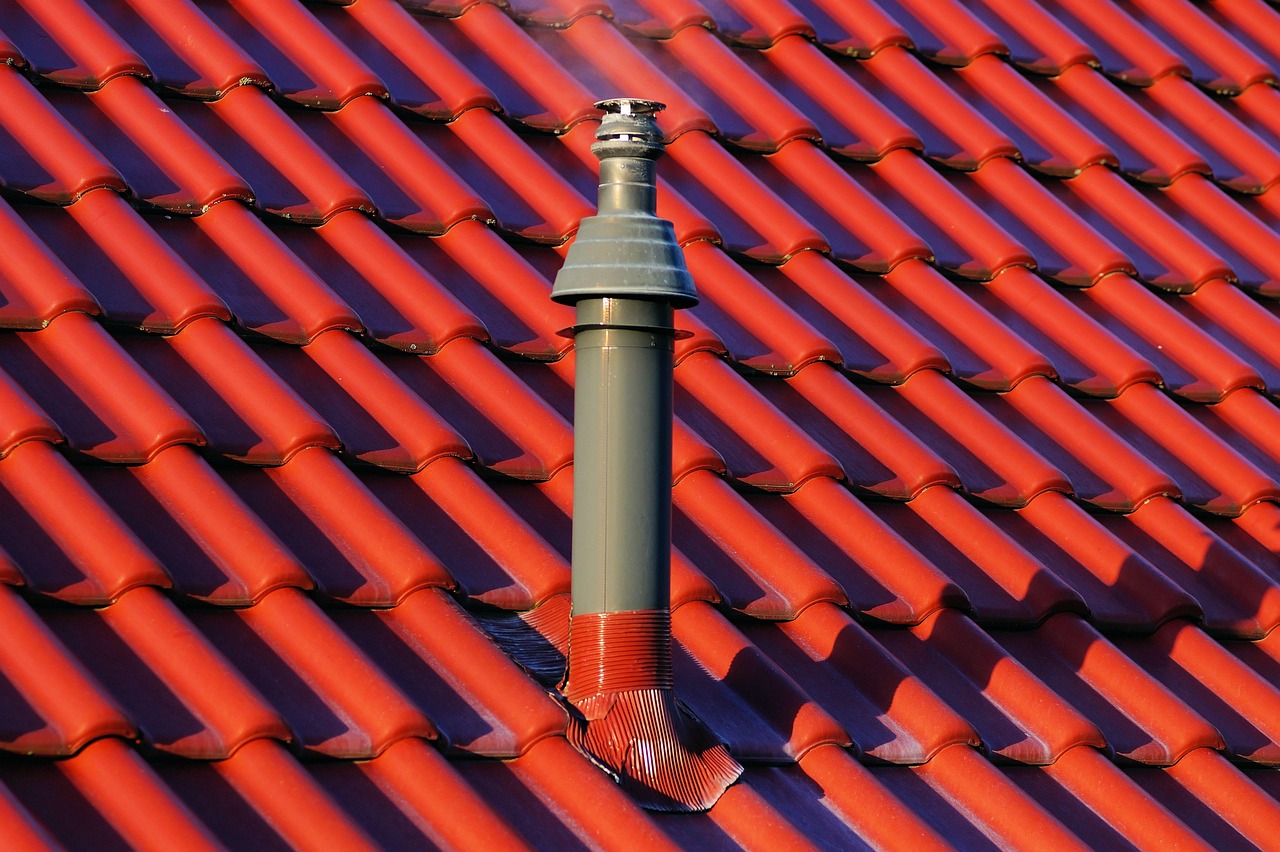
Plumbing vent pipes protruding through your roof rely on specialized flashings commonly referred to as vent boots or pipe collars. Modern homes typically feature metal bases surrounded by an integrated rubber collar that hugs the exterior wall of the PVC or cast-iron vent pipe.
Examine the rubber collar closely. Ultraviolet radiation from the sun is relentless, causing rubber and neoprene to dry out, check, and split over time. A split or degraded rubber collar allows rainwater to run directly down the outside of the pipe into your attic insulation and ceiling drywall.
If the rubber is starting to show fine surface cracking, it is nearing the end of its functional life. In many cases, rather than tearing out the entire metal base (which requires disturbing surrounding shingles), you can slip a specialized rubber retrofit collar or storm collar over the existing pipe and seal it according to the manufacturer’s instructions. If the metal base is bent or the nails are backing out, lift the surrounding shingle tabs carefully, secure the flange with new galvanized roofing nails, and seal the nail heads.
Clearing Valleys and Preventing Ice Dams
Roof valleys—the internal angles where two sloping roof planes meet—handle a massive volume of water during heavy rains and snowmelt. Because valleys sit at a lower incline than the surrounding roof planes, they act as natural collection troughs for windblown leaves, pine needles, twigs, and granules shed from aging asphalt shingles.
When debris accumulates in a valley, it forms a dam that traps standing water. Over time, this trapped moisture can seep beneath the valley flashing or work its way under shingle edges, leading to steady leaks into the framing below. Furthermore, debris-filled valleys accelerate ice dam formation during freezing winter weather by retaining moisture that refreezes into thick blocks of ice.
Clear valleys gently using a soft-bristled broom or a leaf blower operating on a low setting. Always sweep debris downward toward the gutters; never push debris upward under shingle edges, as this can lift the fasteners and compromise the seal. Once the valley is clear, inspect the exposed metal or closed-cut shingle valley for signs of corrosion, popped nails, or loose sealant along the perimeter.
Step-by-Step Guide to Applying Polyurethane Sealant
When minor gaps, separated overlaps, or cracked surface beads are discovered during your roof flashing inspection and maintenance check, applying a high-quality polyurethane sealant provides an effective weather-tight fix. Do not use silicone caulk or cheap asphalt roofing cement for detailed flashing repairs; silicone fails to adhere reliably to dusty metal surfaces, and traditional asphalt tar dries out, cracks, and runs when exposed to summer heat.
Follow these steps to ensure a lasting seal:
- Clean the surface thoroughly: Use a stiff wire brush to remove all traces of old, degraded caulk, rust flakes, and dirt. Wipe the metal and masonry surfaces clean with a rag dampened with mineral spirits to remove oily residues. Allow the area to dry completely before proceeding.
- Cut the nozzle: Slice the tip of your polyurethane sealant tube at a 45-degree angle, making an opening roughly the width of a pencil lead. A smaller bead is easier to control and provides a cleaner, more durable seal than a thick blob.
- Apply steady pressure: Hold the caulking gun at a 45-degree angle to the joint. Pull the gun smoothly along the seam, maintaining a consistent bead that bridges the gap between the metal flashing and the adjacent wall, shingle, or masonry.
- Tool the bead: Using a gloved finger or a dedicated caulking smoothing tool, press the sealant firmly into the joint. This eliminates air pockets and ensures maximum surface contact.
- Check weather windows: Ensure there is no rain in the immediate forecast for at least 24 hours to allow the polyurethane sealant to cure properly without washing out.
Replacing Damaged Step Flashing
While sealing minor gaps works well for surface maintenance, rusted-through metal or missing step flashing pieces demand full replacement. Neglecting a rusted section of step flashing because it seems small is a gamble that rarely pays off once wind-driven rain hits your roof from an angle.
To replace a damaged piece of step flashing safely, you will need to gently pry open the surrounding asphalt shingles. Use a flat pry bar to carefully release the roofing nails holding the shingle courses directly above and beside the damaged flashing piece, taking care not to tear the fragile asphalt tabs.
Slide the old, damaged step flashing piece out from beneath the shingle course. Clean any debris or old sealant from the exposed deck underneath. Slide the new L-shaped piece of step flashing into position, ensuring the vertical leg sits flush against the wall and the horizontal flange rests flat on the roof deck underneath the upper shingle.
Secure the new flashing piece through its upper corner with a single galvanized roofing nail, keeping the nail as high as possible so it won’t be exposed to direct water flow. Re-secure the surrounding shingles with a dab of roofing adhesive under each tab and new roofing nails where necessary. Ensure the overlapping shingle course completely covers the upper edge of the new flashing.
Common DIY Maintenance Mistakes to Avoid
Homeowners eager to solve a roof leak often fall into traps that cause more harm than good. Recognizing these common missteps will save you from compounding your roofing troubles:
- Over-relying on roofing tar: Slathering thick layers of black asphalt mastic over entire flashing assemblies is a temporary band-aid at best. Tar traps moisture underneath, accelerates metal corrosion, and bakes into a brittle crust within a couple of seasons. Use sealants sparingly and purposefully.
- Sealing weep holes: Some masonry chimney flashings feature weepholes designed to allow trapped moisture to escape from behind the brickwork. Never block these weep holes with caulk or sealant.
- Neglecting safety precautions: Skipping ladder stabilizers, ignoring footwear traction, or working alone on a high pitch are risks that outweigh any money saved on a service call. If a roof feels unsafe to walk, stay on the ground and hire a professional.
- mrow>Ignoring attic inspections: Always check your attic space with a flashlight after a heavy rain. Spotting water stains, damp insulation, or mold growth on the underside of the roof deck confirms a flashing failure before it rots structural framing.
When to Call a Professional Roofing Contractor
While DIY preventative maintenance is ideal for clearing debris, sealing minor perimeter gaps, and replacing accessible step flashing, certain conditions require professional intervention. Knowing your limits protects both your physical safety and the structural integrity of your home.
Call a licensed, insured roofing contractor if you encounter any of the following scenarios:
- The roof pitch is steeper than 6-in-12, or the roof height exceeds two stories, making safe access impossible without commercial scaffolding.
- You find extensive structural wood rot around the chimney cricket or roof deck, which requires carpentry repair in addition to flashing replacement.
- The flashing system is integrated into complex architectural features such as multiple intersecting dormers, slate tile, or standing-seam metal roofs that require specialized trade skills.
- Water leaks persist despite multiple attempts to seal suspected flashings, indicating a more complex underlying flaw in the roof’s primary drainage design.
By investing a few hours in a methodical roof flashing inspection and maintenance check each autumn, you fortify your home against the worst that winter weather can deliver. Staying proactive ensures your roof system sheds water efficiently, protects your framing, and preserves the value of your property for years to come.



