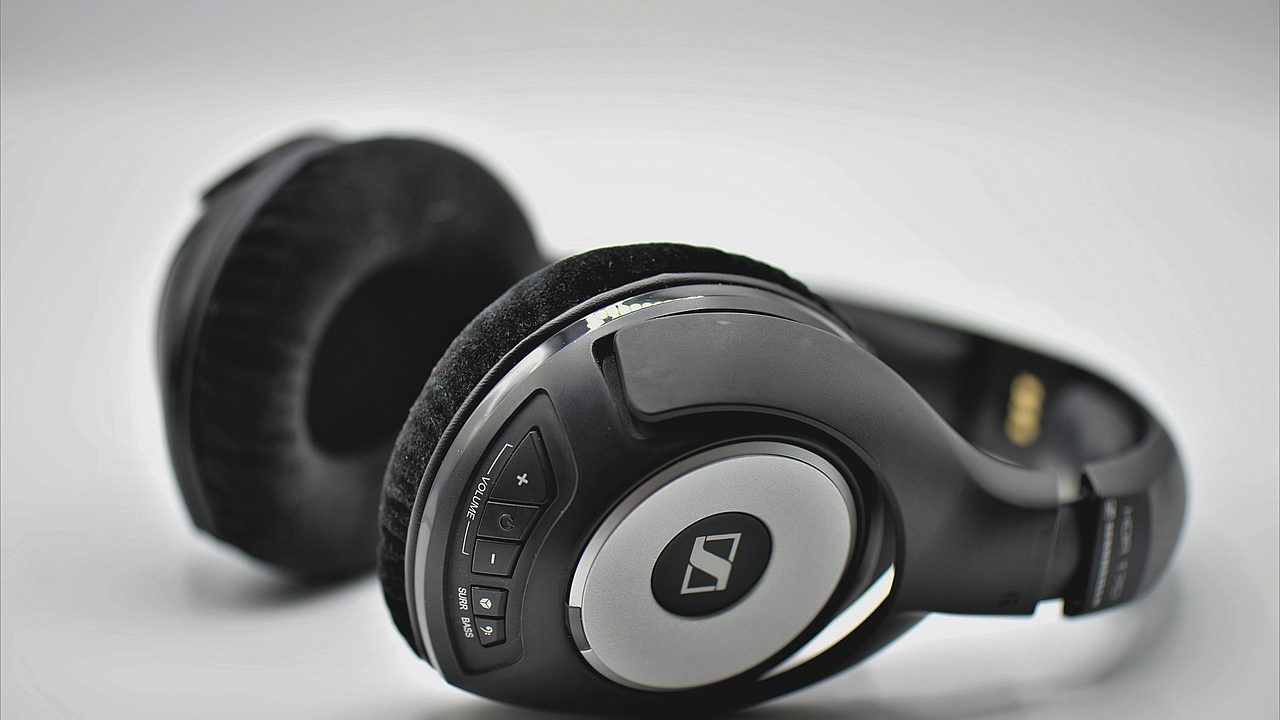
When you invest in a quality pair of studio monitors or over-ear headphones for your home workstation, the last place they belong is on the edge of your primary work surface. Cluttered desks invite accidental spills, cat nudges, and sudden drops when cables snag on rolling chair bases. Implementing a dedicated under desk headphone hanger setup completely transforms how you handle daily audio peripherals, shifting your gear from a high-risk desktop obstacle to a protected, ergonomic stowage position.
Achieving a reliable under-desk audio ecosystem requires more than simply sticking a plastic hook under your tabletop and calling it a day. You have to account for mounting physics, material strengths, desk thickness, chair arm clearance, and the dynamic movement of motorized sit-stand frames. Furthermore, pairing your headphone hook with an intelligent cable loop strategy ensures your headphone wires or USB interfaces never become a tripping hazard or a point of mechanical failure.
The Anatomy of Workstation Audio Hazards
Home offices and developer workspaces face unique physical challenges. Unlike commercial corporate environments with fixed furniture, home setups frequently feature multi-use spaces, hard flooring where chair casters roll freely, and dense tangles of power, display, and audio cables running directly to the floor. Understanding these hazards highlights why an under-desk audio strategy is essential for protecting sensitive hardware.
The primary threats to desktop audio gear fall into three distinct categories: dynamic physical impacts, continuous mechanical strain, and environmental wear. Dynamic impacts happen when a headphone cable drapes across the floor and gets caught in the caster wheels of an office chair. When you roll backward, the sudden tension yanks the cable, either ripping the headphone jack out of its port, cracking the internal solder joints of the ear cup, or pulling the entire headphone assembly off the desk and onto a hard floor.
Continuous mechanical strain occurs even when gear is stationary. If your headphone cable hangs vertically with too much tension, the dead weight of the dangling copper wire slowly stresses the strain relief collar near the 3.5mm or 6.35mm plug. Over months of use, this constant pulling degrades internal conductors, leading to intermittent audio dropouts in one channel. Finally, environmental wear includes dust accumulation and accidental liquid spills from coffee mugs placed too close to coiled headphone cables resting on the desktop surface.
Relocating your headphones underneath the desk surface solves these problems by altering the physics of your peripheral storage. By lifting the gear off the work surface and routing cables vertically through dedicated anchor loops, you remove them from the line of fire of foot traffic, rolling chairs, and airborne liquids.
Evaluating Mounting Hardware: Clamp-On Versus Adhesive Mounts
The foundation of any under-desk audio layout is the mounting mechanism. Manufacturers generally rely on two primary methods to attach hangers to furniture: mechanical C-clamps and pressure-sensitive adhesive pads. Each approach has strict structural limits, advantages, and ideal use cases depending on your desk material.
Mechanical clamp-on hangers operate much like a miniature C-clamp or vice. They slide over the edge of your desk, and you tighten a thumbscrew or hex bolt against the underside of the tabletop. This creates a secure, friction-locked grip that can often support up to 10 or 15 pounds of combined weight. Clamp-on models are ideal for solid wood, thick plywood, and heavy-duty butcher block desks. However, they require an overhanging lip; if you use a minimalist desk with a flush metal frame or a completely flush edge, a standard clamp will not find a secure purchase.
Adhesive mounts, conversely, use high-bond foam tape—typically industrial-grade acrylic adhesives like VHB (Very High Bond) tape—to stick directly to the underside of a desk. These are mandatory if your desk has no overhanging lip, if you want to mount the hanger deep toward the center of the desk away from the edge, or if your desk surface is made of glass or metal where clamping is impossible. The primary trade-off with adhesive is weight capacity and longevity. While a properly cured VHB pad can hold several pounds, it is susceptible to shear forces if you repeatedly slam headphones onto the hook or yank cables at an angle.
When choosing between the two, inspect your desk’s underside. Check for modesty panels, cable trays, or steel reinforcement bars that might block a clamp’s travel path. If your desk accommodates a clamp, it is almost always the superior structural choice for long-term durability and repositioning flexibility.
Weight Capacity and Material Mechanics
Not all headphones are created equal. Lightweight plastic gaming headsets might weigh less than 250 grams, whereas professional planar magnetic studio headphones with massive aluminum chassis, braided cables, and leather headbands can easily exceed 500 to 600 grams. When you factor in the extra weight of coiled cables or desktop DAC/amp dongles occasionally draped over the same hook, your hanger must handle substantial downward force.
Material selection dictates how your hanger behaves under load. Cheap injection-molded ABS plastic hangers often flex under heavy loads, creating a springy, insecure feel. Over time, constant downward pressure can cause cheap plastic to fatigue and snap at the 90-degree bend where the cradle meets the vertical stem. Anodized aluminum or powder-coated steel hangers provide absolute rigidity, ensuring that even the heaviest studio headphones rest securely without bending or sagging.
Furthermore, examine the geometry of the cradle itself. A flat, narrow hook creates a sharp pressure point against the center of your headphone’s headband cushion, compressing the foam permanently over time. Look for hangers that feature a wide, contoured saddle matching the natural curve of a human head or a padded silicone surface that distributes the weight evenly across a broader area of the headband padding.

Cable Management Loop Strategies
A headphone hanger alone is only half the battle. If you hang your headphones up but leave a ten-foot coil of thick cable pooled on the floor or dangling in a loose loop, you have merely relocated the hazard. A robust cable management loop strategy ensures your headphone wire travels cleanly from your audio interface or PC tower to the hanger without excess slack.
Begin by measuring the exact distance required when your head is in a normal working posture, plus an extra six to twelve inches of safety slack to allow you to turn your head or lean back in your chair without pulling the cable taut. Once you determine this ideal working length, gather the remaining cable length into a neat, uniform coil or S-bend.
Secure this excess length using dedicated cable loops, Velcro cinches, or under-desk J-channels mounted near the back edge of the desk. Never wrap long headphone cables tightly around the headphones themselves for storage while on the hook; this puts continuous torsional stress on the internal wire strands and the solder joints inside the ear cups. Instead, let the cable hang in a relaxed, gentle loop from a secondary anchor point beneath the desk, leading smoothly up to the main headphone cradle.
Step-by-Step Installation Guide
Executing a clean, professional installation requires patience and proper preparation. Rushing through the placement phase often leads to awkward ergonomics or failing adhesives. Follow this methodical sequence to set up your hardware correctly on the first try.
- Audit your seating position and dominant hand: Sit at your desk in your usual working posture. Determine whether you naturally reach for items with your left or right hand. Place the headphone hanger on the corresponding side to minimize unnecessary arm movement and shoulder rotation.
- Check clearance zones: Verify that the proposed mounting spot clears your chair’s armrests when pushed all the way under the desk. Ensure your knees or thighs will not strike the bottom of the hanger when shifting your position.
- Prepare the surface: If using a clamp-on mount, wipe down the desk edge to remove dust and oils. If using an adhesive mount, clean the underside of the desk thoroughly with isopropyl alcohol and let it dry completely for at least five minutes to ensure maximum chemical bond strength.
- Mount the hardware: For clamps, hand-tighten the screw until snug, then give it a final quarter-turn. Do not overtighten, as excessive torque can crush particle board or crack wood veneers. For adhesive mounts, peel the backing liner, press the pad firmly against the desk with continuous, heavy pressure for 30 seconds, and—crucially—wait a full 24 hours before hanging any heavy gear to let the adhesive cure to maximum strength.
- Route the cables: Install your secondary cable loops or clips between your audio source and the hanger. Test the cable travel path by pulling gently on the cord to ensure it glides freely without snagging on desk frames or power strips.
Ergonomic Placement and Reach Mechanics
Ergonomics is not just about chair lumbar support and monitor height; it encompasses the micro-movements you make dozens of times a day when starting and ending work sessions. Poor placement of desk accessories forces awkward, repetitive reaches that strain your shoulders, rotator cuffs, and upper traps.
If you place your headphone hanger too far back under the desk, you are forced to blind-reach, twisting your torso and elbow outward to find the cradle. Over the course of a year, this repetitive minor strain can contribute to shoulder discomfort. The ideal mounting position is typically just behind or flush with the side edge of the desktop, allowing you to reach down and forward in one natural, fluid motion.
Consider your cable entry point as well. If your audio interface sits on the left side of your desk, but your headphone hook is mounted on the far right, your cable will have to stretch across your lap or snake directly across your keyboard tray. Always align your storage hardware as close as possible to the physical output port of your computer, DAC, or audio interface to minimize chaotic cable routing across the workspace.
Preventing Strain Relief Failures on Headphone Plugs
The physical junction where a cable meets a plug is the most vulnerable point in any personal audio setup. When headphones hang incorrectly, gravity constantly pulls the cable downward at an angle, stressing this delicate interface.
To protect your headphone cables, ensure that the cable’s path from the hanger to the desk surface includes a strain-relief loop or a gentle curve rather than a sharp 90-degree bend. If your headphones feature a detachable cable with a locking mechanism or a standard 3.5mm jack, consider unplugging the cable entirely during extended periods away from the desk if your work style permits, or ensure the cable rests in a dedicated support channel that bears the weight of the wire rather than letting the plug bear it.
Furthermore, be mindful of how you lift your headphones off the hanger. Always lift the headband straight up off the cradle rather than pulling the headphones sideways by the ear cup or yanking them forward by the cable. Developing this simple muscle memory preserves both the structural integrity of the hanger and the electrical integrity of your audio cables.
Integrating with Existing Desk Risers and Motorized Standing Desks
If you use a motorized standing desk or an adjustable desktop converter, your under-desk hardware faces an additional variable: changing vertical dimensions. When a desk rises from a sitting height of 28 inches to a standing height of 45 inches, the distance between your computer tower (resting on the floor or a stationary PC stand) and your desktop changes significantly.
Failing to account for this change in vertical travel is the most common cause of snapped cables or yanked USB hubs in standing desk environments. If your cables are cut to the exact length required for a seated position, raising the desk to standing height will pull the cables taut like guitar strings. When you reach the top of the travel range, the tension will either rip the plug out of your audio interface, damage the port on your computer, or pull your headphones crashing down from their hanger.
To prevent this, calculate your cable length requirements based on your standing height position, not your sitting position. Gather the resulting excess slack into a flexible, organized loop system secured directly to the moving underside of the desk. Because the cable loops move in tandem with the tabletop, the relative distance between your headphone hanger, your cable management loops, and your audio interface remains constant throughout the entire lifting cycle. Always test the full range of motion of your desk slowly on the first run, watching every cable path to verify that nothing binds, pulls, or pinches.
Long-Term Maintenance and Troubleshooting
Once your under-desk audio setup is complete, it requires very little active maintenance, but periodic checks prevent minor issues from turning into hardware failures. Every few months, take a moment to inspect your workstation hardware.
For clamp-on mounts, check the thumbscrew tension. Vibrations from typing, bumping the desk, or raising and lowering a standing desk can cause metal screws to back out slightly over time. A quick finger-tightening restores total rigidity. For adhesive mounts, check the edges of the VHB tape pad. If you notice any lifting, gaping, or sliding when you place your headphones on the hook, remove the mount immediately, clean off the old adhesive residue with rubbing alcohol, and apply a fresh square of industrial mounting tape rather than risking a sudden failure that could drop your gear onto a hard floor.
Inspect your headphone cables for signs of jacket twisting, micro-kinks, or fraying near the strain relief collars. If a cable begins to twist persistently, unhook the headphones and let them dangle freely for a few minutes to unwind internal rotational tension. By maintaining these small habits, your under-desk audio ecosystem will protect your investment for years to come.
Conclusion
Optimizing your workstation with an under-desk headphone hanger and a structured cable loop system is a straightforward weekend project that yields immediate daily dividends. By removing physical hazards from the floor, eliminating desk clutter, and respecting the mechanical limits of your mounting hardware and cables, you create a safer, more professional, and more ergonomic environment for your audio gear. Take time to audit your desk layout, choose hardware that matches your desk’s specific construction, and test your cable paths carefully—especially if you work at a sit-stand desk—to enjoy a seamless, protected audio workspace.