When your home begins exhibiting sudden drop-offs in water pressure, mysterious discolored tap water, or a sequence of unexplained pinhole leaks, you are usually looking at a systematic failure of your fresh water supply network. For millions of single-family residences across the United States built between the mid-20th century and the late 1990s, the culprit is frequently aging galvanized steel or defective polybutylene piping. Resolving these deep structural issues requires a full supply-line replacement. However, evaluating a whole house repipe cost PEX vs copper US estimate can leave homeowners struggling to compare radically different contractor bids.
A comprehensive plumbing replacement involves far more than simply pulling old pipes out of the basement and sliding new ones behind your bathroom vanities. The total financial commitment depends heavily on raw material market prices, structural accessibility, local municipal permitting fees, and the often-overlooked expense of drywall repair and repainting. Understanding how licensed plumbing contractors structure their proposals enables you to evaluate competing bids accurately, avoid unexpected change orders, and select the material best suited for your climate, water chemistry, and long-term financial budget.
Understanding the Signals: When Does a Home Need a Full Repipe?
Homeowners often attempt to delay a full repiping project by repairing individual leaks as they surface. While a single spot repair makes practical economic sense for isolated mechanical damage, performing repeated localized fixes on an aging pipe network quickly becomes a continuous financial drain. Recognizing when your residential plumbing system has reached the absolute end of its operational life is the critical first step in planning a structured replacement strategy before a catastrophic flood occurs.
Galvanized Steel Corrosion and Diameter Restriction
Galvanized steel pipes, standard in American homes constructed prior to the 1960s, are dipped in a protective zinc coating to prevent oxidation. Over decades of exposure to moving water, this protective layer gradually dissolves, exposing the raw iron structural core to internal rust. As iron rust accumulates inside the pipe walls, it creates a rough interior surface that catches mineral deposits and forms thick internal flaking known as tuberculation. This buildup severely restricts water volume, leading to low water pressure when multiple fixtures are operated simultaneously. Additionally, internal flaking releases iron oxide particles directly into your drinking water supply, producing reddish, yellowish, or metallic-tasting tap water whenever faucets are opened after a period of disuse.
Polybutylene Pipe Breakdown and Micro-Fracturing
Installed extensively across US housing developments from the late 1970s through the mid-1990s, polybutylene (frequently identified by its signature grey plastic exterior and flexible profile) was originally celebrated by builders as a fast, cost-effective alternative to rigid copper. However, reactive oxidants present in municipal water treatment plants—primarily dissolved chlorine and chloramines—chemically react with the polybutylene polymer chains. This chemical interaction causes the interior wall matrix to micro-fracture and become extremely brittle. Because these micro-fractures occur inside the pipe, the line presents no exterior warning signs before a complete structural failure occurs. A polybutylene replacement strategy is rarely optional; major home insurance underwriters across many US regions actively refuse coverage or demand prohibitive deductibles for properties with active polybutylene water lines.
Copper Pinhole Leaks and Aggressive Water Chemistry
While copper is traditionally viewed as a premium, long-lasting material, specific environmental and chemical conditions cause premature pitting corrosion. Low pH acidic water, high concentrations of dissolved solids, aggressive municipal water treatment additives, or excessive water velocity through undersized lines cause localized interior erosion. When chemical erosion penetrates the pipe wall, it creates a microscopic pinhole leak. If your home experiences two or more pinhole leaks within a single 12-month window, the remaining copper tubing in your walls is almost certainly thinned across its entire length, rendering further localized repairs a temporary and high-risk gamble.
PEX vs. Copper: Material Characteristics and Cost Factors
Choosing between Cross-linked Polyethylene (PEX) and rigid copper is the single biggest decision shaping both your overall project budget and the physical construction methodology inside your home. Both piping systems fully comply with major American model building codes (such as the International Plumbing Code and Uniform Plumbing Code), but their physical performance characteristics and installation labor demands differ fundamentally.
PEX (Cross-Linked Polyethylene) Overview
PEX is a high-density, flexible synthetic polymer that has transformed residential plumbing across North America over the past two decades. Available in three primary manufacturing variants (PEX-A, PEX-B, and PEX-C), each type offers unique material characteristics:
- PEX-A (Peroxide Method): Manufactured using a hot-crosslinking method that produces the highest level of cross-linking density. PEX-A exhibits maximum flexibility, superior cold-temperature ductility, and physical thermal shape memory. If kinked during installation, PEX-A can be safely restored using a controlled heat gun application.
- PEX-B (Silane Method): Cross-linked through a moisture-curing process after extrusion. PEX-B is slightly stiffer than PEX-A but offers higher tensile strength and exceptional resistance to chlorine oxidation in harsh municipal water environments.
- PEX-C (Electron Beam Method): Cross-linked using cold irradiation. It represents a balanced middle ground in stiffness and flexibility, though it is less commonly specified in major residential repiping contracts.
Key practical benefits of PEX include its ability to bend around structural framing without requiring constant right-angle fittings, its physical elasticity (which allows the pipe to expand slightly under freeze conditions rather than bursting immediately like metal), and its complete immunity to metallic corrosion and scale buildup. However, PEX cannot be exposed to direct sunlight during storage or installation due to UV degradation, and it must maintain specific distance clearances from high-heat sources such as gas appliance flues and direct hot water heater tank outlets.
Copper Tubing Overview
Rigid copper tubing has served as the baseline standard for high-durability water distribution in the United States for nearly a century. Residential systems utilize two main wall-thickness grades:
- Type M (Thin-Wall Copper): Marked with red lettering, Type M is the minimum code-approved standard for interior domestic supply lines. It is lower cost than Type L but has thinner wall margins against long-term aggressive water pitting.
- Type L (Medium-Wall Copper): Marked with blue lettering, Type L features roughly 30% to 50% thicker walls than Type M. It is widely specified in premium residential construction, commercial applications, and regions with known aggressive soil or water conditions.
Copper delivers exceptional structural rigidity, complete resistance to rodent chew-through, zero chemical leaching into potable water streams under neutral pH conditions, and inherent biostatic properties that actively inhibit bacterial growth on interior pipe surfaces. Furthermore, discarded scrap copper retrieved during a repipe retains solid commodity recycling value, which can help offset raw material disposal expenses. On the downside, raw copper material prices fluctuate significantly based on global metal markets, and the physical installation demands precise, labor-intensive soldering or specialized press-fit technology at every single directional turn.
Comparing Costs: Material, Labor, and Project Economics
When analyzing a whole house repipe cost PEX vs copper US balance, the final total on your proposal reflects both raw material pricing and the substantial variance in billable trade hours required to complete the installation.
From a pure material standpoint, PEX tubing routinely costs a fraction of the price per linear foot compared to copper tubing. However, the most profound economic savings associated with PEX stem from installation efficiency. A standard rigid copper installation requires a technician to cut each section to precise length, deburr the inner edge, clean the joint surfaces, apply flux paste, heat the copper fitting with a open-flame propane torch, and sweat solder directly into the joint—or alternatively, use expensive mechanical press tools and specialized press fittings. A typical two-story, three-bathroom home may require hundreds of individual soldered copper connections, each representing dedicated billable minutes and potential joint failure points if executed poorly.
Conversely, flexible PEX is pulled continuously from a central manifold (a home-run distribution system) or off a main branch line directly to individual fixture stop valves. Plumbers snake the tubing through hole-punched wall studs much like electrical wiring. Directional connections are secured in seconds using cold-expansion rings or mechanical crimp rings. This streamlined installation process reduces core plumbing labor hours by roughly 30% to 50% compared to a traditional copper layout. Consequently, electing to use PEX drastically lowers both the raw materials line item and the total billable contractor hours necessary to complete the rough-in plumbing inspection.

Anatomy of a Plumbing Repipe Estimate Breakdown
A transparent plumbing repipe estimate breakdown should clearly itemize every phase of the labor and material scope rather than supplying a vague, single-page lump-sum estimate. When auditing candidate proposals, ensure the following core operational expenses are fully detailed:
1. Direct Plumbing Labor and Existing Pipe Handling
This line item covers the physical labor of shutting off the main municipal meter, draining existing interior lines, making access incisions into wall framing, routing new hot and cold supply trunk lines, and installing new brass shut-off valves (angle stops) and flexible stainless steel supply lines under every sink, toilet, ice maker, and washing machine. The proposal must clearly define whether existing abandoned piping will be left securely inside wall cavities or completely removed; while leaving dead pipes in place lowers labor fees, removing old heavy steel or contaminated lead lines ensures a cleaner wall cavity for future upgrades.
2. Material Specifications and Fitting Hardware
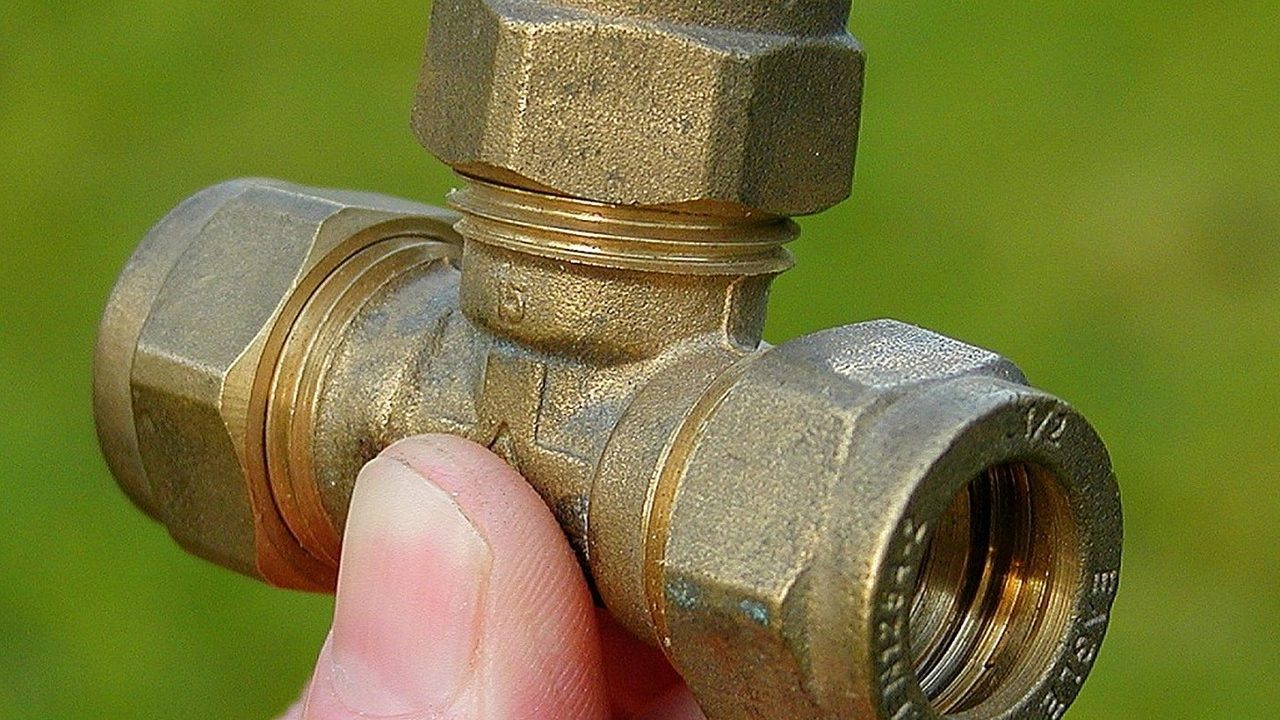
Verify that the quote explicitly names the exact grade and brand of material being quoted. If PEX is selected, the proposal should clarify whether PEX-A or PEX-B is being supplied, along with the precise fitting type (machined brass vs. high-performance engineered polymer/polysulfone fittings). If copper is quoted, the contractor must detail whether Type M or Type L copper is being installed, and whether joints will be traditionally sweat-soldered or joined using press-fit mechanical sleeves.
3. Main Service Line and Pressure Reducing Valve (PRV)
Replacing interior supply lines while leaving an old, 1/2-inch corroded iron underground water service line intact introduces an immediate performance bottleneck. Inspect your scope of work to confirm if the plumber includes running a new 3/4-inch or 1-inch main service water line from the municipal water meter (or well pressure tank) straight into the main distribution manifold of the home. Additionally, check for the inclusion of a new high-quality Pressure Reducing Valve (PRV) and an main ball-valve emergency shutoff.
4. Permitting, Administrative Fees, and Inspections
Repiping a residential dwelling requires a official plumbing permit issued by your city or county building department. The proposal must explicitly state that the licensed master plumber assumes full administrative responsibility for pulling all necessary permits, paying local municipal filing fees, and managing the formal municipal building inspector through both the rough-in pressure check and the final sign-off.
The Hidden Overhead: Drywall Repair and Paint Restoration
One of the single largest sources of unexpected conflict between property owners and plumbing firms involves interior surface restoration. Most specialized plumbing companies focus exclusively on pipe mechanics, valving, and water pressure dynamics; they do not maintain dedicated, high-end finishing trade crews on their payroll. Consequently, a standard plumbing repipe estimate usually covers making necessary drywall and ceiling access openings, but deliberately excludes patching, floating drywall joint compound, and repainting those cuts.
Understanding the potential drywall repair cost after repipe operations is essential to building an accurate overall project budget. To route rigid copper or even flexible PEX through a multi-story home, plumbers must cut strategic access windows into drywall, plaster, beadboard, or tile directly behind sinks, behind shower valves, inside closet access panels, and across ceiling joist runs.
A thorough repipe on a standard 2,000-square-foot home can create anywhere from 12 to upwards of 35 individual wall access cuts. Remediating these cuts requires installing backing wood studs, installing new drywall patches, applying multiple feather-coats of joint compound, sanding surfaces smooth, matching pre-existing wall textures (such as knock-down, orange peel, or smooth broom finishes), and applying matching primer and interior paint across the full wall plane to avoid patchy sheen inconsistencies.
| Work Element | Standard Plumbing Contract Scope | Separate Restoration Specialist Scope |
|---|---|---|
| Drywall Access Cuts | Included | Not Applicable |
| Rough Pipe Installation & Strapping | Included | Not Applicable |
| Hydrostatic System Pressure Testing | Included | Not Applicable |
| Drywall Backing Wood & Patching | Rarely Included (Check Scope) | Included |
| Joint Compound Taping, Floating & Sanding | Excluded | Included |
| Wall Texture Matching & Full-Wall Paint Coverage | Excluded | Included |
To avoid jarring out-of-pocket financial surprises after the plumbing crew packs up their tools, always ask your contractor upfront if wall restoration is handled by an in-house crew or if you will need to independently hire a licensed drywall and painting contractor once the pressure inspection passes.
Polybutylene and Galvanized Replacements: Key Considerations
Replacing specific legacy plumbing materials requires specialized planning steps due to unique structural hazards, insurance liability issues, and historical building practices associated with those installations.
Polybutylene Replacement Strategies
Homes constructed during the polybutylene era frequently used plastic crimp rings or acetal plastic insert fittings that degrade even faster than the grey tubing itself. When replacing polybutylene, it is critical to perform a complete system purge, ensuring that concealed branch lines running to outdoor hose bibbs, water heaters, and wet bars are entirely eliminated. Many home insurance companies require formal signed certification from a licensed plumbing contractor confirming that 100% of accessible polybutylene material has been physically detached and decommissioned before updating active property coverage policies.
Galvanized Pipe Demolition Hazards
Galvanized steel pipe runs are extraordinarily heavy and rigidly anchored to framing studs with heavy-duty steel iron straps. Severing old galvanized pipe during demolition can create substantial mechanical vibration across wall frames, which may crack adjacent lath-and-plaster surfaces or disturb aging electrical wiring runs inside older homes. Furthermore, galvanized threads where pipes join fittings are common failure points; removing them often requires double-pipe-wrench torque methods that necessitate larger wall access openings compared to modern repipe scenarios.
Step-by-Step Timeline of a Whole-House Repipe
Understanding the standard sequence of construction helps homeowners manage daily routines, family water usage, and access expectations while their property undergoes major mechanical upgrades. While exact project length varies based on home square footage and architectural complexity, a standard residential repipe generally follows this operational timeline:
Phase 1: Preparation and Site Protection (Day 1 Morning)
The plumbing crew arrives to lay down heavy drop cloths, plastic floor runners, and dust barriers across high-traffic hallways, carpeted zones, and work zones. The crew locates the main municipal water shut-off valve, isolates the home supply, and drains the standing water out of the lowest fixture points in the home.
Phase 2: Access Cutting and Demolition (Day 1 Midday)
Technicians measure and cut strategic square access openings into drywall framing behind vanities, behind toilets, inside utility closets, and along basement or crawlspace access paths. Old plumbing lines are cut into manageable lengths and unstrapped from joists.
Phase 3: Structural Drilling and Pipe Routing (Days 1–2)
The team drills cleanly centered passage holes through floor plates and wall studs in compliance with structural notch-and-hole building codes. New main trunk supply lines and flexible or rigid branch lines are routed through the frame toward every designated plumbing fixture.
Phase 4: Valving, Fixture Connections, and Manifold Setup (Days 2–3)
Plumbers install brand-new quarter-turn ball-type angle stop valves under every sink, toilet, and appliance point. Main supply manifolds, pressure-reducing valves, and boiler drain bibbs are installed and secured with heavy-duty pipe straps to prevent mechanical pipe vibration (water hammer).
Phase 5: Hydrostatic Pressure Testing and Inspection (Day 3)
The newly installed piping system is capped, filled with water or pressurized air, and pressurized well above standard operating pressure to verify absolute air-tight and water-tight integrity. A municipal building inspector visits the job site to review stud penetration safeguards, fire-stopping seals, and pressure gauge stability, officially approving the mechanical installation.
Phase 6: Surface Wall Restoration and Paint (Days 4–5)
Once the official plumbing inspection sign-off is documented, the drywall repair team (or subcontractor) installs wood backing, fits drywall patches into access cutouts, tapes joints, applies feathering coats of joint compound, sands surfaces smooth, applies matching spray texture, and executes final prime and paint coats across affected rooms.
Vetting Contractors and Evaluating Bids: Essential Questions
A accurate evaluation of a whole house repipe cost PEX vs copper US proposal requires looking well past the total dollar figure listed at the bottom of the page. To ensure you are hiring a qualified, fully insured master plumber who will execute the job safely, ask candidate contractors the following direct questions during the quote phase:
- Are you a fully licensed Master Plumber carrying active General Liability and Workers’ Compensation insurance? Request physical insurance certificates with your address listed as the certificate holder before work commences.
- Will this job be completed entirely by your full-time W-2 employees, or do you subcontract the core plumbing work to third-party crews? In-house teams ensure consistent workmanship standards and direct operational accountability.
- Does your quote explicitly include pulling local building permits and hosting municipal inspectors? Never hire a contractor who asks you, as the property owner, to pull trade permits, as this transfers regulatory liability directly onto your shoulders.
- What specific brand, type, and fitting system will be installed in my home? Ensure the bid details precise specifics, such as