
When autumn temperatures begin to drop, most homeowners shift their focus indoors, tackling gutter cleaning and furnace checks. However, neglecting the driveway right before freezing weather arrives can lead to expensive springtime repairs. Water is asphalt’s worst enemy. When autumn rains seep into unsealed cracks and overnight temperatures plunge, that trapped moisture freezes, expands, and shatters the surrounding stone aggregate. This process, known as a freeze-thaw cycle, tears apart your pavement from the inside out, turning minor fissures into gaping potholes over a single winter.
Mastering asphalt driveway crack sealing is one of the most effective DIY preventative maintenance tasks you can tackle on a crisp weekend. By sealing cracks before the ground freezes, you block water infiltration, protect the vulnerable sub-base, and drastically extend the lifespan of your pavement. This guide walks you through the entire process, from diagnosing your driveway’s damage and choosing the right materials to proper surface preparation and application techniques that stand up to harsh winter weather.
Understanding the Threat: Why Winter Freezing Destroys Unsealed Asphalt
To appreciate why timing matters so much for driveway maintenance, it helps to understand what happens beneath the surface. An asphalt driveway is not a solid slab of rock; it is a flexible, engineered mixture of stone aggregates, sand, and liquid asphalt binder resting on a compacted aggregate sub-base. This flexibility is a feature, allowing the driveway to bend slightly under the weight of vehicles and shift with natural soil expansion.
Over time, ultraviolet (UV) radiation from the sun oxidizes the top layer of asphalt, stripping away its rich black color and making the binder brittle. Once the binder loses its elasticity, microscopic surface cracks form. These cracks widen under traffic loads and daily temperature fluctuations. When autumn rains fall, water fills these cavities. If you leave these cracks open as winter approaches, the trapped water freezes. Water expands by roughly nine percent when it turns to ice. This expansion exerts immense hydraulic pressure against the sidewalls of the crack. Repeated night-after-night freezing shatters the bond between the stone aggregate and the asphalt binder. By spring, minor cracks merge into extensive network cracking, commonly called alligator cracking, which requires a complete professional repaving rather than a simple DIY fix.
Furthermore, water that reaches the sub-base softens the compacted stone and soil beneath your pavement. When heavy vehicles drive over a saturated sub-base, the ground gives way, leading to severe depression, rutting, and sub-base heaving. This is why addressing minor surface flaws in the fall is infinitely cheaper and less labor-intensive than rebuilding a failed driveway section in the spring.
Timing Your Project: Weather Windows and Temperature Requirements
You cannot simply seal driveway cracks on any mild day of the year. Environmental conditions dictate whether your crack filler will cure properly and bond to the asphalt. Rushing the job in sub-optimal weather guarantees premature failure, as the product may wash out with the next heavy rain or peel up under snow plow blades.
First, check the forecast. You need at least 24 to 48 hours of completely dry weather before and after your application. Rain falling on freshly applied liquid crack filler will wash it away or dilute it, ruining the cure. Second, pay close attention to ambient and surface temperatures. Most commercial crack fillers require both air and pavement temperatures to remain consistently above 50 degrees Fahrenheit for at least 24 hours. If the ground is too cold, the emulsion cannot cure, and it will fail to form a resilient bond with the asphalt walls.
Aim for mid-to-late autumn when daytime temperatures are moderate and the humidity is relatively low. Avoid applying sealants in direct, blistering midday sun if the asphalt surface feels hot to the touch, as extreme heat can cause the outer skin of the filler to dry too fast while trapping moisture underneath, resulting in bubbling and cracking. Additionally, factor in morning dew; if heavy dew forms overnight before the sealant has fully cured through its depth, it can compromise the structural integrity of the repair.
Assessing Your Driveway: Cracks, Joints, and Alligator Areas
Before buying materials or dragging out tools, perform a detailed inspection of your entire asphalt surface. Not all pavement damage is created equal, and treating every flaw the same way will lead to frustration. Walk the length of your driveway on a dry day, taking note of the size, depth, and pattern of the cracks.
Hairline cracks—those less than a quarter-inch wide—are prime candidates for standard pourable crack fillers. These minor fissures are usually caused by surface oxidation and can be sealed easily. Moderate cracks, ranging from a quarter-inch to a half-inch wide, require specialized rubberized fillers that can bridge wider gaps and flex with seasonal movement. Anything wider than a half-inch requires special backing materials, such as foam backer rod, to avoid wasting gallons of liquid filler into deep sub-base voids.
Be realistic about damage that goes beyond simple cracking. If you find sections of the driveway that resemble a jigsaw puzzle or alligator skin, crack filler is not the answer. Alligator cracking indicates that the sub-base beneath has failed and can no longer support vehicle weight. Pouring sealant over these areas only masks the underlying structural failure. Those sections must be excavated, the sub-base re-compacted, and new hot-mix asphalt patched in before winter.
Take note of utility cuts, expansion joints near the garage apron, and areas where the driveway meets concrete sidewalks or curbs. These transition zones are high-stress points where thermal movement is greatest, often requiring specialized elastomeric sealants that can stretch up to fifty percent or more without tearing away from the vertical concrete edges.
Gathering the Right Tools and Materials
Attempting driveway maintenance with inadequate tools makes a messy job even harder. Gather everything you need before starting so you can work efficiently once the cleaning and prep phase begins.
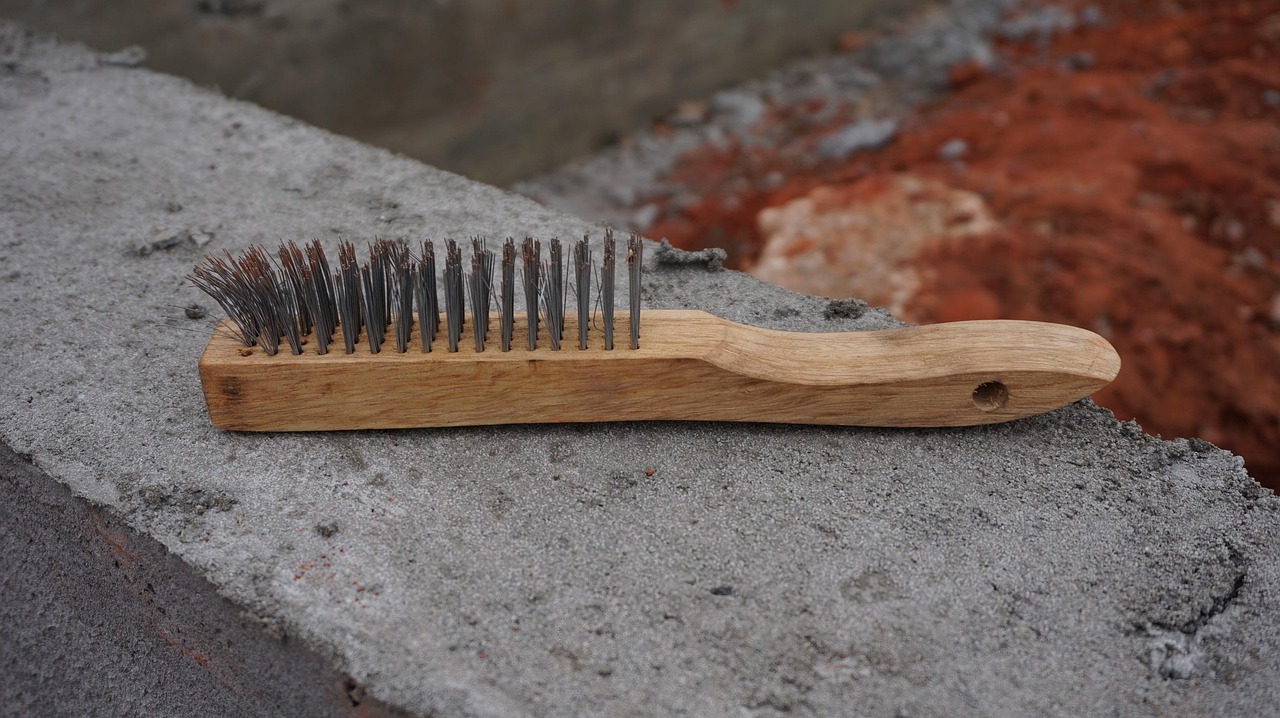
- Stiff wire brush and broom: Essential for scrubbing out loose debris, dirt, and organic matter from deep inside the cracks.
- Leaf blower or shop vacuum: Used to blast away fine dust particles that would otherwise prevent the sealant from adhering.
- Weed killer or torch: For eliminating grass and root systems growing up through the pavement.
- Commercial-grade crack filler: Choose between cold-pour rubberized liquid emulsions for DIY convenience or hot-pour blocks if you are renting professional heating equipment.
- V-shaped crack scraping tool: Helps widen narrow cracks slightly to give the liquid sealant a better bite.
- Pouring jug or applicator squeegee: Keeps application neat and controls the flow rate of the material.
- Dry masonry sand: Used to dust over tacky sealants so they do not stick to tires or footwear if you need to use the driveway soon after application.
- Safety gear: Heavy-duty work gloves, protective eyewear, and old clothing that you do not mind discarding, as asphalt emulsions are notoriously difficult to wash out of fabrics once dried.
Step-by-Step Preparation: Cleaning Is the Key to Longevity
The number one reason DIY driveway crack sealing fails prematurely is poor surface preparation. If you pour expensive rubberized sealant over packed dirt, moss, or old crumbling asphalt, the bond will fail within weeks. The sealant is only as good as the surface it grips.
Start by clearing away all loose surface debris with a stiff broom. Next, inspect the cracks for biological growth. Grass, weeds, and moss thrive in the moisture trapped inside pavement cracks, and their root systems push against the asphalt walls. Pull out any large weeds by hand, and use a weeding tool or a targeted weed killer to destroy remaining roots. If you use a chemical weed killer, ensure you give the area sufficient time to dry completely according to the manufacturer’s instructions before applying any moisture-sensitive sealants.
Once the cracks are free of vegetation, break out the stiff wire brush. Scrape vigorously along the length of every crack to dislodge compacted dirt, road salt residue, and crumbling aggregate. You want to expose clean, solid asphalt on both sidewalls of the crack. After manual scraping, use a leaf blower or a wet/dry shop vacuum to suck and blow every trace of dust out of the channel. A clean crack looks dark, sharp, and dry; a dusty crack looks gray and hazy. Take your time here—skimping on the cleaning phase guarantees that your sealant will eventually peel right out.
A common question homeowners ask is whether they can use a pressure washer to clean cracks. While pressure washers blast away stubborn dirt, they introduce a massive amount of water deep into the aggregate sub-base. If you use a pressure washer, you must wait at least 48 to 72 hours of warm, dry weather for that trapped moisture to completely evaporate before you apply any sealant. For most DIY projects, a dry mechanical cleaning with a wire brush and shop vacuum is safer, faster, and eliminates the risk of sealing moisture inside the pavement structure.
Choosing Your Weapon: Cold-Pour vs. Hot-Pour Rubberized Sealants
When selecting your repair material, you will generally choose between cold-pour liquid emulsions and hot-pour rubberized blocks. Understanding their distinct performance characteristics helps you make the right choice for your specific climate and budget.
Cold-pour rubberized asphalt crack fillers are sold in jugs or bottles at home improvement centers. They are designed for straightforward DIY application without specialized gear. You simply open the container, pour the liquid into the crack, and smooth it out. Cold-pour products cure by evaporation, meaning water content leaves the mixture as it sets. Because they rely on evaporation, they shrink slightly as they dry, which often requires a second pass for deep cracks. They work exceptionally well in moderate climates for hairline and moderate cracks.
Hot-pour crack fillers, on the other hand, are solid blocks of rubberized asphalt compounds that must be melted down in a specialized melter-applicator machine at temperatures exceeding 350 degrees Fahrenheit. Hot-pour materials contain zero water, meaning they do not shrink as they cool. They cure almost instantly upon cooling and offer superior elasticity, allowing them to stretch and recover as the pavement expands and contracts through extreme seasonal temperature swings. While hot-pour provides commercial-grade durability that easily lasts several winters, renting the equipment and handling molten material requires greater safety precautions and a larger upfront investment, making cold-pour the preferred choice for standard residential touch-ups.
When reviewing product labels, look specifically for terms like “modified rubberized asphalt” or “elastomeric.” Pure asphalt sealants are brittle and crack easily when cold; adding rubber polymers gives the material the elasticity required to stretch during freezing winter weather without shearing apart.
Application Techniques for a Professional-Grade Seal
With your driveway thoroughly cleaned and your sealant selected, you are ready for the application phase. Precision and patience ensure a neat, durable finish that protects your sub-base through freezing winter weather.
For deep cracks exceeding a half-inch in depth, push foam backer rod into the opening before applying liquid sealant. Leave about a quarter-inch of space from the top of the rod to the surface of the asphalt. This backer rod saves you from wasting gallons of expensive liquid filler on empty sub-base voids and provides a solid foundation that prevents the sealant from sagging too deeply into the crack.
If using a cold-pour jug, shake the container thoroughly to mix the rubberized solids that may have settled at the bottom. Position the spout over the crack and walk at a steady pace, filling the channel until the sealant is nearly flush with the surrounding pavement surface. Avoid overfilling to the point of creating large mounds on top of the asphalt; thick humps of sealant will catch on snow shovel blades and peel away prematurely. Instead, aim for a slightly concave finish or a flush line. Use a V-squeegee or a putty knife to feather the edges of the sealant out onto the sound asphalt surface by an inch on either side, creating a watertight strap that locks out moisture.
Work systematically across your driveway, starting from the highest elevation point and working downward so you can easily spot and correct any runoff. If a crack is particularly deep, pour the first pass, let it shrink and cure overnight, and apply a second topping pass the next day to ensure a completely level, watertight seal.
Curing, Dusting, and Post-Application Care
Patience during the curing phase protects all your hard work. Most cold-pour rubberized sealants require 24 to 48 hours to cure completely, depending on humidity, temperature, and depth of the crack. Avoid driving vehicles or walking across freshly sealed areas during this window.
If you live in a busy household and vehicles need to use the driveway sooner, or if the air is humid and the surface remains slightly tacky, broadcast a light dusting of dry masonry sand directly over the wet sealant lines. The sand adheres to the surface skin, instantly eliminating tackiness and preventing car tires from pulling the fresh rubber out of the cracks. Avoid using damp sand, as moisture interferes with proper curing. Once the sealant has turned a uniform dark black and feels firm to the touch throughout its depth, your driveway is officially ready to face winter freeze-thaw cycles head-on.
In the event of an unexpected autumn rain shower hitting your driveway before the 24-hour cure window has passed, inspect the lines immediately after the rain stops. If the sealant has turned milky white or washed out of the cracks, you will need to scrape away the damaged product, let the crack dry completely, and reapply. A properly cured rubberized seal will repel water droplets entirely, maintaining its deep black sheen.
Long-Term Maintenance Habits to Prevent Future Damage
Crack sealing is not a permanent once-and-done chore; it is an essential part of an ongoing home maintenance routine. Inspect your driveway twice a year—once in the spring after the snow melts and once in the autumn before freezing temperatures return. Catching new hairline cracks early prevents them from expanding into major structural issues.
In addition to seasonal crack sealing, consider applying a protective asphalt sealer coat every two to three years. While crack filler repairs specific fissures, sealcoating restores the lost oils and binders across the entire surface of the pavement, shielding it from damaging UV rays and sealing up microscopic pores before they turn into visible cracks. Combined with prompt snow removal using a rubber-edge shovel or a properly adjusted snow blower blade that does not gouge the surface, proactive maintenance keeps your asphalt driveway strong, smooth, and watertight for decades.
By investing a single Saturday in fall maintenance, you insulate your property against thousands of dollars in premature paving replacement costs. Keep your materials stored in a frost-free area over the winter so you are fully prepared for touch-ups when the spring thaw finally arrives.



