
When severe weather knocks out the local electrical grid, a permanent whole-house standby generator is your home’s lifeline. Yet, many homeowners focus exclusively on engine oil levels and battery health while ignoring the critical artery keeping the machine running: the fuel supply system. Performing regular standby generator fuel line maintenance ensures that your natural gas or liquid propane system delivers the precise pressure and volume required when utility power fails.
Fuel delivery failures during a major outage are rarely caused by the utility company running out of fuel. More often, they stem from minor localized issues—such as a sticky manual shut-off valve, a corroded flexible gas connector, a sediment-clogged drip leg, or an uncalibrated pressure regulator. Because these systems sit idle for months at a time, vibration, outdoor weathering, and shifting ground can compromise fuel integrity. By adopting a methodical inspection routine twice a year, you can catch minor wear items before they turn into costly emergency repairs.
Understanding Your Standby Generator Fuel System
Before turning a wrench or spraying soapy water on a pipe fitting, it helps to understand how fuel travels from your main utility meter or bulk storage tank to the generator’s internal demand regulator. Whole-house generators typically run on either municipal natural gas or residential liquid propane (LP). While both fuels burn cleanly and efficiently, their delivery systems have distinct characteristics and maintenance requirements.
A typical natural gas installation features a dedicated line running from your utility meter, equipped with an exterior manual shut-off valve, a sediment trap (also called a drip leg), a flexible connector to absorb engine vibration, and a secondary gas regulator near or inside the generator cabinet. Propane setups share a similar layout but draw from an exterior storage tank, often featuring a first-stage regulator at the tank and a second-stage regulator near the unit.
No matter which fuel type powers your home, every component along this delivery chain must remain completely sealed, corrosion-free, and correctly pressurized. A restriction anywhere in the line starves the engine of fuel, causing it to surge, sputter, or fail to start altogether under heavy electrical loads. Furthermore, understanding the volumetric requirements of your specific generator model is essential; a 22-kilowatt generator demands significantly more cubic feet per hour (CFH) of natural gas than a 10-kilowatt model, meaning undersized piping or restricted valves will manifest immediately under peak household electrical loads.
Pre-Inspection Safety and Preparation
Working around fuel lines demands absolute respect for safety protocols. Before you begin any visual or physical check of your standby generator fuel supply line, take these fundamental precautions:
- Shut down the generator: Ensure the generator control panel is switched to the ‘Off’ or ‘Manual’ position so the engine does not unexpectedly crank while you are working near fuel components.
- Know your emergency shut-offs: Locate the primary gas shut-off valve at your utility meter or propane tank, as well as the immediate service shut-off valve near the generator housing. Every adult in the home should know how to close these valves in an emergency.
- Have leak detection supplies ready: Do not rely solely on your nose. Prepare a simple leak-detection solution by mixing a few drops of liquid dish soap with water in a spray bottle.
- Clear the perimeter: Remove leaves, mulch, stored items, and overgrown landscaping from a three-foot radius around the generator and gas piping to ensure clear access and proper ventilation.
It is also wise to check local weather forecasts before beginning any hands-on inspection. Never conduct fuel line maintenance during active lightning storms or heavy precipitation, as moisture can compromise electrical components or obscure potential leak tests. Ensure you have adequate lighting, sturdy gloves, and safety glasses before proceeding.
Inspecting Manual Shut-Off Valves and Piping
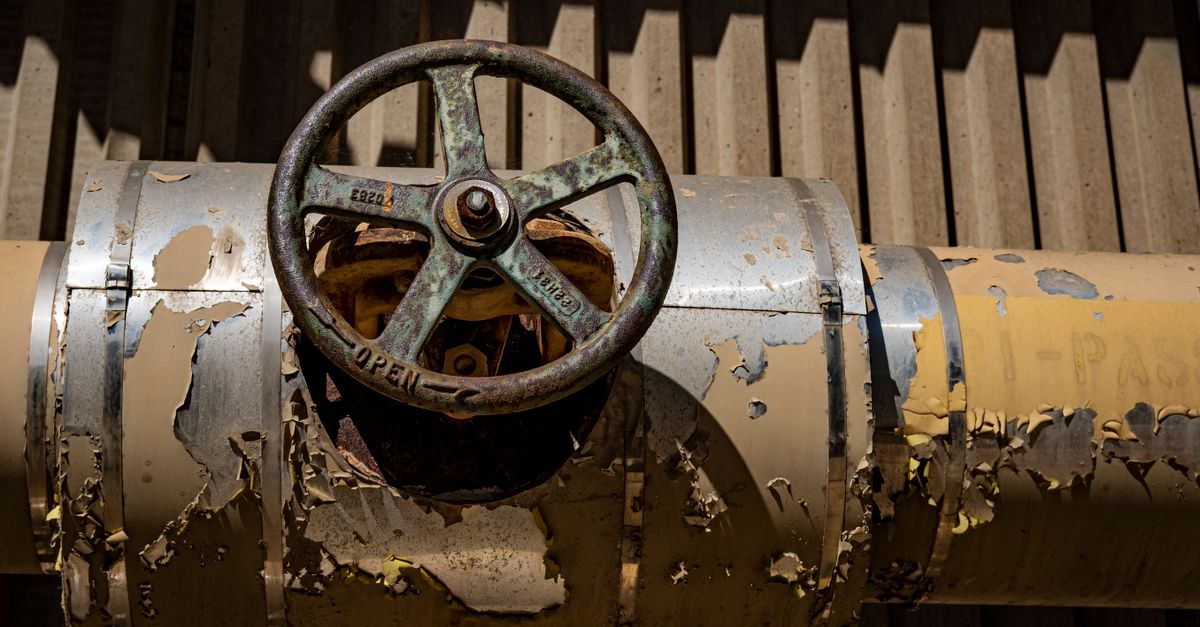
Your first hands-on task is to examine all visible exterior gas piping, fittings, and manual shut-off valves. Standby generators vibrate significantly when running, and this constant shaking can loosen threaded pipe joints or stress rigid mounts over time.
Begin at the structural entry point where the gas line emerges from the ground or foundation and follow it all the way to the generator cabinet. Look closely for signs of surface rust, flaking paint, pitting, or physical dents. If your gas piping is made of black iron pipe, any deep rust oxidation requires immediate wire brushing and a fresh coat of rust-inhibiting outdoor paint to prevent wall thinning and eventual structural failure.
Next, inspect the manual shut-off valve. This valve should turn smoothly through a 90-degree arc from fully open to fully closed. If the valve feels stiff, do not force it with excessive leverage or cheater pipes, as this can snap older brass or iron fittings. Instead, apply a manufacturer-approved valve lubricant if specified, or call a licensed gas technician to replace a seized valve. Ensure the handle remains unobstructed and easy to reach in a hurry.
In addition to checking the valve operation, examine the pipe hangers and mounting brackets securing the rigid gas line to your home’s exterior wall or concrete pad. If anchors have pulled loose due to frost heave or soil settling, the entire pipe run can experience dangerous mechanical stress. Re-secure any loose brackets using appropriate masonry or framing fasteners to maintain a rigid, stable delivery path.
Checking Flexible Gas Connector Integrity
Because whole-house generators vibrate violently during startup and heavy load cycles, rigid gas piping cannot connect directly to the engine inlet. Code requires a flexible gas connector—usually made of corrugated stainless steel—to bridge the gap between the rigid supply pipe and the generator cabinet.
Flexible connectors are durable, but they have a finite lifespan and are vulnerable to specific types of damage. Inspect the entire length of the flexible hose using a flashlight, checking for:
- Kinks or sharp bends: The hose should form a gentle, sweeping curve rather than a sharp angle that restricts internal gas flow.
- Cracking or stretching: Look for hairline fractures, abrasion marks where the hose rubs against the metal cabinet knockout, or signs that the connector has been stretched beyond its design limits.
- Corrosion: Examine the end fittings and braided stainless mesh for white powdery oxidation or red rust spots, which indicate moisture entrapment.
If you spot any deep kinks, splits, or weeping corrosion on the flexible connector, it must be replaced immediately before running the generator. Never attempt to patch a damaged gas hose with tape, clamps, or sealants. Furthermore, ensure that the flexible connector passes directly into the generator cabinet without being concealed behind walls, flooring, or partitions, as building codes strictly prohibit hidden gas connectors due to the difficulty of inspecting them for wear.
Testing for Gas Leaks with Soap Solutions
Once you have verified the physical integrity of the pipes and connectors, you need to check for microscopic gas leaks at every threaded joint, valve stem, and fitting. This is where your soapy water spray bottle comes into play.
Turn on the main gas supply valve to pressurize the line up to the generator’s primary shut-off valve. Generously spray your soap solution onto all pipe threads, unions, valve packings, and the entire length of the flexible connector. Watch closely for 10 to 15 seconds.
If gas is escaping, the pressure will blow bubbles in the soapy film, creating expanding foam or steady bubbling streams. If you see bubbles forming, immediately shut off the main gas supply, ventilate the area, and tighten the fitting or call a professional. Never use an open flame, match, or lighter to check for gas leaks under any circumstances.
Keep in mind that very tiny pinhole leaks may form slow-developing, microscopic foam bubbles rather than aggressive bursting bubbles. Take your time inspecting every single connection angle, union joint, and pipe joint interface. If you live in an area subject to freezing temperatures, ensure your soapy water solution contains a small amount of rubbing alcohol or use a specialized commercial gas leak detection liquid that will not freeze on contact with cold metal pipes.
Maintaining Sediment Traps and Drip Legs
Natural gas and propane lines can occasionally carry microscopic amounts of moisture, compressor oil, or particulate debris. To prevent this foreign matter from fouling delicate internal generator valves and carburetors, fuel codes require a sediment trap (drip leg) installed at the lowest point of the gas train just before the unit.
A standard sediment trap consists of a vertical pipe tee pointing downward, with a short capped pipe extension below the gas inlet. Over the years, condensation and debris settle into the bottom cap rather than flowing into the generator engine.
During your seasonal maintenance check, inspect the drip leg cap for external corrosion. While draining a drip leg typically requires closing the gas supply and removing the bottom cap with pipe wrenches, this task is often best left to a professional service technician during an annual tune-up. If you notice the generator sputtering during cold weather, a water-logged sediment trap is a frequent culprit. Neglecting this maintenance item can allow moisture to freeze inside the trap during sub-freezing winter storms, completely blocking gas flow and causing sudden generator failure precisely when you need emergency backup power most.
Evaluating Regulator Pressure and Performance
Gas supply pressure is one of the most critical factors in standby generator reliability. If the incoming gas pressure is too low, the generator will starve for fuel under heavy loads, causing voltage drops or automatic shutdowns. If the pressure is too high, it can damage internal regulators and flood the combustion chamber.
Most residential standby generators require specific inlet gas pressure ranges—typically measured in inches of water column (in. w.c.)—both when the engine is resting and when it is running under full electrical load. Natural gas systems usually operate around 5 to 7 inches of water column, while propane systems often run slightly higher, around 11 to 14 inches of water column.
Testing this pressure accurately requires a specialized tool called a manometer connected to the pressure tap port on the generator’s demand regulator. Because this procedure involves connecting test gauges to a live fuel system, it is generally recommended for professional technicians during a scheduled preventative maintenance visit. However, homeowners can verify that regulator vent caps outside the unit are clean, unobstructed by insect nests, and pointing downward to prevent rainwater entry.
Additionally, pay attention to environmental factors affecting your outdoor regulators. Mud daubers and spiders are notorious for building nests inside open regulator vent holes, which blocks atmospheric reference pressure and causes erratic fuel delivery. Regularly clear away any debris, insect nests, or ice buildup surrounding the regulator vent to ensure proper mechanical operation of the internal diaphragm.
Recognizing When to Call a Licensed Professional
While DIY visual inspections and soap-bubble leak checks are safe and effective for proactive homeowners, gas line work carries inherent risks. You should step back and call a licensed plumber, HVAC contractor, or certified generator service technician immediately if you encounter any of the following situations:
- Persistent gas odors: If you smell the distinct rotten-egg odor of mercaptan near the generator or gas meter, evacuate the area immediately and call your utility provider or emergency services.
- Damaged hard piping: Any cracked iron pipe, stripped threads, or structural shifting of the gas supply riser requires professional pipe-fitting equipment and re-threading.
- Unstable pressure readings: If your generator starts but bogs down or throws low-pressure fault codes whenever major household appliances kick on, a professional must adjust or replace the utility regulator.
- Regulatory compliance updates: If your local building codes have changed or your generator installation lacks required protective bollards or weather shielding, professional installation and inspection ensures full code compliance and prevents insurance claim denials.
Attempting complex gas line modifications without proper licensing, permits, or pressure testing equipment not only violates municipal building codes but also introduces severe risks of fire, explosion, or carbon monoxide poisoning. Always defer to certified professionals for pipe sizing alterations, main meter upgrades, or primary regulator replacements.
Establishing a Seasonal Maintenance Schedule
Maintaining your standby generator’s fuel system shouldn’t be a one-time emergency reaction; it should be part of an ongoing home maintenance calendar. By tying inspections to specific seasonal milestones, you eliminate the guesswork and ensure your equipment remains in top operational readiness.
In the spring—just before the start of traditional severe thunderstorm and hurricane season—perform a comprehensive visual check of all outdoor gas piping, clear away surrounding vegetation, and run the generator through a manual exercise cycle while monitoring fuel connections. In the late autumn, prior to winter freeze events, repeat your visual inspection and soap-bubble test, ensuring that regulator vents are clear of fallen leaves and winter debris.
Pairing these routine homeowner checks with an annual service contract from a certified technician ensures that internal components, fuel solenoids, and regulator calibrations remain in peak condition. When the next major power outage strikes, you will have complete peace of mind knowing your standby generator fuel supply line is secure, pressurized, and ready to perform.