
When severe weather knocks out the local power grid, your whole-house standby generator is supposed to kick on automatically, seamlessly transitioning your home from utility power to backup electricity. But that flawless transition relies heavily on a component many homeowners overlook until an outage strikes: the automatic transfer switch (ATS). Performing routine standby generator transfer switch maintenance before storm season arrives is the only way to guarantee your backup power system will actually respond when you need it most.
While most homeowners focus entirely on the exterior generator housing, engine oil levels, and battery health, the transfer switch acts as the crucial brain and muscle of your entire backup ecosystem. It constantly monitors incoming utility voltage, signals the generator to start when power drops, safely isolates your home from the grid to prevent dangerous backfeeding, and routes generator power back to your main electrical panel. If the contacts inside this unit are pitted, the control wiring is loose, or the mechanical relays fail, your generator might run perfectly outside while your home remains completely dark.
This guide walks you through a practical, safety-first maintenance protocol for residential automatic transfer switches. We will cover what you can safely inspect yourself, how to verify exercise cycles, when to check backup control batteries, and clear boundaries on when it is time to call a licensed electrical contractor.
Understanding Your Automatic Transfer Switch
Before opening any electrical enclosures, it helps to understand what happens inside an automatic transfer switch during a power outage. Typically installed right next to your main electrical service panel or subpanel, the ATS contains heavy-duty mechanical contactors, control circuit boards, and sensing relays.
When utility power flows normally, the utility side contactor remains closed, routing electricity directly from the utility company into your home’s breaker panel. At the same time, a low-voltage control wire runs from the ATS to the standby generator outside, keeping the generator’s start battery trickle-charged and signaling when an outage occurs.
The moment utility voltage drops below a safe threshold—usually around 70 percent of normal voltage on any single phase—the ATS control board starts a built-in time delay (typically three to five seconds) to ignore momentary flickers. Once confirmed, the ATS fires a relay to start the generator. After the generator warms up and reaches proper voltage and frequency, the ATS mechanically opens the utility contactor and closes the generator contactor. This mechanical interlocking is vital: it physically prevents utility power and generator power from ever feeding into each other simultaneously, which would cause catastrophic electrical damage and create severe hazards for utility linemen working on downed power lines.
Open Transition vs. Closed Transition Switches
Most residential installations utilize an “open transition” transfer switch, often referred to as a break-before-make switch. This means the unit physically disconnects your home from the utility grid before connecting it to the generator. The brief interruption—lasting mere milliseconds—is completely unnoticeable for most household appliances and electronics, though highly sensitive equipment may benefit from uninterrupted power supplies (UPS) downstream.
By contrast, closed transition switches (make-before-break) momentarily parallel the generator and the utility grid for a fraction of a second during transfer. These are far more common in commercial and industrial settings because they eliminate even a momentary drop in power. However, utility companies rarely permit closed transition switches in standard residential settings due to the strict safety protocols required to prevent unsanctioned backfeeding into public distribution lines.
Safety First: High-Voltage Realities
Working around electrical equipment always carries inherent risks, but transfer switches present a unique hazard because they contain multiple power sources inside a single metal enclosure.
Even when your main utility breaker is shut off, utility service conductors entering the top of the transfer switch remain permanently live. You cannot simply flip a household circuit breaker to kill all the power inside an ATS enclosure. The lugs where the utility service lines attach carry live, unmeasured high voltage directly from the utility transformer outside.
Because of this, standard homeowner maintenance should remain strictly visual and non-contact unless you possess professional electrical training, insulated hand tools rated for high voltage, and appropriate personal protective equipment (PPE). Never insert tools, fingers, or cleaning instruments past the outer deadfront barrier of the transfer switch enclosure.
NFPA 70E and Arc Flash Awareness
Professional electricians approach transfer switch maintenance with extreme caution, adhering strictly to standards set by the National Fire Protection Association (NFPA 70E) for electrical safety in the workplace. An arc flash—an explosive electrical discharge through the air—can occur if metal tools or conductive debris bridge live utility lugs and grounded metal surfaces. The resulting flash causes severe burns and intense light hazards. Homeowners must respect these invisible dangers by never removing deadfront panels that expose live wiring terminals.
Step 1: Performing a Safe Visual Inspection
Routine visual checks can catch many developing problems before they cause a system failure. You should inspect your transfer switch at least twice a year—ideally in the spring before storm season and again in the fall before winter heating demands peak.
Start by examining the exterior of the transfer switch metal cabinet. Look for any signs of physical damage, rust, moisture intrusion, or pest entry. Enclosures installed in garages, basements, or outdoors must remain tightly sealed against dust and dampness. Check that the cabinet door is securely latched and that any required security seals or padlocks are intact.
Next, remove the outer cover panel (often called the deadfront) only if your specific unit design allows safe access to non-energized compartments, or simply inspect through transparent viewing windows if equipped. Look for the following warning signs:
- Discoloration or Burn Marks: Any brown or black scorching around wiring terminals, contactors, or circuit boards indicates overheating, loose connections, or electrical arcing.
- Corrosion or Oxidation: White powdery deposits or rust on metal parts or terminals signal humidity or water leaks inside the housing.
- Insect Nests: Spiders, wasps, and mice are frequently attracted to the warmth of electrical enclosures. Cobwebs or nesting materials can bridge circuit board contacts or jam mechanical relays.
- Dust and Debris Accumulation: Heavy dust buildup can retain moisture and cause tracking paths for electricity.
Step 2: Checking Control Wiring and Connections
Vibration from normal household activity, heavy appliances, and the generator itself can cause electrical connections to loosen over time. Loose connections create high resistance, which generates intense heat and can melt wire insulation or trigger false fault codes.
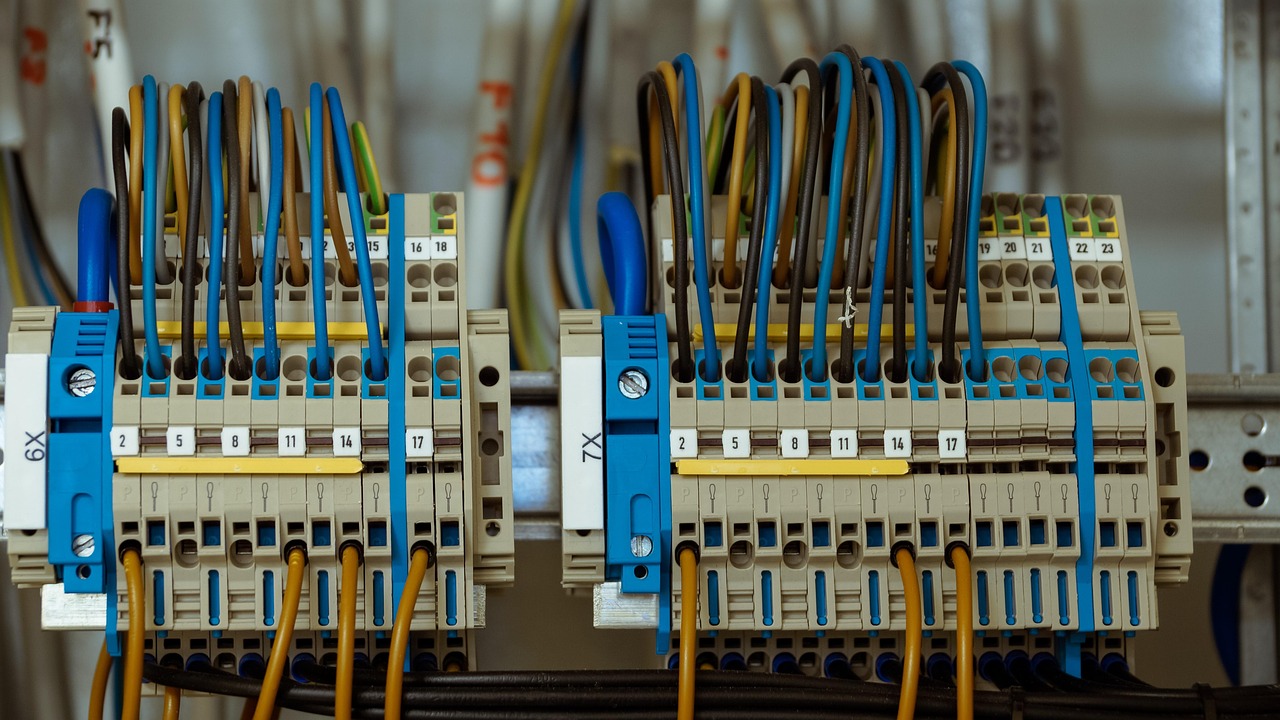
With the system completely de-energized by a qualified professional (or during a scheduled utility outage when both grid and generator power are shut down), inspect the control wire terminal strips. Look for frayed wire strands, pinched insulation, or sagging cables. Low-voltage control wires—typically carrying 12-volt or 24-volt signals between the ATS and the generator—must be securely fastened to their terminal blocks.
If you notice any loose screw terminals, do not attempt to tighten them on live equipment. Even low-voltage control circuits can short out and damage sensitive solid-state control boards if accidentally bridged with a metal screwdriver.
Step 3: Verifying the Generator Exercise Cycle
One of the most effective ways to test your transfer switch without plunging your home into darkness is to rely on the generator’s built-in weekly or bi-weekly exercise cycle.
Modern standby generators are programmed to start automatically once a week, run for 15 to 20 minutes, and shut down. During this routine test, the generator engine runs, but in most standard residential setups, the transfer switch does not actually switch the home’s electrical load over to the generator; instead, it performs a “quiet test” where the engine runs to lubricate internal parts and charge the battery while utility power stays connected.
However, you can configure or manually initiate a transfer switch test under load to verify that the entire system functions properly:
- Notify Household Members: Let everyone in the house know you will be conducting a scheduled power test so computers and sensitive electronics can be safely shut down if desired.
- Initiate Manual Test Mode: Locate the control panel on your standby generator and press the “Manual” or “Test” button. Most panels give you the option to run with or without transferring the load. Choose the option to transfer load.
- Observe the Transfer: Listen for the generator to start, warm up, and reach speed. Within a few seconds, you should hear a distinct, heavy mechanical click or thud inside the transfer switch as the contactors shift position.
- Verify Home Power: Confirm that household lights remain steady and appliances continue operating normally on generator power.
- Restore Utility Power: After running the test for five to ten minutes, switch the generator back to “Auto” mode. Listen for the transfer switch to click back to utility power, followed by a brief cool-down cycle before the generator shuts off.
If the generator starts during the test but the transfer switch fails to shift power into the house, you have identified a critical failure point that requires immediate professional service before a real storm hits.
Step 4: Inspecting and Testing the Generator Battery
An automatic transfer switch relies entirely on the standby generator’s starting battery to provide the DC voltage needed to throw the heavy relay contactors when an outage occurs. If your generator battery is weak or dead, the generator engine might not crank, and even if it does, the transfer switch may fail to complete the circuit switch.
Most modern standby units feature an integrated battery charger powered by utility electricity through the transfer switch wiring harness. During your seasonal maintenance routine, perform these battery checks:
- Check Battery Age: Most lead-acid standby generator batteries last between three and five years. If your battery is older than four years, replace it proactively before storm season, regardless of its current charge.
- Inspect Terminals: Look for greenish corrosion on the battery posts. Clean terminals with a wire brush and a solution of baking soda and water, then coat them with terminal protector spray.
- Test Voltage: Use a digital multimeter to check the resting DC voltage across the battery terminals. A healthy 12-volt battery should read around 12.6 volts or higher when fully charged. If the voltage drops below 12.0 volts, the battery may be sulfated or failing to hold a charge.

Seasonal Climate Considerations for Storm Regions
Different storm-prone regions present unique environmental challenges that can degrade your transfer switch and backup generator system over time. Tailoring your maintenance approach to your local climate helps prevent unexpected failures when severe weather strikes.
Coastal and High-Humidity Environments
Homeowners living near saltwater coasts face constant threats from salt-laden air. Salt accelerates galvanic corrosion on metal terminals, contactor blades, and circuit board traces. If your transfer switch is installed in an unconditioned coastal garage or outdoor patio enclosure, inspect the interior seals annually. Apply a dielectric grease or corrosion inhibitor spray specifically approved for electrical components to non-contact metal surfaces, and ensure your cabinet gasket remains supple and airtight.
Freezing Northern Climates
In northern regions prone to heavy ice storms and blizzards, sub-zero temperatures can affect battery chemistry and mechanical actuator lubrication. Lead-acid batteries lose significant cranking amp capacity in freezing weather. Ensure your standby generator is equipped with a thermostatically controlled battery warmer blanket and block heater. Furthermore, check that exterior conduit entrances into the transfer switch are sealed with expanding foam or duct seal putty to prevent condensation from freezing inside the metal raceways.
Common Maintenance Mistakes to Avoid
Homeowners often mean well when maintaining their backup systems, but certain common errors can damage equipment or compromise safety:
- Ignoring Fault Codes: Modern transfer switches and generator control panels display error codes on their digital screens. Never ignore a blinking amber warning light or persistent fault message.
- Applying Liquid Cleaners Directly: Never spray liquid cleaners, lubricants, or contact cleaners directly onto electrical contacts or circuit boards inside the ATS enclosure. Always apply products to a clean cloth first, and ensure power is off.
- Skipping Professional Servicing: DIY visual checks are essential, but they do not replace a comprehensive annual service inspection by a factory-certified generator technician who can test contactor coil resistance and calibrate voltage sensing relays.
Frequently Asked Questions (FAQs)
How often should an automatic transfer switch be professionally serviced?
Even with diligent homeowner visual inspections and weekly exercise cycles, you should have a certified generator technician perform a comprehensive service on your transfer switch and generator once a year. Professionals test contactor coil operation, inspect thermal lugs with a calibrated torque wrench, and update firmware if necessary.
Can I manually operate an automatic transfer switch during an extended blackout?
Most modern automatic transfer switches feature a manual operation handle or lever located inside the deadfront enclosure. However, operating this handle requires opening the enclosure and exposing yourself to dangerous live electrical components. This procedure should only be performed by trained professionals or in extreme emergency scenarios following strict utility shut-off protocols.
Why does my generator run during its weekly test, but the house lights do not switch over?
By default, most residential standby systems perform a “quiet test” where the generator runs to exercise the engine without transferring the electrical load to your home. If your system is performing a load transfer test and the house power fails to switch, the issue typically lies within the low-voltage control wiring harness, a faulty transfer relay, or a tripped circuit breaker inside the ATS housing.
When to Call a Professional Electrician
While clearing debris from around your outdoor unit, checking battery terminals, and observing exercise cycles are great DIY tasks, certain symptoms demand an immediate call to a licensed electrical contractor or certified generator technician:
- Burning smells, melting plastic odors, or visible soot emanating from the transfer switch housing.
- Persistent clicking, buzzing, or chattering noises coming from the contactors while running.
- Failure of the transfer switch to engage during a manual test cycle.
- Error codes indicating voltage sensor failure, transfer fault, or controller motherboard issues.
By taking a proactive, safety-conscious approach to standby generator transfer switch maintenance before severe weather arrives, you ensure that your home remains safe, warm, and powered no matter what nature brings your way.



