Modern airtight homes rely on mechanical ventilation to supply fresh outdoor air while exhausting stale indoor pollutants, humidity, and odors. If your house features a mechanical ventilation system, performing regular hrv and erv core maintenance guide routines is essential to keep the equipment operating efficiently. Heat recovery ventilators (HRVs) and energy recovery ventilators (ERVs) process hundreds of cubic feet of air every hour. Over time, dust, pollen, pet dander, and outdoor debris accumulate on the filters, the core surfaces, and the drainage components.
When these vital components become clogged, system airflow drops, motors work harder against increased static pressure, and energy recovery efficiency plummets. Worse, neglected units can develop mold, foul odors, or freeze solid during freezing winter weather. This manual provides a systematic approach to servicing your whole-house ventilation system, covering everything from routine filter washing to deep core sanitization and frost-damper checks.
Understanding Your Ventilation System: HRV vs. ERV
Before diving into maintenance tasks, it helps to understand what type of system you have installed in your utility room, basement, or attic. Both HRVs and ERVs use a central core to transfer thermal energy between incoming fresh air and outgoing stale air without allowing the two airstreams to mix directly.
An HRV transfers sensible heat. In the winter, it warms incoming cold outdoor air using heat from the outgoing stale air. In the summer, it helps temper incoming hot air. HRVs are ideal for colder, heating-dominated climates where managing indoor humidity during deep winter is a primary concern. They also include a condensate drain to handle moisture that condenses out of the air during extreme cold snaps.
An ERV transfers both sensible heat and latent moisture (water vapor). The core material—often a specialized polymer membrane or treated paper—allows moisture vapor to pass from the more humid airstream to the drier airstream. In winter, an ERV helps retain some indoor humidity so your home does not become bone-dry. In summer, it pulls humidity out of incoming fresh air before it enters your living spaces. While ERVs also require regular filter and core care, their moisture-transfer membranes demand careful handling to prevent damage.
The Essential Maintenance Schedule
Consistency is key to extending the lifespan of your ventilation system and protecting indoor air quality. While some components require monthly attention, others only need a thorough check once or twice a year. Establishing a reliable seasonal checklist prevents minor dust accumulation from turning into a costly motor failure or system breakdown.
Monthly tasks generally involve inspecting the outdoor intake and exhaust hoods for blockages, checking the condensate drain tube for free flow, and performing a quick visual inspection of the unit’s control panel or indicator lights. Every three months, you should remove and wash the air filters and inspect the interior cabinet. Semi-annually or annually, the core itself should be pulled and cleaned, along with a deeper inspection of the blower fans, balancing dampers, and electrical connections.
Step 1: Safely Shutting Down and Opening the Unit
Never attempt to clean or service your HRV or ERV while it is plugged in or actively running. Safety is paramount when working around electrical components, spinning blower wheels, and sharp sheet metal edges.
Start by turning off the system at your wall-mounted control switch or main living area digital controller. Next, unplug the unit from the 120V electrical outlet. If the unit is hard-wired directly into a dedicated junction box or electrical panel, locate the corresponding circuit breaker and switch it to the off position. Secure the breaker with a lockout tag if other people share your home.
Once power is completely disconnected, locate the latches, thumb screws, or clips securing the front access door. Open or remove the door carefully. Some modern units feature safety interlock switches that cut power when the door opens, but manually unplugging the unit remains the safest practice. Keep a flashlight or headlamp handy, as utility rooms and basements often lack direct overhead lighting inside dark mechanical compartments.
Step 2: Inspecting and Washing Air Filters
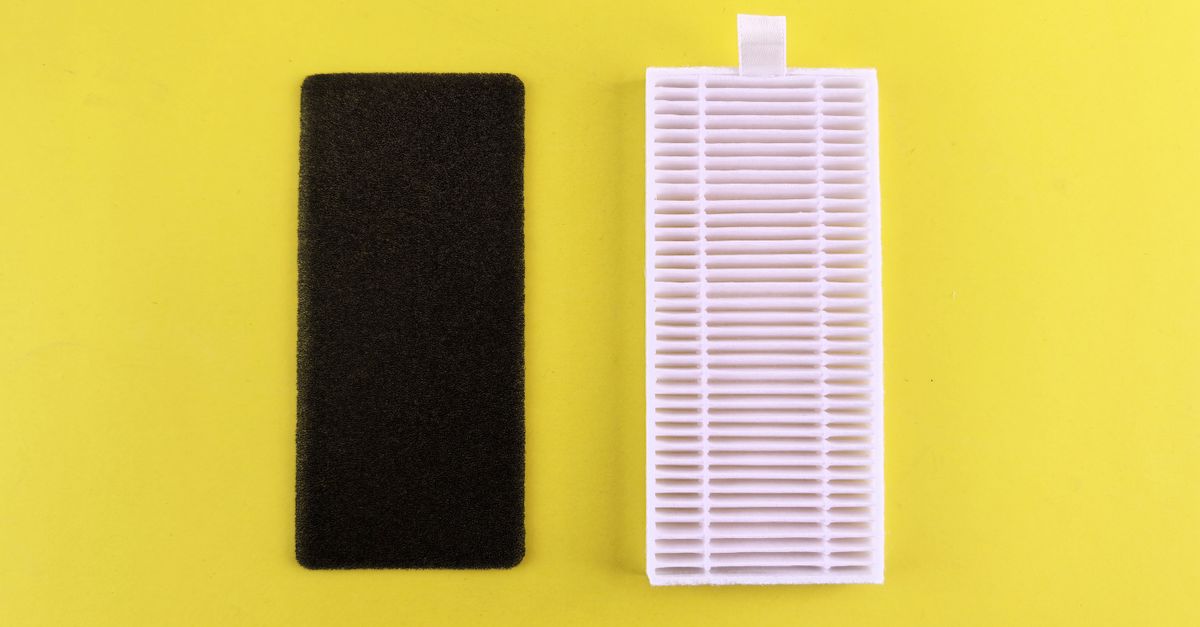
Air filters are your ventilation system’s first line of defense. Most residential HRVs and ERVs feature two washable foam filters—one positioned in the return air stream (capturing indoor dust) and one in the fresh air stream (capturing outdoor pollen and large debris).
Slide the filters gently out of their tracks. Take note of their orientation so you can reinstall them correctly later. Carry the filters to a utility sink or take them outdoors. Shake or vacuum off loose surface debris before introducing water.
Wash the filters using lukewarm water and a few drops of mild, unscented dish soap. Avoid harsh chemical cleaners, bleach, or solvent-based degreasers, which can degrade the foam material. Rinse thoroughly until the water runs clear and no soap bubbles remain. Gently press out excess water—never wring, twist, or wring out foam filters, as this tears the delicate cellular structure. Set the filters on a clean towel and allow them to air-dry completely before placing them back into the unit.
Step 3: Removing and Cleaning the Ventilation Core
The core is the heart of your heat recovery system. Over several months of continuous operation, microscopic particulate matter bypasses the filters and settles within the narrow channels of the core.
Gently slide the core straight out of the cabinet channels. Be prepared for it to have some weight, and support it with both hands. Inspect the core material carefully:
- Aluminum Cores (HRV): Durable and rigid. These can usually be washed with warm soapy water.
- Enthalpy/Paper Cores (ERV): Delicate and moisture-sensitive. Never submerge an ERV paper core in water. Instead, vacuum it gently with a soft brush attachment or use compressed air from a safe distance.
For washable aluminum cores, submerge the unit in a tub or utility sink filled with lukewarm water and mild dish soap for 15 minutes to loosen trapped grease and dust. Rinse thoroughly with a gentle stream of water from a sprayer nozzle. Never use a high-pressure pressure washer or compressed air on thin aluminum fins, as they bend easily and permanently restrict airflow.
Step 4: Checking Condensate Drains and Traps
During cold weather operation, HRVs extract significant moisture from exhaust air. This water collects in the bottom drain pan and flows out through a condensate tube. If the drain line clogs with algae, slime, or dust, water will overflow into the unit cabinet, potentially leaking onto your floor or damaging the internal electronics.
Inspect the drain pan at the bottom of the unit. Clean out any accumulated sludge using a damp cloth and mild disinfectant. Pour a cup of warm water mixed with a few drops of dish soap down the drain port to verify that the water flows freely through the tube and out to your floor drain or condensate pump.
If your system features an external P-trap, ensure it has not dried out during dry weather seasons. A dry trap can allow unconditioned basement air or sewer gases to be pulled backward into your ventilation airstream.
Step 5: Inspecting Blower Motors and Electrical Compartments
With the filters and core removed, you have a clear view of the dual blower assemblies. While deep motor maintenance should generally be left to licensed HVAC professionals, homeowners can perform basic visual checks to spot early signs of wear.
Look closely at the squirrel-cage fan blades. Dust and lint buildup on fan blades throws the wheel out of balance, leading to noisy operation, excessive vibration, and premature bearing wear. If you notice a gray fuzz coating the blades, clean them carefully using a soft brush attachment on a vacuum cleaner or a damp microfiber cloth, taking care not to bend the individual metal blades.
Check the wiring harnesses to ensure connectors are snug and free of corrosion. Look for any signs of scorching, loose wire nuts, or unusual rust around the metal housing. If the blower motors emit a persistent squealing, grinding, or humming noise when restarted, the sealed bearings may be failing, requiring professional service.
Step 6: Inspecting Outdoor Intake and Exhaust Grilles
Outdoor hoods are frequently neglected because they are located outside the house. However, blocked outdoor hoods are one of the most common reasons residential ventilation systems fail to deliver proper airflow.
Walk around the exterior of your home and locate your fresh air intake and stale air exhaust vents. Check them seasonally for the following obstructions:
- Cottonwood seeds, autumn leaves, and windblown debris trapped against wire mesh screens.
- Wasp nests, bird nests, or spider webs built inside the cowlings.
- Overgrown shrubs, tall ornamental grasses, or mulch piled too close to ground-level vents.
- Snow drifts blocking intake hoods during heavy winter storms.
Clear away all debris by hand or with a soft brush. Ensure that built-in backdraft dampers or gravity flaps move freely and close completely when the system is turned off, preventing outdoor drafts from pushing unconditioned air into your ductwork.
Step 7: Understanding Frost Controls and Dampers
In cold climates where winter temperatures regularly drop below freezing, moisture inside an HRV core can freeze and block airflow entirely. Modern ventilation systems use different strategies to prevent frost buildup, and knowing how yours works helps you troubleshoot winter performance issues.
Many units use a timed defrost cycle. When outdoor temperatures drop past a preset threshold, the system temporarily shuts off the supply fan while continuing to run the exhaust fan, pulling warm indoor air through the core to melt accumulated frost. Other units use an internal motorized damper that recirculates indoor air through the core briefly, or an electric pre-heater element that warms incoming air before it hits the core.
Inspect the defrost damper actuator arm and linkages (if visible) to ensure they move freely without binding. If your unit features an automatic electronic control board, verify that the outdoor temperature sensor wire is securely connected and not pinched or severed.
Reassembly and System Restart
Once every component has been thoroughly cleaned and allowed to dry completely, you can reassemble your ventilation system in reverse order. Taking your time during this phase ensures an airtight seal and prevents rattles or air leaks.
- Slide the cleaned core carefully back into its designated slots, making sure it sits flush and square within the cabinet.
- Reinstall the dry foam air filters into their respective intake and exhaust channels.
- Check that the rubber door gasket is intact and free of cracks or gaps.
- Close the front access door and secure all latches or screws tightly.
- Plug the power cord back into the electrical outlet or switch the dedicated circuit breaker back to the ON position.
- Power on the main wall control and select your desired operating speed (usually low or intermittent for normal daily use, and high for cooking or bathroom humidity removal).
Listen closely as the unit spins up. The airflow should sound smooth and steady, without rattling sheet metal, rubbing fan blades, or vibrating housing panels.
Common Maintenance Mistakes to Avoid
Even well-intentioned homeowners can accidentally damage sensitive ventilation equipment by using incorrect cleaning techniques. Keep these common pitfalls in mind when servicing your system:
Avoid using harsh chemical solvents, bleach, or abrasive scouring pads on plastic components or delicate cores. Never put foam filters or aluminum cores into a household dishwasher; the high heat and aggressive detergent tabs can warp plastic frames and destroy delicate filter foam. Do not reinstall filters or cores while they are still damp, as moisture trapped inside the dark cabinet creates an ideal breeding ground for mold and mildew. Finally, never force a core into place if it feels stuck; check for proper orientation and alignment before applying pressure.
When to Call a Professional HVAC Technician
While routine cleaning and filter replacement are straightforward DIY tasks, certain issues require professional expertise. Contact a qualified HVAC service technician if you encounter any of the following warning signs:
Persistent electrical tripping or blown fuses immediately upon startup indicate internal shorts or failing motor windings. Loud grinding, screeching, or electrical buzzing noises suggest worn-out motor bearings or failing capacitors. If your home experiences persistent high humidity, condensation on windows, or stale air despite regular filter cleaning, a technician can use specialized manometers and flow hoods to rebalance your system airflow and verify that the core is transferring heat efficiently. Scheduling a professional tune-up every two to three years ensures your entire ventilation investment continues to protect your home and health for years to come.