

When you step out of a hot shower, you expect your bathroom exhaust fan to quickly clear the steam from your mirror and walls. If your mirror stays fogged for half an hour, or if you notice peeling paint, warped trim, or a musty smell near the ceiling, your fan is not pulling its weight. Often, the culprit is not a dying motor, but a choked, disconnected, or improperly installed ventilation duct. Following a thorough bathroom exhaust duct cleaning guide ensures that moist air actually leaves your home rather than dumping into your attic or crawlspace.
Too many homeowners treat bathroom fans as set-and-forget appliances. In reality, bathroom ventilation systems require periodic inspection and cleaning just like your clothes dryer vent. Dust, lint, dead insects, and moisture combine inside the ductwork over the years, choking off airflow and creating a breeding ground for mold. This guide walks you through how to inspect your entire exhaust path, clean out blockages, check your exterior wall or roof caps, and fix common installation mistakes.
Before you dive into a maintenance project, it helps to understand why your bathroom exhaust system matters so much. A standard shower pumps a tremendous amount of water vapor into the air. Without proper mechanical ventilation, that humidity settles against cooler drywall, wood framing, and insulation. Over time, trapped moisture rots structural lumber, ruins drywall tape, and triggers toxic mold blooms that can compromise indoor air quality and trigger allergies. Keeping your ductwork clear is one of the most cost-effective preventive maintenance steps you can take to protect your home’s structural integrity.
Recognizing the Signs of a Blocked or Faulty Exhaust Duct
Before you climb into the attic or head out to the roof, look for clues inside the bathroom itself. Your exhaust system usually leaves clear forensic evidence when something is wrong. Paying attention to these early warning signs can save you from a major renovation later.
The most obvious symptom is a drastic drop in suction power. If you hold a single square of toilet paper up to the running fan grille and it barely flutters, your airflow is severely restricted. Another major indicator is excessive condensation pooling on windows, tile grout, and metal fixtures long after you have finished showering. If water droplets are running down your walls, your fan is either underpowered or the duct is blocked.
Odor and mold are even more serious red flags. If you smell mildew every time you walk into the bathroom, or if you see dark spots forming on the ceiling drywall directly around the fan housing, moisture is lingering too long. Sometimes, a blocked duct forces moist air to back up into the fan housing, causing rust on the internal metal parts or leaking rusty brown water down onto your ceiling when the fan turns on. If you hear a loud rattling or buzzing noise, the fan motor might be struggling against a blocked duct or a stuck backdraft damper.
Beyond these immediate visual and auditory clues, consider the age of your home and when the ventilation system was last serviced. Homes built or remodeled more than a decade ago frequently feature outdated flexible plastic venting that degrades over time, sagging under its own weight and accumulating layers of household dust combined with bathroom humidity. If you have recently noticed an unexplained spike in your indoor humidity levels or if family members are experiencing increased morning congestion or allergy symptoms, your bathroom exhaust infrastructure is a prime suspect worthy of immediate investigation.

Mapping Your Duct Run and Gathering Tools
To clean and inspect your exhaust system, you need to know where the air goes. Bathroom fans rarely vent directly into the room; they connect to a length of ducting that travels through the ceiling, across the attic, and out through a roof cap, gable vent, or soffit vent. Grab a flashlight and head up into your attic to trace the ductwork from the top of the bathroom ceiling box to the exterior termination point.
As you trace the line, note what kind of material was used. Older homes or cheap DIY installations often feature flexible plastic or foil ducting. Modern building codes typically require rigid or semi-rigid metal ductwork because flexible foil sags, catches lint in its ridges, and can easily tear. Also check whether the duct is insulated. In cold climates, uninsulated metal ducts running through a freezing attic will cause warm shower air to condense inside the pipe, pooling water back down into your bathroom fan.
Gather your safety gear and tools before starting the job. You will need:
- A sturdy stepladder
- N95 dust mask and safety glasses
- A cordless drill or screwdriver
- A shop vacuum with a long hose attachment
- A flexible dryer vent cleaning brush kit with extendable rods
- Heavy-duty aluminum foil tape (not standard duct tape)
- Work gloves and a flashlight
Having the right personal protective equipment is essential because attic spaces harbor accumulated fiberglass insulation fibers, dust mites, and potential mold spores. Always wear long sleeves, sturdy shoes, and an approved dust mask when crawling around ceiling joists. Furthermore, ensure you lay down plywood boards or walk exclusively on structural ceiling joists to prevent accidentally stepping through the drywall ceiling into the rooms below. Preparation and safety safeguards ensure your maintenance session goes smoothly without unexpected property damage or personal injury.
Step-by-Step Interior Fan Cleaning and Inspection
Start your maintenance routine right at the source: the bathroom ceiling grille. Turn off the circuit breaker that controls the bathroom fan to avoid any electrical shocks while working near the motor housing.
Gently pull down the plastic ceiling grille. Most grilles are held in place by metal V-springs that squeeze into slots inside the housing. Pinch these springs together to release the grille. Once it is down, wash it in warm, soapy water to remove accumulated dust and soap scum, then set it aside to dry completely.
Look up into the fan housing. You will likely see a thick layer of dust coating the fan blower wheel and motor housing. This buildup throws the fan off balance, reduces its cubic feet per minute (CFM) output, and creates a fire hazard if it reaches the motor windings. Use your vacuum brush attachment to suck out loose dust. For stubborn grime on the fan blades, use a damp microfiber cloth or a soft-bristled brush. Many modern fan assemblies allow you unplug the motor unit and drop the entire blower assembly down for easier cleaning; check your manufacturer instructions if you are unsure.
While the grille is off, check the backdraft damper—the small plastic or metal flaps located at the exhaust outlet of the fan housing. These flaps should swing open easily when the fan runs and snap shut tightly when it turns off. If they are stuck open with lint or grease, unconditioned outdoor air will draft backward into your bathroom, and conditioned indoor air will leak out into your attic.
Taking the time to inspect the electrical connections inside the housing is also wise. Look for any signs of scorching, loose wire nuts, or degraded insulation around the wiring junction box. If you notice any electrical abnormalities, consult a licensed electrician immediately. Cleaning the fan motor housing not only restores peak exhaust performance and reduces annoying operating noise, but it also significantly extends the mechanical lifespan of the unit, saving you from premature replacement costs.
Inspecting and Cleaning Attic Duct Runs
With the interior housing clean, head up into the attic to inspect the ductwork itself. This is where many hidden ventilation failures occur. Check every foot of the duct run for the following common issues:
Sagging and Low Points: Flexible ducts must be pulled taut and supported properly with hanging straps every few feet. If a flexible duct sags in the middle, water condensation will pool in that low spot, completely blocking airflow and eventually rotting through the material.
Disconnections and Leaks: Check where the flexible duct attaches to the fan housing and the exterior vent cap. The connection should be secured with a metal worm-gear clamp or heavy-duty zip tie, and wrapped securely with aluminum foil tape. If the duct has slipped off, your fan has been pumping all that steamy shower air directly into your attic insulation, creating a prime environment for mold growth on your roof decking.
Kinks and Sharp Bends: Air does not like making sharp 90-degree turns. If your ductwork is sharply kinked or crushed under a framing member, the fan cannot push air through efficiently. Straighten out any tight bends wherever possible.
To clean the interior of the duct, disconnect it from the fan housing in the attic. Feed your flexible duct cleaning brush kit—attached to a cordless drill—into the ductwork. Spin the brush slowly as you push it toward the exterior vent cap to scour away years of accumulated lint and dust. Vacuum up any debris that falls out during the process.
Moreover, pay close attention to how the ductwork interacts with surrounding attic insulation. In many homes, installers simply bury flexible ducts underneath blown-in cellulose or fiberglass insulation. While this might look neat, the weight of deep insulation can crush flexible pipe, severely restricting airflow. Ensure the entire run remains exposed or properly suspended above the insulation layer so that air can move freely without encountering external compression.
Checking and Clearing the Exterior Exhaust Cap
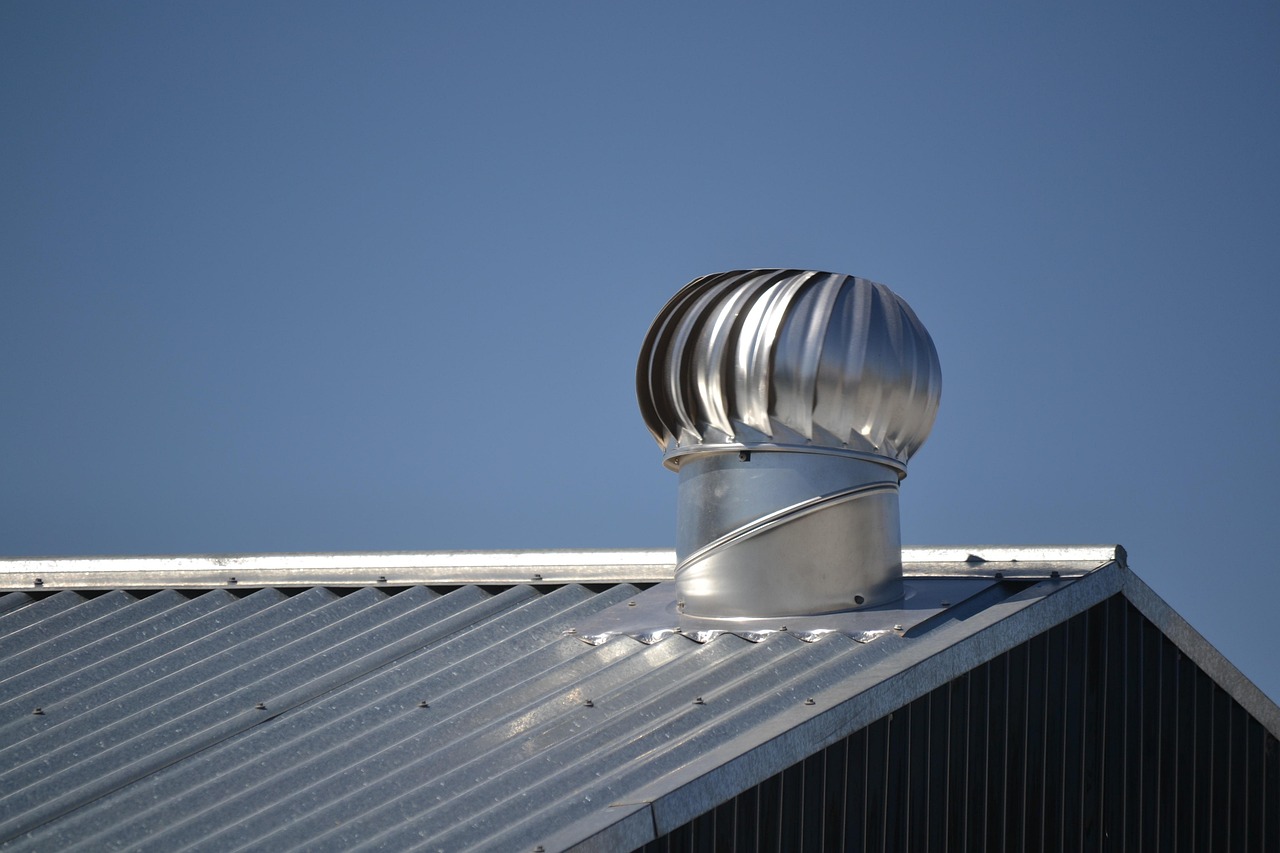
The final leg of your journey is the exterior termination point. Whether your duct exits through the roof, a side wall, or the soffit under your eaves, the outdoor cap is the most common spot for blockages. Because the air leaving the bathroom is warm and moist, it attracts lint and dust that stick to the damp exterior flaps.
Go outside and look at your exhaust vent cap. Common issues include:
- Lint Blockages: Dust and lint accumulate around the exterior damper flaps, acting like glue and keeping the flap partially or fully open. This invites mice, wasps, and cold drafts into your ductwork.
- Missing or Broken Dampers: Many older caps feature a lightweight plastic flap that snaps off in heavy wind or degrades under UV sunlight, leaving an open hole for pests.
- Screen Mesh Obstructions: Some exterior caps include a fine wire mesh screen to keep bugs out. While well-intentioned, these screens catch bathroom lint instantly, clogging the entire vent within months. If your local building codes permit, remove fine mesh screens from bathroom exhaust vents and rely solely on gravity-operated damper flaps.
Use a brush and a vacuum or gloved hand to clear away any debris around the exterior flap. Ensure the flapper swings freely and closes completely when released. If the cap is rusted, broken, or warped, replace it immediately with a durable aluminum or galvanized steel model.
It is also critical to verify where your exhaust terminates relative to other home penetrations. Some improper installations vent bathroom moisture directly into soffit areas, which immediately draws that humid air back up through attic intake vents and right back into the roof structure. If your exterior vent terminates in a soffit, consider extending the duct run to an exterior wall cap or a proper roof penetration to ensure moisture is expelled completely away from your roof overhangs and siding.
Upgrading Substandard Ductwork
If you discover during your inspection that your home uses cheap plastic accordion-style ducting or uninsulated foil pipe, consider upgrading to rigid or semi-rigid metal ductwork. Flexible plastic ducting deteriorates quickly in hot attics, tears easily when snagged, and offers high resistance to airflow due to its corrugated interior ribs.
When replacing ductwork, keep the run as short and straight as possible. Every elbow and extra foot of length reduces the fan’s efficiency. Wrap any metal ductwork running through an unconditioned attic with R-6 or R-8 fiberglass duct insulation sleeve to prevent condensation buildup inside the pipe during winter months. Seal all seams and joints securely with aluminum foil tape—never use standard cloth duct tape, as it dries out, cracks, and falls off within a couple of years in attic temperature extremes.
Investing in rigid metal ductwork pays off immediately in improved exhaust performance and peace of mind. Rigid pipes offer smooth interior surfaces that discourage lint accumulation and stand up robustly against accidental impacts from stored items in the attic. Taking the time to properly size, route, and insulate your duct system ensures your bathroom fan operates at its designated CFM rating, protecting your home against hidden moisture damage for decades to come.
Establishing an Annual Maintenance Schedule
Preventing moisture damage does not require constant labor, but it does demand consistency. Add bathroom exhaust ventilation checks to your annual home maintenance checklist alongside cleaning your gutters and testing smoke detector batteries.
Once a year, set aside an hour to pull the ceiling grilles, vacuum the fan motors, climb into the attic to check duct connections, and verify that your exterior roof or wall caps are clear and operating smoothly. If you have a large family that takes multiple steamy showers daily, you may want to clean the interior fan housing every six months. By keeping your ventilation system clear, you protect your home’s framing, maintain healthy indoor air, and ensure your bathroom stays fresh and dry for years to come.
Maintaining a proactive schedule transforms what could otherwise become an emergency repair into a simple, predictable chore. By documenting your maintenance dates and keeping basic supplies like aluminum foil tape and replacement grilles on hand, you ensure your residential ventilation system remains robust, efficient, and fully capable of handling daily humidity without putting your home at risk of structural moisture degradation.



