When winter heating bills spike, homeowners in cold-weather regions naturally look toward the roof for quick energy savings. Heat naturally rises, and if your attic lacks sufficient thermal resistance, expensive conditioned air escapes right through your ceiling. For many homeowners, the most direct solution appears to be ordering a few extra bags of loose-fill material and adding blown in attic insulation right over the top of whatever is already up there.
It sounds simple, affordable, and effective. After all, more insulation means more resistance to heat flow, right? Technically yes, but thermal dynamics in a real-world residential attic are rarely that straightforward. Before you rent a blower machine or hire a contractor to dump inches of cellulose or loose fiberglass over your existing fiberglass batt insulation, you need to evaluate the condition of your current setup, understand how air movement interacts with thermal barriers, and recognize why skipping foundational prep work can waste your investment.
To truly master attic thermal performance, you must understand that insulation is only half of the performance equation. The other half is air control. Without managing both convective air movement and conductive heat transfer, any insulation upgrade will underperform, potentially leaving you with frozen eaves, high energy bills, and hidden moisture issues. Furthermore, understanding the physical interaction between legacy fiberglass batts and new loose-fill applications prevents common missteps that DIYers frequently encounter when attempting whole-house envelope retrofits.
When planning this type of project, it helps to take a systematic approach. Rather than treating the attic as a passive storage zone or a forgotten utility space, you should view it as a critical boundary layer separating your conditioned living space from the external environment. Every gap, compressed batt, and unsealed wire penetration directly compromises the efficiency of your HVAC system, driving up winter fuel consumption and creating localized cold spots within your living quarters.
The Reality of Existing Fiberglass Batts
To understand what happens when you introduce a new layer of insulation, you first have to inspect what is currently resting on your ceiling joists. Over years or decades, fiberglass batts degrade. Gravity, humidity, roof leaks, and foot traffic compress the material, squeezing out the trapped air pockets that give fiberglass its R-value in the first place.
A compressed batt no longer delivers its nominal rating. If your home was built twenty or thirty years ago, the original batts might provide an R-value well below modern recommendations for cold climates. Furthermore, fiberglass batts are notoriously prone to installation flaws. Gaps, compression around wiring and plumbing lines, and shrinkage leave small thermal bridges where heat easily escapes.
When you dump loose-fill insulation over degraded batts, you do help fill the gaps and add bulk, but you are also locking in whatever problems lie beneath. If the old batts are damp, moldy, or contaminated by rodent activity, simply burying them creates a hidden hazard that can worsen indoor air quality or trap moisture against your drywall ceiling. Over time, organic matter or accumulated dust trapped beneath a thick new layer can foster microbial growth if any seasonal condensation finds its way down to the drywall surface.
Moreover, older batts often lack adequate width, leaving gaps between individual rolls or leaving the edges curled up. Before blowing new material on top, you should walk the attic carefully—using plywood boards laid across joists to avoid stepping through the ceiling—and manually reposition any displaced batts so they lie flat and abut one another tightly. If you notice extensive sections of the old batts are water-stained, torn to shreds, or heavily matted down by moisture or animal nesting, it is often wise to pull those damaged sections out entirely rather than layering more weight on top of compromised materials.
Another factor to weigh is the presence of radiant barriers or paper facings on older batts. Many legacy batts feature kraft paper facings that act as a vapor retarder. If you lay new insulation directly over kraft-faced batts, you need to ensure you do not inadvertently create a double vapor retarder situation, which can trap moisture in the middle of the floor assembly. Generally, slitting the paper facing of the old batts or opting for unfaced loose-fill materials helps mitigate this risk by allowing any residual vapor to migrate safely through the assembly.
Why Air Sealing Must Come First
The single most important rule of attic thermal retrofitting is that insulation does not stop air movement; it only slows conductive heat transfer. Air leakage—driven by the stack effect, where warm indoor air rises and escapes through ceiling penetrations—accounts for a massive share of winter heat loss in typical residential properties.
Common air leaks in an attic include wire penetrations, plumbing stacks, recessed light fixtures, top plates of interior and exterior walls, and the attic hatch or pull-down stair frame. If you blow new insulation over these gaps without sealing them first, you accomplish two counterproductive things:
- You trap warm, moist household air inside the floor of the attic, where it can condense against cold roof framing or the underside of the new insulation layer, leading to winter frost and spring rot.
- You continue to bleed conditioned air out of your living space, meaning your heating system must work just as hard despite the thicker insulation blanket because the convective currents continue unabated.
Comprehensive air sealing involves going through the attic with canned expanding foam and caulk to seal every single penetration, gap, and seam before a single pound of new insulation is added. Only when air movement is choked off can insulation perform at its rated capacity.
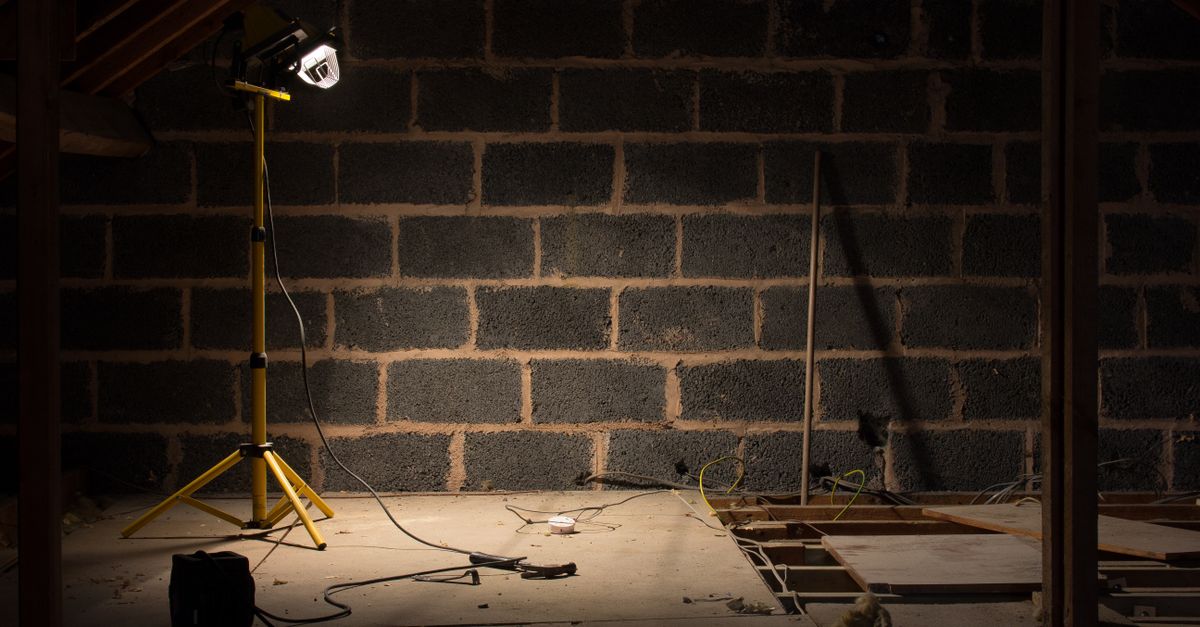
When executing air sealing, pay special attention to dropped ceilings, chases for plumbing or HVAC ducts, and the perimeter top plates where exterior walls meet the attic floor. These large bypasses leak immense volumes of conditioned air and cannot be plugged by loose-fill insulation alone, as loose material is porous and allows air currents to easily drift through it. Contractors often use rigid foam board and expanding foam to cap large open chases, such as those found behind bathtubs or kitchen soffits, before tackling smaller wire penetrations.
Do not forget the attic access hatch or drop-down stair ladder. These openings are notorious air leaks and are rarely insulated properly. Installing an insulated box cover (often called an attic tent) and adding weatherstripping around the perimeter of the hatch frame ensures that your newly sealed and insulated attic floor is not compromised by a massive unsealed hole right in the middle of the ceiling plane.
Evaluating R-Value Targets for Cold Climates
Homeowners in cold-winter climate zones face stiff heating demands, making higher R-value targets essential. The Department of Energy typically recommends between R-49 and R-60 for attics in northern regions. If your existing fiberglass batts provide roughly R-19 (about six inches of thickness), you need to bridge the gap to reach that R-49 or R-60 minimum.
When calculating how much blown-in material to add, you must look at the settled R-value per inch of the specific product you choose. Cellulose generally provides about R-3.5 to R-3.7 per inch once settled, while loose-fill fiberglass yields roughly R-2.2 to R-2.7 per inch. This difference matters greatly when you have limited vertical clearance near the eaves of your roof, as lower R-per-inch materials require greater physical thickness to achieve the same thermal resistance.
To calculate your top-off depth, measure the thickness of your current batts, convert that thickness to its estimated remaining R-value, subtract that from your target R-value, and divide the remainder by the per-inch R-value of your chosen blown-in product. For example, if you need an additional R-30 and choose cellulose at R-3.7 per inch, you will need to blow in roughly eight to nine inches of settled material.
It is also critical to account for settling. Manufacturers state settled R-values, meaning the material is installed at a slightly greater depth to compensate for natural compaction over the first year. Always follow the coverage chart printed on the side of the insulation bags rather than guessing the depth on the ruler during installation. Ignoring manufacturer coverage charts can leave your attic under-insulated once the loose fill naturally settles into its final density.
Furthermore, consider how the insulation depth interacts with your roof framing. In many standard roof designs, standard trusses or ceiling joists flatten out near the exterior walls, leaving very little vertical space between the top plate and the roof deck. If you attempt to achieve a massive R-60 target all the way to the absolute edge of the eaves using a low-density material, you run a high risk of completely choking off the soffit ventilation path unless specialized high-density insulation baffles or raised heel trusses were installed during original construction.
Batt Versus Loose-Fill Compatibility
A common question is whether mixing insulation types creates chemical or physical conflicts. Generally speaking, adding loose-fill fiberglass over fiberglass batts is completely inert. Similarly, adding cellulose over fiberglass batts is a very common industry practice that combines the bulk of old batts with the superior gap-filling characteristics of loose cellulose.
Cellulose is made from recycled paper treated with borate compounds for fire and pest resistance. Because it is denser than loose fiberglass, cellulose excels at conforming tightly around awkward framing irregularities, electrical boxes, and the edges of old batts. However, cellulose is heavier than fiberglass. If your ceiling drywall is thin, old, or poorly attached to the joists, adding a thick layer of dense cellulose can create structural sag over time, whereas loose-fill fiberglass adds minimal dead weight.
Another consideration is dust and installation cleanliness. Loose-fill fiberglass creates fine glass particulate dust that requires rigorous respiratory protection, while cellulose creates significant paper dust during the blowing process. Both materials are safe once settled, but the installation environment demands proper PPE regardless of the mix you choose.
It is also worth noting that cellulose has superior wind-resistance characteristics compared to loose-fill fiberglass. In attics with high wind exposure or powerful gable vents that allow drafts to sweep across the attic floor, loose-fill fiberglass can sometimes shift or form drifts, leaving thin spots over the ceiling joists. Cellulose packs together more cohesively, resisting displacement from minor attic drafts once it has settled into place.
The Step-by-Step Attic Upgrade Process
If you have decided to move forward with an attic thermal upgrade, following a disciplined sequence ensures safety and long-term performance.
- Safety Inspection and Cleanup: Inspect the attic for active roof leaks, knob-and-tube wiring (which must never be covered with insulation due to fire hazards), and pest contamination. Remove or remediate these issues before touching the insulation.
- Install Rafter Vents (Chutes): Ensure every soffit vent has a rigid baffle or chute installed. Blown-in insulation easily blocks airflow from the soffits, which can cause roof deck moisture and ice dams. Baffling maintains a clear airway from the soffit to the ridge vent.
- Perform Air Sealing: Use expanding foam on larger gaps and high-temperature caulk around chimneys and exhaust flues. Cover recessed light fixtures that are not rated for insulation contact with airtight covers, or replace them with modern IC-rated LED retrofits.
- Measure and Mark Joists: Staple depth ruler markers to several ceiling joists around the attic so you or your contractor can verify uniform depth while blowing the material.
- Blow the Insulation: Bring the hose up, start at the perimeter edges near the eaves (working behind your baffles), and work your way toward the attic access hatch, maintaining an even, level depth across the entire ceiling plane.
Executing these steps in order eliminates the risk of missing critical details like soffit clearance or electrical safety hazards. Taking your time during the preparation phase pays massive dividends in efficiency and peace of mind. Moreover, working systematically from the perimeter inward ensures that you do not trap yourself in a remote corner of the attic with a heavy blowing hose while filling the space.
Common Mistakes to Avoid
Even well-intentioned DIY insulation projects can run into trouble if certain pitfalls are ignored. One frequent error is burying junction boxes or recessed lights that generate heat, creating potential fire hazards. Electrical boxes must always remain accessible or be properly rated, and non-IC rated fixtures must have protective metal covers or “tent” structures built around them to maintain required clearance from insulation materials.
Another major mistake is overfilling the eaves. When insulation is blown all the way to the exterior wall top plate without a baffle, it blocks the ventilation path. Proper attic ventilation requires continuous intake at the soffits and exhaust at the top of the roof. Choking off ventilation traps humidity, leading to condensation, wood rot, and ruined insulation.
Finally, failing to wear proper personal protective equipment during the installation process causes immediate respiratory and skin irritation. Whether handling itchy loose fiberglass or dusty cellulose, always wear an N95 or P100 respirator mask, safety glasses, gloves, and long sleeves to prevent particulate contact.
Additionally, avoid walking directly on ceiling drywall between joists. Always keep your feet securely planted on structural framing members or lay down temporary plywood walkways to prevent catastrophic falls through the ceiling below. One misstep onto unsupported drywall can result in costly ceiling repairs and personal injury.
Cost and Return on Investment Expectations
Homeowners often ask whether the winter heating bill savings justify the upfront expense of adding insulation. While utility savings depend heavily on your local climate, fuel source (gas, oil, or electric resistance), and baseline energy usage, attic insulation consistently ranks among the highest return-on-investment home improvements.
When you seal air leaks and bring an under-insulated attic up to modern R-value standards, you can often expect noticeable reductions in seasonal heating energy consumption. More importantly, the qualitative benefits are immediate: rooms that used to feel drafty and cold in January maintain a steady temperature, and your heating equipment cycles less frequently, reducing mechanical wear and tear over the lifespan of the furnace or heat pump.
While professional installation costs vary depending on square footage and regional labor rates, DIY projects involving rented blowing machines significantly reduce out-of-pocket expenses. Most home improvement centers will loan or rent the blowing machine for free if you purchase a minimum number of insulation bags, making this a cost-effective weekend project for capable homeowners who are comfortable working in tight, dusty spaces.
It is also worth checking with your local electric or gas utility provider. Many utilities offer generous cash-back rebates or low-interest financing programs specifically for attic air sealing and insulation upgrades, provided the work meets certain R-value thresholds and is verified by an energy audit. Taking advantage of these programs can drastically shorten your payback period.
Conclusion
Upgrading your attic is one of the most effective ways to make your home more comfortable during freezing winter months while reining in utility costs. However, treating the project as a simple matter of dumping material on top of old fiberglass batts overlooks the foundational physics of thermal performance.
By prioritizing comprehensive air sealing, verifying that your existing batts are dry and undamaged, protecting your soffit ventilation with baffles, and calculating the exact R-value target for your climate zone, you can turn a basic DIY weekend project into a durable, high-performance energy upgrade. Take the time to prep correctly, and your home will reward you with steady comfort and lower heating bills for years to come.