
When optimizing home comfort and reducing monthly heating bills, maximizing your basement bulkhead cellar door insulation energy savings US strategy represents one of the highest-yield home improvement projects available. Exterior angled metal hatch doors—frequently referred to by trade names like Bilco or Gordon doors—are standard architectural features on millions of residences across the Northeast, Midwest, and Mid-Atlantic regions. Designed primarily for rugged durability, exterior access, and security, these heavy-gauge steel structures were never engineered with modern energy efficiency in mind. Left uninsulated and unsealed, a metal bulkhead acts as an open thermal siphon, pulling valuable interior heat out of your home while allowing biting winter air to stream unchecked down your cellar stairs.
Homeowners struggling with drafty basements, freezing floor joists, or damp stairwells usually turn to two primary retrofit solutions: installing interior rigid foam insulation kits or fitting heavy-duty perimeter weatherstripping seals. Each approach targets a completely different physics problem. Weatherstripping stops convective air leakage around the door’s edges, while rigid insulation kits eliminate conductive heat transfer through the cold steel plates themselves. Deciding which method—or combination of methods—will deliver the highest energy savings requires a deep look into how thermal energy moves through basement structures, how seasonal air pressure impacts foundation envelopes, and how these products perform under real-world weather conditions.
The Thermal Dynamics of Exterior Hatch Doors
To understand why cellar bulkheads cause such severe comfort issues, it is essential to examine the physical properties of the materials involved. Standard residential bulkhead doors are constructed from sheet steel, typically between 12-gauge and 14-gauge thickness, mounted onto steel frame channels and set atop a poured concrete or stone masonry curb. Steel has an extraordinarily high thermal conductivity rating, allowing heat energy to pass through it thousands of times faster than through traditional wood or insulated fiberglass building envelopes.
An uninsulated steel sheet has an effective thermal resistance value near R-0.5. During cold winter months when outdoor temperatures hover at 20°F (-6°C), radiant and conductive transfer causes the interior surface of the metal door to drop to nearly identical freezing temperatures within minutes. This rapid thermal bridge initiates three destructive cycles within the basement stairwell:
- Conductive Heat Loss: Heat naturally moves from warmer environments to colder environments. Heated air from the basement flows up into the stairwell, where its energy is rapidly absorbed by the freezing steel panels and radiated directly into the outdoor atmosphere.
- Stack-Effect Convective Infiltration: As warm air inside the upper floors of the home rises and exits through upper-story air leaks, it creates negative air pressure in the basement. This pressure imbalance actively sucks outdoor air through any open seam around the exterior cellar door, creating strong downward drafts.
- Surface Condensation and Humidity Cycles: When warm, moisture-laden air from inside the home comes into contact with the sub-freezing interior surface of the steel hatch, the moisture instantly condenses into liquid water droplets. Over time, this chronic moisture accumulation causes rusting hinges, water damage to concrete steps, rot in wood door frames, and widespread mold proliferation.
Stopping this process requires a clear understanding of whether air leakage (convection) or thermal transfer (conduction) is the primary driver of heat loss in your specific home setup.
Deep Dive: Rigid Foam Insulation Panel Kits
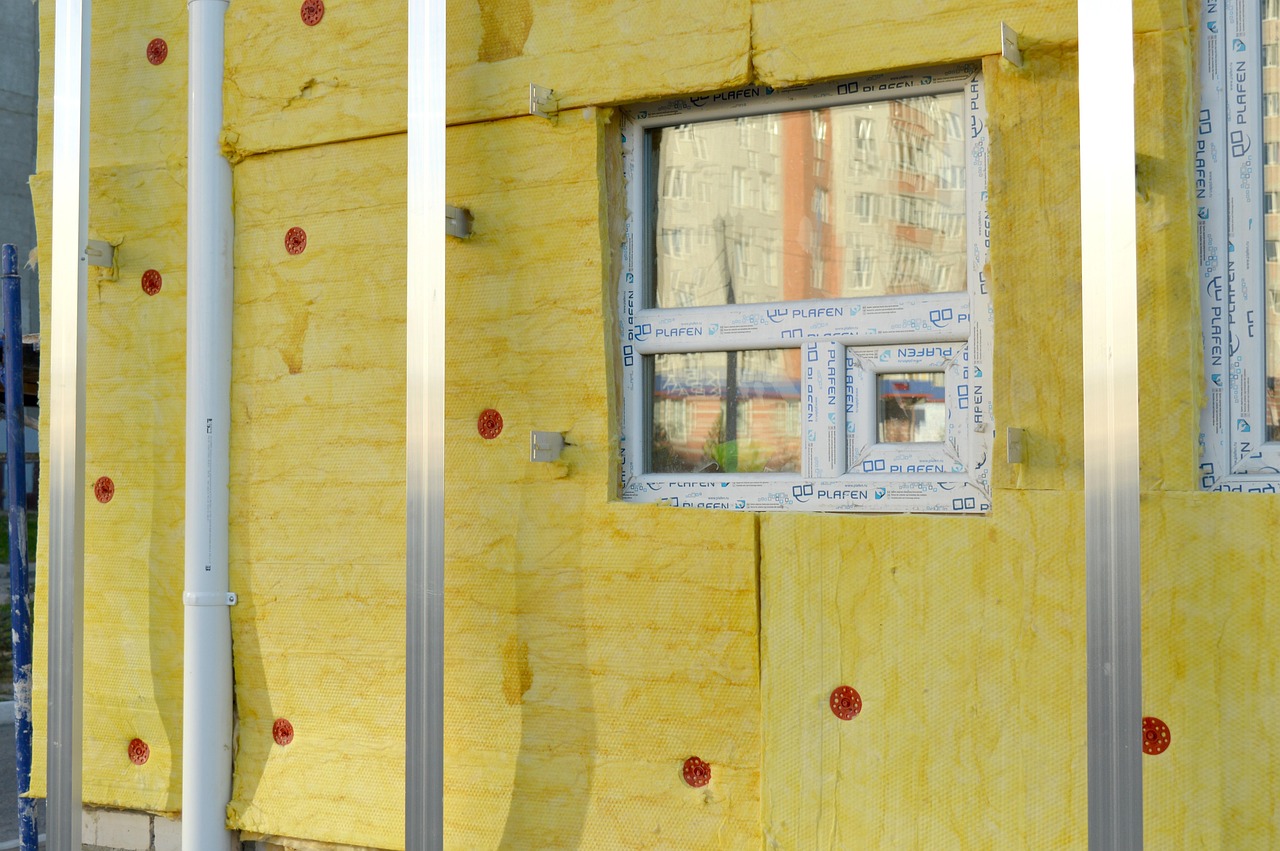
Basement bulkhead door insulation kits are engineered to provide a robust thermal break directly against the underside of the sloped metal door leaves. These kits typically rely on rigid foam board products, such as Extruded Polystyrene (XPS), Expanded Polystyrene (EPS), or Polyisocyanurate (polyiso), frequently laminated with a reflective foil facing.
Material Performance and R-Value Efficiency
The primary function of a rigid foam kit is to increase the R-value of the door assembly from an abysmal R-0.5 up to an efficient R-5, R-10, or higher, depending on foam thickness:
- Expanded Polystyrene (EPS): Offers roughly R-3.8 to R-4.0 per inch of thickness. While budget-friendly, EPS is slightly less dense and can absorb moisture over time if exposed to liquid condensation cycles.
- Extruded Polystyrene (XPS): Provides R-5.0 per inch. Recognized by its distinct blue or pink coloring, XPS features a closed-cell structure that resists water absorption, making it an excellent choice for damp basement stairwells.
- Polyisocyanurate (Polyiso): Delivers an impressive R-6.0 to R-6.5 per inch. Polyiso panels typically come with radiant aluminum foil facings on both sides. The foil layer reflects radiant heat back toward the interior stairwell during winter and blocks radiant solar heating during hot summer afternoons.
Condensation Suppression and Anti-Sweat Benefits
The most transformative advantage of adding rigid foam insulation panels to a steel bulkhead door is the complete elimination of interior condensation—commonly called door sweat. By covering the raw steel underside with continuous, vapor-impermeable closed-cell foam, indoor air is prevented from contacting the cold metal. Without direct air-to-metal contact, condensation cannot form. This keeps the stairwell dry, prevents rust on critical safety latches, and eliminates the damp environment required for mold and mildew growth.
Limitations of Insulation Panel Kits
Despite their high thermal resistance, insulation kits are not a total solution when used in isolation. Rigid foam boards bonded to the undersides of moving door panels do not automatically seal perimeter gaps along the outer frame or center lap joint. If wind can blow around the edges of the door leaves, cold outdoor air will bypass the insulation panels entirely, dumping cold air straight down the steps. Furthermore, adding 1.5 to 2 inches of foam board reduces interior headroom clearance, which can be an important consideration for taller homeowners navigating tight stairwells.
Deep Dive: Perimeter Weatherstripping & Gasket Systems
Weatherstripping systems take aim at air infiltration rather than thermal conduction. The goal of weatherstripping is to turn the mechanical interface between the moving metal door leaves and the fixed foundation frame into an airtight seal.
Types of Weatherstripping Suitable for Cellar Doors
Standard indoor foam tapes are ill-suited for the harsh moisture and temperature fluctuations experienced by exterior cellar doors. Durable exterior retrofits rely on industrial-grade materials:
- EPDM Rubber Bulb Seals: Flexible Ethylene Propylene Diene Monomer (EPDM) synthetic rubber retains its elasticity in extreme cold down to -40°F (-40°C). Hollow bulb profiles compress flat when heavy steel doors shut, conforming to uneven or slightly warped metal edges.
- Neoprene Sponge Rubber Gaskets: Dense closed-cell neoprene strips provide heavy compression strength, making them ideal for placement along the flat bottom threshold where the steel door hits the concrete curb.
- Silicone D-Profile Strip Seals: Highly resilient against UV light, moisture, and extreme temperature cycling. Silicone seals remain flexible over long periods without taking a permanent compression set.
- Flexible Vinyl or Brush Sweeps: Applied along the vertical overlap seam where the two door leaves lock together in the center to prevent wind-driven rain and snow from penetrating the seam.
Controlling Air Infiltration and Drafts
Air leakage represents a massive component of total building energy loss. A 1/8-inch gap extending around the 15-foot cumulative perimeter of a standard bulkhead door equals an open 22-square-inch hole leading directly into your home. Installing high-grade weatherstripping seals this hole completely, stopping air migration driven by outdoor wind pressure and interior stack effect. Eliminating these direct air drafts produces an immediate, noticeable improvement in floor temperatures on the main basement level.
Limitations of Weatherstripping
While weatherstripping effectively locks out physical wind, rain, debris, and pests, it provides zero conductive thermal resistance. An airtight steel bulkhead door will still feel ice-cold to the touch. Heat from the basement will continue to flow into the stairwell and escape through the uninsulated metal surface via conductive radiation, leaving the air inside the uninsulated enclosure significantly colder than the rest of the home.

Comprehensive Comparison: Kits vs. Weatherstripping
Understanding how rigid foam insulation kits compare against heavy-duty weatherstripping allows homeowners to prioritize their investment based on existing symptoms, installation skills, and energy goals.
| Evaluation Factor | Rigid Foam Insulation Panel Kits | Heavy-Duty Weatherstripping Systems |
|---|---|---|
| Primary Energy Target | Conductive & Radiant Heat Loss | Convective Drafts & Air Infiltration |
| Thermal Resistance Rating | High (R-5 to R-13 depending on thickness) | None (R-0 improvement) |
| Draft & Air Sealing Impact | Low to Moderate (requires secondary edge sealing) | Exceptional (creates airtight compression seal) |
| Condensation & Rust Control | Outstanding (prevents moist air touching cold steel) | Minimal (metal interior stays cold) |
| Infiltration of Rain, Dust, & Pests | No impact on exterior seal | High (blocks debris, water, spiders, and rodents) |
| Impact on Interior Clearance | Reduces head clearance by 1 to 2 inches | Zero impact on stairwell headroom |
| Installation Complexity | Moderate (measuring, cutting, adhesive curing) | Low to Moderate (surface prep, peeling, alignment) |
| Material Longevity | 15–20+ years (protected from exterior elements) | 5–10 years (subject to mechanical wear & UV) |
Evaluating Energy Savings, Climate Zones, and ROI
Achieving meaningful basement bulkhead cellar door insulation energy savings US performance depends heavily on your geographic climate zone and the structural layout of your basement entry.
Impact by US Climate Zone
The US Department of Energy divides the country into distinct climate zones. The energy financial return on a bulkhead insulation retrofit varies based on local weather conditions:
- Zones 5, 6, and 7 (Cold / Very Cold – Northeast, Upper Midwest, Northern Rockies): Homeowners experience severe temperature differentials during 5- to 7-month heating seasons. Insulating and sealing exterior cellar doors in these regions yields substantial reductions in fuel oil, natural gas, propane, or electric heating costs. Investment payback cycles often range between 1 and 3 winter seasons.
- Zone 4 (Mixed-Humid / Temperate – Mid-Atlantic, Lower Midwest): Winter heating loads are moderate, but summer air conditioning loads are elevated. Foil-faced insulation kits pay dual dividends here by blocking solar thermal radiation during hot, humid July afternoons while keeping moderate winter drafts at bay. Payback cycles typically span 2 to 4 years.
- Zone 3 and Below (Warm / Hot Climates): Conductive winter heat loss is minimal, but summer heat gain and excessive outdoor humidity present risks. Sealing out humid air prevents summer basement moisture build-up and reduces dehumidifier electrical consumption.
Basement Layout: Finished Living Space vs. Unconditioned Storage
The economic return of a cellar door retrofit is heavily influenced by how the basement space is used and partitioned:
Scenario 1: Open or Finished Basements. If your basement stairwell opens directly into a finished family room, home office, or heated play area without an insulated door at the bottom of the steps, the bulkhead door represents a major boundary breach in your thermal envelope. Insulating and weatherstripping the hatch delivers immediate energy reductions, eliminates floor-level cold spots upstairs, and stabilizes thermostat readings across the ground floor.
Scenario 2: Unconditioned Utility Spaces with Insulated Interior Doors. If your home features a secondary, fully insulated wood or fiberglass exterior-grade door situated at the bottom or top of the masonry basement steps, the thermal boundary is located at that interior door. Retrofitting the upper steel hatch primary benefits the stairwell microclimate—preventing frozen water pipes, protecting stored belongings, stopping concrete frost-heaving, and reducing moisture migration into the foundation walls.
The Hybrid Strategy: Achieving Complete Envelope Sealing
Because rigid foam panels solve thermal conduction while weatherstripping solves air infiltration, building science professionals overwhelmingly advocate for a combined, two-stage hybrid retrofit. Integrating both methods guarantees comprehensive envelope performance and delivers the maximum achievable energy savings.
By pairing 1.5-inch to 2-inch foil-faced rigid foam panels on the door undersides with heavy-duty EPDM rubber bulb gaskets along the perimeter edges, you construct a complete thermal barrier. The weatherstripping halts cold air currents before they enter the stairwell, while the foil-faced foam boards insulate the steel plates, preventing radiant losses and eliminating internal door condensation.
Step-by-Step DIY Retrofit Installation Guide
Executing a high-performance hybrid retrofit on a standard double-leaf steel bulkhead door can easily be completed in a single weekend with basic tools.
Phase 1: Exterior Frame and Surface Preparation
- Inspect and Repair the Foundation Curb: Examine the masonry or concrete curb where the steel frame meets the foundation. Clean away old, cracked caulking. Fill open voids or structural gaps with exterior polyurethane masonry sealant or high-density minimal-expansion spray foam.
- Clean Metal Contact Surfaces: Scrape away flaking paint, surface rust, and grime along the steel door frame rim using a wire brush. Wipe down all mounting surfaces with denatured alcohol or acetone to remove oil residues, ensuring strong adhesive bonding for weatherstripping tapes.
- Paint Raw Steel Areas: Apply a high-quality rust-inhibiting exterior metal primer and topcoat over any exposed bare steel sections to stop corrosion before sealing.
Phase 2: Applying Precision Weatherstripping Seals
- Install Frame Perimeter Gaskets: Apply heavy-duty EPDM hollow bulb gasket tape along the inner horizontal lip of the fixed frame where the door leaves settle when shut. Ensure continuous coverage along the side jambs and top header.
- Seal the Lower Threshold: Attach a thick neoprene foam compression strip along the bottom sill plate where the lower edges of the metal doors make contact.
- Equip the Center Overlap Flange: Stick a durable silicone wiper strip or flexible vinyl seal down the vertical lip of the overlapping door leaf. When both doors are shut and latched, this seal creates a tight barrier against driving rain and wind.
- Perform a Daylight Test: Step inside the stairwell, close the bulkhead doors completely, and turn off interior lights. Look for daylight leaking through the perimeter. Adjust gasket positioning or apply additional seal depth until no outdoor light passes through.
Phase 3: Measuring, Cutting, and Bonding Rigid Foam Panels
- Measure Panel Recesses Carefully: Measure the recessed underside sections of each steel door leaf individually. Factor in a 1/2-inch offset around all moving components, including slide bolts, safety release handles, hold-open hinges, and spring-assist mechanisms, to ensure smooth operation.
- Cut the Rigid Insulation Boards: Using a sharp utility knife and a heavy aluminum straightedge, score and snap 1.5-inch or 2-inch foil-faced polyisocyanurate or XPS foam panels to match your interior measurements. Bevel panel edges slightly along sloped door angles for a tight, flush fit.
- Apply Construction Adhesive: Select a specialized foam-safe panel adhesive (such as Loctite PL Premium Fast Grab or similar solvent-free formulations). Apply generous 3/8-inch zigzag beads of adhesive across the back of the foam panels. Do not use standard solvent-based adhesives, as aggressive organic solvents will chemically dissolve polystyrene foam.
- Mount and Prop Panels: Press each foam panel firmly onto the clean interior underside of the steel doors. Use temporary wooden prop sticks wedged gently against the concrete steps to maintain constant pressure while the adhesive cures (typically 12 to 24 hours).
- Seal Panel Edges with Foil HVAC Tape: Cover all exposed foam edges, seam cuts, and perimeter joints with heavy-duty 2-inch or 3-inch aluminum foil HVAC tape. Tape seals raw foam core edges against moisture absorption and creates an attractive, uniform reflective finish.
Safety Considerations, Egress, and Building Codes
While maximizing home energy efficiency is critical, retrofitting a cellar door requires strict adherence to safety standards and structural guidelines:
- Emergency Egress Unobstructed Access: In many jurisdictions, basement bulkhead doors serve as secondary egress routes required by residential building codes (such as IRC standards for habitable basements). Never apply insulation, weatherstripping, or adhesives in a way that jams, obstructs, or delays the operation of internal release latches or emergency release bars. Ensure that all household members can quickly operate safety mechanisms from inside the stairwell.
- Counterbalance Spring Calibration: Modern steel bulkhead doors utilize heavy steel torsion rods or compressed gas struts to assist users in lifting heavy metal doors. Adding heavy wood framing or excessively thick insulation boards adds weight. Keep retrofits lightweight by sticking strictly to high-density foam panels so you do not overload lifting hardware or cause doors to slam shut unexpectedly.
- Fire Safety Requirements: Exposed plastic foam board insulation can represent a fire hazard if exposed to direct flame or electrical wiring. In finished spaces, building codes often require rigid foam insulation to be covered by an approved thermal barrier (such as 1/2-inch drywall). Check local municipal codes if your bulkhead stairwell opens directly into a finished interior living area.
Frequently Asked Questions
Can I spray expanding foam insulation directly onto the underside of my steel bulkhead door?
While closed-cell spray foam provides good insulation, applying canned expanding foam across large steel door panels is strongly discouraged. It cures with an uneven, unsightly texture, adds unpredictable weight that can unbalance lift springs, and creates a messy fire hazard that is difficult to trim neatly without jamming hinges and latch mechanisms. Pre-cut rigid foil-faced foam boards secured with foam-safe construction adhesive deliver a far cleaner, safer, and more controllable finish.
How do I know if my heat loss is coming from the bulkhead door or the interior basement door?
You can identify heat loss sources by conducting a simple visual or thermal draft inspection. On a cold day, hold a smoke pencil, incense stick, or thermal camera near the perimeter of the interior door at the top or bottom of the cellar stairs. If you detect strong airflow or temperature drops under 50°F (10°C), the interior door seal is leaking. Next, inspect the exterior steel hatch. If the stairwell air feels almost identical to outdoor temperatures and condensation drips down the metal undersides, the exterior hatch requires insulation and weatherstripping upgrades.
Will weatherstripping prevent rain from leaking into my basement during storms?
Yes. Installing thick, weather-resistant EPDM rubber bulb seals and threshold compression gaskets stops surface water runoff, wind-driven rain, and melting snow from blowing past the door flanges into the stairwell. However, if water is pooling around the base of your foundation due to clogged gutters or poor yard grading, water may enter under the concrete foundation curb itself, requiring masonry sealant, exterior flashing, or improved drainage grading around the hatch structure.
What is the best way to insulate a cellar door in high-humidity regions?
In high-humidity climates, prioritize moisture resistance by selecting 1.5-inch closed-cell Extruded Polystyrene (XPS) or double-foil-faced Polyisocyanurate rigid foam board. Pair the panels with continuous exterior EPDM rubber bulb gaskets to keep humid outdoor air from penetrating the stairwell during summer months. Always tape all raw panel cuts thoroughly with waterproof aluminum foil tape to seal out humidity completely.
Final Decision Framework
Determining the right combination of retrofits for your home comes down to identifying your primary symptoms and budget considerations:
If your chief complaint is biting winter drafts and outdoor wind blowing down the stairs, begin by installing a complete EPDM rubber weatherstripping system and sealing foundation curb joints. Weatherstripping offers the fastest, lowest-cost fix to active air infiltration, immediately restoring draft-free comfort to your basement floor.
If your chief complaint is heavy metal sweating, dripping ceiling moisture, mold accumulation, or extreme summer solar heat gain, install foil-faced rigid foam insulation panel kits onto the underside of the steel doors. Insulation panels block conductive thermal transfer and eliminate condensation cycles on metal surfaces.
For homeowners committed to realizing maximum long-term basement bulkhead cellar door insulation energy savings US performance, implementing a hybrid approach—combining perimeter weatherstripping gaskets with custom-fitted foil-faced rigid foam panels—provides the ultimate thermal envelope barrier. This complete upgrade keeps your stairwell dry, stabilizes basement temperatures, stops cold drafts, and delivers measurable energy bill savings season after season.