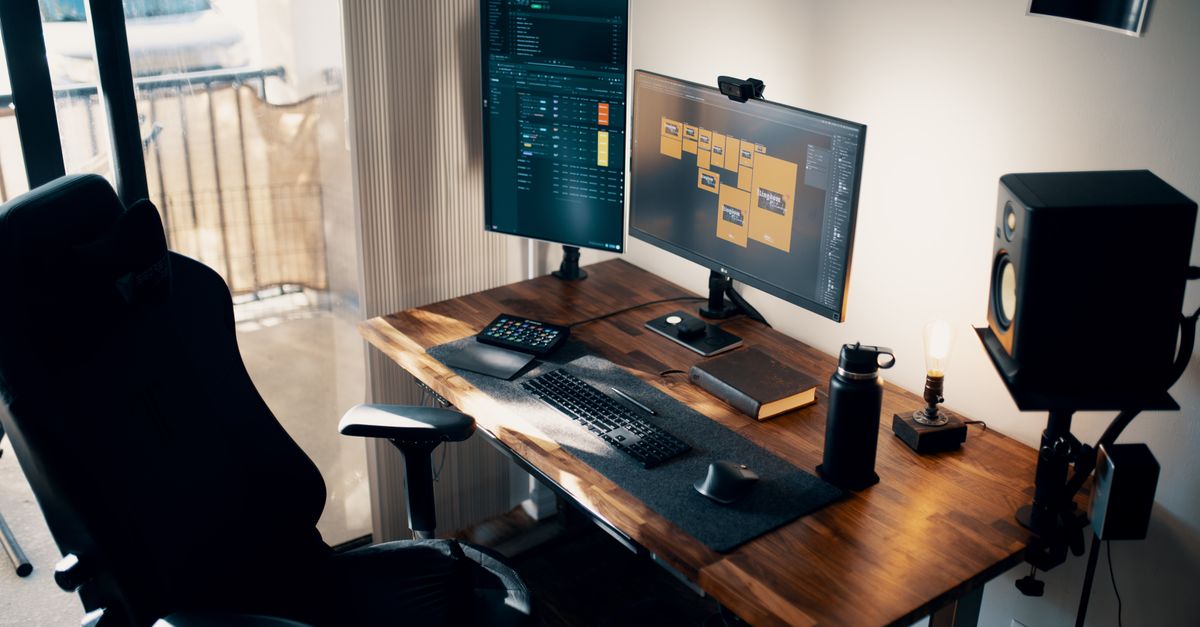
When your daily routine involves spending eight to ten hours staring at screens, your physical workspace plays a direct role in your comfort, focus, and long-term joint health. For remote knowledge workers, the battle against neck strain, shoulder tension, and cluttered work surfaces is ongoing. One of the most effective hardware modifications you can make is executing a proper desktop monitor shelf riser setup. By lifting your primary display off the main work surface, a wooden or metal riser solves two distinct home office challenges simultaneously: it corrects your ergonomic viewing angle and creates a hidden storage shelf for your keyboard, notebook, and daily accessories.
Yet, simply dropping a shelf onto your desk and placing a heavy monitor on top can introduce new problems if it is done without planning. Issues range from desk sagging and clamp instability to improper screen height that leaves your cervical spine bent at an awkward angle. This guide covers how to evaluate your hardware, select the right physical dimensions, install the shelf securely, and configure your workstation for maximum daily comfort.
The Ergonomic Foundation: Why Height and Depth Matter
Before looking at aesthetics or storage capacity, you must understand the ergonomic baseline of a proper workspace. Most standard desks sit at a fixed height of around 28 to 30 inches, which is generally designed for writing on paper rather than viewing a glowing digital display. When you place a standard monitor directly on the desktop, gravity forces you to look downward. Tilting your chin down for hours at a time places immense pressure on the cervical vertebrae, often leading to tension headaches, shoulder fatigue, and lower back slouching.
The goal of a desktop monitor shelf riser setup is to bring the top third of your display screen to eye level when you are sitting fully upright with your shoulders relaxed. When your gaze naturally meets this upper sweet spot, your neck remains in a neutral, balanced position. Furthermore, positioning the monitor at an arm’s length distance prevents eye strain and encourages you to lean back into your chair support rather than hunching forward toward the glass.
Understanding the geometry of your body in relation to office furniture requires looking at your skeletal alignment from multiple angles. When you slouch, your pelvis rolls backward, which flattens the natural lumbar curve of your lower back and forces your upper thoracic spine to curve outward. This compensatory rounding pulls your head forward—a posture often called anterior head carriage. For every inch your head moves forward from its neutral position over your shoulders, the effective weight load experienced by your neck muscles and cervical spine increases dramatically. By lifting your display to the correct height using a solid monitor shelf, you eliminate the primary visual trigger that causes you to crane your neck downward.
In addition to vertical height, horizontal viewing distance plays a vital role in preventing visual fatigue. Your eyes naturally relax when viewing objects at a distance greater than 20 feet, but office work requires sustained near-point focus. If your desk is too shallow—meaning under 24 inches in depth—even a properly elevated monitor will sit too close to your face. This forces your eye muscles to work harder to maintain focus, leading to digital eye strain symptoms such as dryness, blurred vision, and burning. Combining a monitor riser with an appropriately deep work surface ensures you maintain that critical 20-to-30-inch gap between your pupils and the screen.
Evaluating Weight Capacity and Desk Material Compatibility
Not all desks and risers are created equal. Before purchasing or installing a shelf, you need to audit the weight of your display equipment and the structural integrity of your desktop surface. A standard single 27-inch monitor might weigh between 10 and 15 pounds with its stand removed, whereas a heavy 34-inch ultrawide display or a dual-monitor arm mounted to a shelf can easily push past 30 to 40 pounds of concentrated downward force.
Check the manufacturer specifications of your chosen shelf to confirm its maximum weight threshold. If you are using a solid hardwood desktop, it can generally handle significant weight without complaint. However, if your home office features a hollow-core desk or a lightweight particleboard surface from an assembly-it-yourself retailer, heavy clamp-on shelves can crush the inner honeycomb structure or crack the laminate veneer. For weaker desktop materials, opt for wide-footed resting risers that distribute the weight across a larger surface area rather than concentrated pinch points.
Beyond the riser itself, consider the long-term load characteristics of your desk. Hollow-core desks are notoriously fragile when subjected to localized clamping pressure. Many popular flat-pack desks consist of thin wood veneer skins separated by corrugated cardboard lattices. When a heavy monitor shelf clamp is tightened onto this type of edge, the internal structure collapses under the torque. If you own a hollow-core desk and insist on using a clamp-on shelf, you must use large distribution plates—sometimes called load-spreading blocks—on both the top and bottom surfaces to disperse the clamping force over a broader area of wood.
Solid wood slabs, butcher block counters, and high-density fiberboard (HDF) offer much higher resistance to compression and bending. However, even sturdy materials can develop a permanent center bow if you place a heavy monitor on a long, unsupported shelf span. If your riser spans 40 inches or more without a central leg or vertical dividing wall, check if the material incorporates a hidden steel reinforcement channel underneath. Selecting materials like solid walnut, oak, or industrial-grade steel guarantees that your display platform remains dead-flat over years of daily service.
Choosing Between Resting Risers and Clamp-On Shelves
Desktop risers generally fall into two distinct mechanical categories: resting units and clamp-on units. Each option comes with specific trade-offs regarding stability, installation complexity, and desk preservation.
Resting risers typically feature four legs or two solid side panels that simply sit on top of your desk. They require no tools for installation and can be repositioned in seconds. They are ideal if you frequently rearrange your workspace or rent your living space and want to avoid drilling or clamping marks. The primary trade-off is that they consume valuable surface footprint on the top of your desk where the legs make contact.
Clamp-on shelves, conversely, use heavy-duty C-clamps or grommet mounts to attach directly to the rear edge of your desk, suspending the shelf slightly above the surface. This design creates a floating effect and reclaims 100% of your desk’s top surface area underneath the shelf. However, they require an overhanging desk edge, take more time to align properly, and demand careful tightening to avoid warping the desk material.
When deciding between these two architectural styles, examine the physical layout of your existing desk and your personal workflow habits. If you use a motorized standing desk, cable management and vibration mitigation become crucial factors. Resting risers are susceptible to lateral wobble if your standing desk shakes slightly when transitioning between sitting and standing heights. Clamp-on shelves, because they are mechanically locked to the desktop moving frame, tend to move in unison with the desk surface, reducing relative motion between your eyes and the monitor during height transitions.
On the other hand, resting risers offer unmatched versatility. If you frequently need to pull your monitor closer for detailed design work or push it back to make room for sketching on physical paper, a resting shelf can be slid across the desk effortlessly. Furthermore, resting risers often include built-in accessory drawers, phone slots, or pen trays carved directly into the wood, providing modular organization features that clamp-on floating shelves rarely match due to their minimalist structural requirements.
Step-by-Step Installation and Alignment
Once you have selected your hardware and cleared your desk, follow a methodical approach to installation to ensure safety and precision.
- Clear the Surface: Remove everything from your main desk. Wipe down the surface to eliminate dust, debris, or oils that could cause a resting riser to slide or a clamp to slip.
- Position the Riser: If you are using a resting shelf, center it directly in front of your primary seating position, keeping in mind where your keyboard and mouse will live. If you are using a clamp-on model, secure the rear brackets loosely first, checking for level alignment across the span.
- Manage Weight Distribution: Place the heaviest part of your monitor base or monitor arm mount directly over or near the structural support legs of the shelf to prevent bowing over time, especially if you are using a solid wood board that lacks a metal reinforcement spine.
- Mount the Display: Carefully lift your monitor onto the platform. If you are attaching an independent monitor arm to the shelf, ensure the shelf’s clamp can handle the localized torque of an articulating arm extending outward.
Achieving absolute precision during this installation phase prevents chronic ergonomic discomfort later. Once the riser and monitor are in place, sit down in your office chair and adjust your posture. Plant your feet flat on the floor, set your seat height so your knees form a comfortable 90-degree angle, and let your arms rest naturally on your armrests. Close your eyes, take a deep breath, and open them. Your natural gaze should land squarely within the upper third of the monitor screen without requiring you to tilt your chin up or down.
If your gaze falls too low, you may need to introduce additional height spacers or switch to an adjustable-height monitor stand. Conversely, if you find yourself looking upward, your desk surface or chair height may need secondary tuning. Take the time during this initial setup phase to test different window placements and application layouts on your screen. Ensuring that your primary work windows—such as document editors or code environments—sit right at eye level will eliminate unconscious neck micro-movements that accumulate into severe muscle fatigue by the end of the work week.
Maximizing Under-Shelf Storage and Cable Management
The secondary benefit of a desktop monitor shelf riser setup is the usable cavity created underneath the elevated platform. This space acts as a garage for your input devices and daily tools at the end of the workday.
Measure the vertical clearance beneath your shelf before buying. A clearance of 3 to 4 inches is usually sufficient to slide a standard mechanical keyboard, mouse, and a slim notepad completely out of sight when you need a clean surface for writing, drawing, or reviewing physical documents. This clear separation between digital tasks and analog tasks helps maintain mental focus.
Under-shelf space is also prime real estate for cable management. Instead of letting power bricks, USB hubs, and display cords dangle behind your desk, secure a small wire management tray or adhesive clips to the underside of the riser. Routing your cables cleanly beneath the shelf keeps them from tangling with your keyboard feet and creates a polished, professional look that eliminates visual clutter from your field of view.
Effective cable management under a monitor shelf requires strategic planning of your power delivery and data pathways. Start by mounting a compact surge protector or power strip directly to the underside of your desk or the back of the riser using heavy-duty hook-and-loop fasteners. This keeps power bricks off the floor where they collect dust and get kicked by your feet. Next, bundle your monitor power cord, HDMI or DisplayPort cables, and USB-C peripheral lines together using split-sleeve braided tubing or Velcro cable ties.
By routing this consolidated bundle through a central opening or along the rear lip of the shelf, you prevent unsightly cord loops from spilling over the front edge of your workspace. If you use a laptop docked beneath the shelf, ensure that your connection cables have enough slack to accommodate plugging and unplugging without straining the ports on your machine. A tidy under-shelf environment not only looks professional on video conference calls but also reduces tactile distractions during high-focus tasks.
Common Setup Mistakes to Avoid
Even with high-quality hardware, several common oversights can compromise your ergonomic setup. Avoid these pitfalls during your installation:
- Overlooking Desk Depth: If your desk is too shallow, elevating your monitor will force it too close to your face. Ensure your desk is at least 24 to 30 inches deep so your eyes maintain a healthy distance from the screen.
- Ignoring Keyboard Height: While the monitor goes up, your keyboard stays down. Make sure your chair armrests and desk height allow your elbows to bend at a comfortable 90-degree angle when typing on the main desk surface.
- Skipping Level Checks: A crooked monitor shelf causes chronic eye strain because your brain constantly tries to level the horizon. Always use a small bubble level during installation.
- Overloading the Center Span: Solid wood and bamboo shelves can sag over the years if loaded with heavy gear directly in the middle without a central support strut. Distribute weight evenly toward the outer edges.
Another frequent error is failing to account for peripheral clearance when placing office gear around the riser base. For instance, if you use external desktop speakers or studio monitors, setting them directly on the same shelf as your primary display can transmit mechanical vibrations through the desk surface, causing audio distortion or rattling noises during video calls. Separate your audio gear by placing speakers on dedicated desktop stands on either side of the riser rather than crowding them onto the elevated platform.
Additionally, pay close attention to lighting angles. When you elevate your monitor, you may inadvertently change how overhead room lights or desk lamps reflect off the glass surface. Glossy monitor panels act like mirrors when positioned directly beneath harsh ceiling lights. Ensure your monitor maintains a slight downward tilt—around 5 to 10 degrees—to deflect overhead glare away from your eyes, or position your desk perpendicular to windows rather than directly facing or backing them.
Maintaining and Adjusting Your Workstation Over Time
Ergonomics is not a set-it-and-forget-it project. As your workflow evolves—perhaps transitioning from a single laptop to a desktop tower and dual screens—your hardware configuration must adapt with it. Periodically check the tightness of any clamps or screws, especially if your desk experiences minor vibrations from typing or adjusting motorized standing desk legs.
By treating your desktop monitor shelf riser setup as an integrated system of structural support, ergonomic alignment, and smart storage, you create a durable foundation for daily productivity. Take the time to measure twice, verify your weight limits, and dial in your viewing angles, and your neck and shoulders will thank you through every remote workday.
Establishing a quarterly hardware maintenance routine helps preserve your workspace investment. Every three months, take ten minutes to clear your desk and inspect all structural contact points. Tighten any hex bolts on clamp-on risers that may have loosened due to desk movement. Dust the surfaces beneath your monitor shelf where static electricity tends to draw airborne particles. If you use a wooden shelf, applying a thin coat of natural furniture wax or mineral oil once a year will protect the finish from drying out and maintain a rich, professional luster.
Finally, listen to your physical feedback. If you notice persistent muscle tightness between your shoulder blades or find yourself leaning forward to read small text, treat these sensations as diagnostic signals rather than normal annoyances. Re-evaluate your font scaling, adjust your screen brightness, and double-check that your monitor riser has not shifted out of its optimal vertical alignment. Proactive adjustments ensure your home office remains a comfortable, efficient sanctuary for years to come.