When you open an estimate from an insulation contractor, the final figure can sometimes feel like a moving target. One company quotes a flat rate for the entire house, while another breaks down costs by square footage, material type, R-value performance, and disposal fees. If you want to make sure you are getting a fair price, using a reliable home insulation contractor cost estimator approach is essential. Residential insulation upgrades directly impact your monthly utility bills and home comfort, making it a major investment that deserves careful financial and technical scrutiny.
Evaluating these proposals requires looking past the bottom line. Insulation contracting involves a mix of commodity material costs and specialized labor overhead. Contractors factor in attic accessibility, old material removal, ventilation baffles, and local disposal fees. This guide breaks down how insulation pricing works, what goes into standard bids, and how to spot hidden markups or vague line items that could inflate your project cost.
Deconstructing the Estimate: Square Footage and Material Math
Most professional insulation bids are calculated using square footage, but the math varies significantly depending on whether you are insulating an attic, crawlspace, or exterior walls. Contractors typically measure the footprint of the space rather than the surface area of the materials, though wall insulation requires calculating stud bays and framing cavities.
When reviewing your bid, look closely at how the square footage is stated. An attic estimate should list the exact square footage of the floor surface, not the roof pitch. If a contractor measures by gross wall area, check whether they subtracted doors and windows. Failing to deduct openings is a common way bids become artificially inflated. Furthermore, verify whether the quote accounts for waste factor. Material cutting and fitting typically generates a five to ten percent waste allowance, but excessive padding should be questioned.
Material selection drives the baseline cost of any proposal. Cellulose, fiberglass batts, loose-fill fiberglass, and spray foam each carry distinct price points per square foot and per R-value unit. A transparent contractor will list the specific product, manufacturer, and installed thickness required to achieve your local building code or target R-value. If a quote simply says “install insulation” without naming the material or density, treat it as a red flag.
Beyond basic square footage, complex roof geometries, cathedral ceilings, sloping rooflines, and knee walls alter the installation labor math drastically. A standard square-footage calculation assumes unencumbered, open surfaces. If your attic features tight clearance near the eaves, HVAC ductwork obstructing access, or low-slope sections that require manual crawling rather than standing space, the labor factor must be adjusted. When evaluating complex structures, professional estimators account for these access challenges explicitly rather than rolling them into a hidden surcharge.
Blowing-In Costs Versus Fiberglass Batt Labor Tiers
Labor charges vary dramatically based on the installation method. Understanding the difference between blown-in applications and batt installation helps you determine if the labor hours billed on your estimate are reasonable.
Blown-in insulation—typically cellulose or loose-fill fiberglass—is priced based on coverage area and target depth. The labor for blown-in insulation involves setting up a blowing machine outside, running a hose to the attic, and having one technician feed the hopper while another maneuvers the hose to ensure even distribution. Because the process is relatively fast for open spaces, labor constitutes a smaller percentage of the total project cost compared to material. Estimates that overcharge for blown-in labor often fail to account for the efficiency of pneumatic equipment.
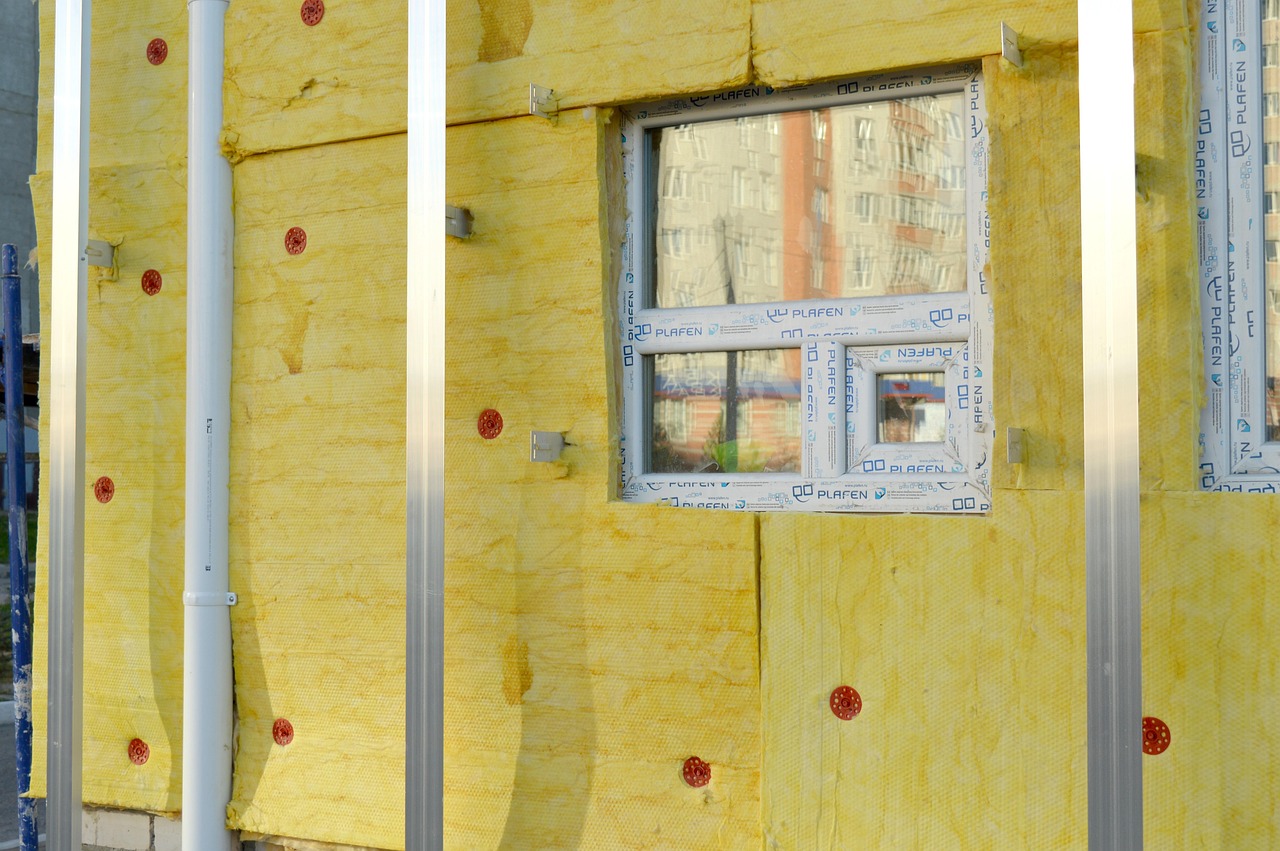
Fiberglass batts, on the other hand, are labor-intensive. Installing batts in walls or crawlspaces requires cutting pieces to fit tightly around electrical wiring, plumbing pipes, and framing irregularities. Poorly installed batts with gaps, compression, or voids lose significant thermal value. Consequently, batt insulation installation bids carry higher labor tiers. When auditing a batt insulation proposal, evaluate whether the labor rate reflects skilled handling or simple piecework. If the crew is rushing through walls without properly splitting batts around wires, you are paying premium labor rates for substandard thermal performance.
Another nuance in labor tiers involves kraft-faced versus unfaced batts. Faced batts include a vapor retarder that must be stapled correctly to the face or inside of the wood studs, adding time and labor precision requirements. Unfaced batts require friction-fit placement, which demands careful cutting to avoid slumping over time. When reviewing a bid for wall insulation, check whether the contractor specifies the exact facing type and installation method to match your regional moisture control requirements.
Understanding R-Value Tiers and Thermal Performance
The cost of insulation is directly tied to its thermal resistance, known as R-value. Different parts of the country require different R-values for attics, walls, and floors to meet modern energy standards. Contractors often present tiered options, such as upgrading from an R-30 minimum to an R-49 or R-60 performance level.
When evaluating these tiers, calculate the incremental cost per unit of R-value. Moving from lower insulation levels to moderate levels is usually cost-effective, but pushing for extreme R-values in mild climates may yield diminishing returns on your utility savings. Ensure the contractor specifies the exact thickness required to achieve the claimed R-value over time, accounting for material settling. Cellulose and loose-fill fiberglass settle slightly after installation, and professional contractors should factor this initial settling percentage into their blown-in insulation contractor pricing models.
It is also critical to understand climate zones defined by local building codes, such as the International Energy Conservation Code (IECC). For instance, southern regions might mandate attic insulation around R-30 to R-38, while northern cold-climate zones require R-49 to R-60. If a contractor proposes an R-value significantly below your local code minimum, they are delivering a non-compliant installation. Conversely, if they push an excessively high tier without justification, verify whether your home’s framing and ventilation can physically accommodate the added depth without blocking critical roof eave ventilation.
Spotting Hidden Contractor Markups and Vague Line Items
Predatory or sloppy contractor bids often rely on vague line items to hide excessive markups. Scrutinizing the fine print protects you from unexpected change orders and inflated material costs.
Look out for bundled pricing that lumps material, labor, removal, and disposal into a single lump sum. While convenient, a lack of itemization makes it impossible to challenge unreasonable charges. Ask for a breakdown separating material costs from labor hours and disposal fees. Material markups of ten to twenty percent are standard industry practice to cover logistics and warranty handling, but markups exceeding fifty percent on standard fiberglass or cellulose should be challenged.
Another common hidden cost involves old insulation removal. If your attic contains contaminated, wet, or compressed old insulation, removal requires specialized heavy-duty vacuum equipment and disposal bags. A legitimate bid will specify the cubic yards of material to be removed and the disposal site fees. Vague estimates that quote a high flat fee for “debris clearing” without defining the scope often result in disputes once the work begins.
Additionally, watch for extraneous fees such as equipment mobilization, truck fuel surcharges, or safety gear charges. While legitimate contractors factor overhead into their general hourly or square-footage rates, line-item nickel-and-diming for basic personal protective equipment (PPE) or standard tools indicates an unprofessional estimating structure.
Evaluating Attic Insulation Cost Per Square Foot
When analyzing attic insulation cost per square foot, you need to normalize the quotes you receive from different contractors. Because contractors package their services differently, converting every bid into a per-square-foot metric allows for an apples-to-apples comparison.
To calculate this, take the total project cost—excluding major structural repairs or unrelated electrical work—and divide it by the square footage of the insulated space. For blown-in attic insulation achieving standard R-38 to R-49 levels, regional pricing generally falls within predictable ranges depending on local labor markets. If one contractor’s per-square-foot cost is double the others without a clear justification—such as hazardous material remediation or extreme clearance challenges—request a detailed technical explanation before signing.
When comparing these numbers, ensure that prep work like installing cardboard rafter vents (baffles) is factored into the calculation. Baffles prevent blown-in material from spilling into the soffit vents and blocking vital airflow into the attic. A thorough estimate explicitly includes the quantity and installation of these vents. If a low-ball bid leaves them out, expect a surprise change order once the technician realizes the soffits are unobstructed.
The Role of Air Sealing in Insulation Bids
Insulation alone cannot stop heat loss if air is leaking freely through your ceiling penetrations, top plates, and rim joists. Professional insulation contractors almost always include air sealing as part of a comprehensive thermal upgrade, or they will offer it as a mandatory prerequisite.

Examine how air sealing is handled in the proposal. Is it bundled into the overall price, or is it itemized? Air sealing involves using expanding foam and caulk to seal gaps around light fixtures, plumbing stacks, and chases before the new insulation is installed. If a bid does not mention air sealing, ask the contractor why. Installing insulation over an unsealed attic floor leaves major thermal bypasses open, rendering the new insulation far less effective. A trustworthy contractor will explain how air sealing and insulation work together as an integrated system.
Advanced thermal upgrades often incorporate blower door testing to measure air leakage rates before and after the project. If a contractor offers or recommends pre- and post-retrofit diagnostic testing, it demonstrates a rigorous, building-science approach. While this adds a minor fee to the estimate, it provides verifiable proof that the air sealing work successfully reduced infiltration losses.
Red Flags and Predatory Clauses in Insulation Contracts
Before signing any home improvement contract, read the legal and administrative terms carefully. Insulation upgrades are generally straightforward projects, but poorly written contracts can leave you financially vulnerable.
Watch out for open-ended time-and-materials clauses that allow the contractor to bill you for extra hours without prior written approval. All pricing should be fixed-bid unless unforeseen structural damage is uncovered inside a wall or ceiling cavity. Even then, the contract should state that the contractor must stop work and obtain your signature before proceeding with change orders.
Another warning sign is demanding an excessive upfront deposit. Standard industry practice in most states limits upfront deposits to a reasonable percentage of the total project cost—frequently one-third or less—with milestone payments tied to completed work stages and final inspection. Be wary of contractors demanding full payment before materials are delivered or work begins.
Always verify that the contractor carries valid general liability insurance and active workers’ compensation coverage. Request certificates directly from their insurance agency rather than accepting a photocopied paper from the salesperson. If a worker is injured on your property and the contractor lacks adequate insurance, you could face severe liability exposure.
Preparing for the Installation Day
Once you have audited the bids, selected a qualified contractor, and signed a clear agreement, preparing your home for installation day ensures the project runs smoothly and safely.
Insulation work generates significant dust and debris, particularly during removal or blown-in installation. Discuss containment procedures with your contractor. They should seal off living areas with plastic sheeting, protect floors with drop cloths, and vent blowing machines properly to the outdoors. Clarify who is responsible for moving stored items out of the attic or crawlspace. Clear communication upfront prevents misunderstandings and ensures your home is treated with care throughout the project.
If you have recessed lighting fixtures (pot lights) in your top-floor ceiling, confirm whether they are insulation-contact (IC) rated. Non-IC rated fixtures require metal covers or dams to prevent blown-in cellulose or fiberglass from touching the hot light cans, which poses a fire hazard. A responsible contractor will inspect these fixtures during the initial walkthrough and include any necessary safety modifications in the project scope.
Frequently Asked Questions About Insulation Bids
Navigating home insulation projects often raises practical questions regarding timing, materials, and contractor accountability. Here are answers to common concerns homeowners face when reviewing bids.
Should I layer new insulation over old insulation?
In many cases, yes. If your existing attic insulation is dry, clean, and free of mold or pest contamination, blowing new loose-fill material or rolling unfaced batts right over it is standard practice. However, if the old material is compressed, wet, or damaged, it must be completely removed first to prevent hidden moisture problems and mold growth.
How long does a whole-house insulation upgrade take?
For a standard attic insulation and air-sealing project, professional crews typically complete the work in a single day. More complex projects involving old insulation removal, extensive wall retrofits, or crawlspace encapsulation can span two to three days depending on crew size and home square footage.
What is the difference between cellulose and fiberglass for blown-in applications?
Cellulose is made from recycled paper treated with fire retardants, offering a slightly higher R-value per inch and excellent air-sealing characteristics when settled. Loose-fill fiberglass is made from spun glass fibers, which will not absorb moisture or settle as much over time but requires slightly more depth to achieve the same equivalent thermal resistance.
Conclusion: Making Your Final Choice
Auditing residential insulation bids comes down to demanding transparency, verifying technical specifications, and comparing normalized costs. By breaking down square-footage pricing, understanding material performance tiers, and eliminating vague line items, you can confidently select a contractor who delivers genuine value. A well-executed insulation upgrade pays dividends for years through lower energy bills, improved indoor comfort, and a more durable home envelope.