
A dripping outdoor spigot is more than just an annoying waste of water; it can stain your siding, pool around your foundation, and drive up your utility bill over the course of a dry summer. Fortunately, you do not always need to call a plumber or even shut off your home’s main water supply to solve the problem. Knowing how to fix leaking hose bibb assemblies can save you time, money, and frustration.
Most outdoor faucet leaks stem from two common culprits: a loose or degraded packing nut right behind the handle, or a flattened rubber washer at the very end of the valve stem. If your spigot drips from the spout when turned off, you are likely dealing with a bad bibb washer. If water oozes out around the handle stem whenever you turn the water on, the packing material or stem O-ring has failed. This guide walks you through diagnosing both issues and performing lasting repairs safely.
Understanding Your Outdoor Spigot Type
Before you grab your wrench, take a close look at the exterior of your house. Outdoor water fixtures generally fall into two categories, and knowing which one you have dictates how you will approach the repair.
Standard traditional hose bibbs are attached directly to an exterior pipe elbow. The valve seat sits right outside the house or just inside the rim joist in a warmer climate. Frost-free sillcocks, on the other hand, feature a long metal stem—often 4 to 14 inches long—that extends through the exterior wall into the conditioned space of your basement or crawlspace. This keeps the actual water shut-off valve deep inside the warm house, preventing freezing during winter.
While both types use packing nuts and rubber washers, frost-free models require you to pull out a much longer internal stem assembly. Never force an unfamiliar fixture, and always inspect the handle assembly to determine if you are dealing with a standard compression valve or a modern quarter-turn ceramic disc model. Understanding these mechanical variations prevents you from applying excessive torque to delicate internal components or purchasing the wrong replacement hardware during your trip to the hardware store.
Furthermore, consider the age of your installation. Older homes may feature gate valves or heavy brass ball valves retrofitted onto exterior runs, while newer builds almost universally employ frost-free copper-sweated sillcocks or threaded brass assemblies. Knowing the exact material composition—whether solid brass, chrome-plated brass, or modern composite metals—helps you gauge how much resistance the threads will offer when you finally put a wrench to them.
The No-Shut-Off Secret: Working Under Pressure
One of the best-kept secrets of residential plumbing maintenance is that you can often service the packing nut or replace a standard stem washer without shutting off your house’s main water supply—provided you follow a few basic rules and understand hydraulic pressure.
If you are simply tightening a loose packing nut to stop a leak around the handle stem, you do not need to turn off the water at all. The packing nut simply compresses a ring of graphite, Teflon string, or rubber against the stem to prevent water from slipping past the handle shaft. Tightening it a quarter-turn is usually enough to stop weeping around the handle while the system remains fully pressurized.
If you need to remove the entire valve stem to replace the flat rubber washer at the tip, you can still avoid shutting off the main water as long as your indoor shut-off valve to that specific line is working, or if the bibb is a frost-free model with an integral seat far inside. However, if you are unsure or if the valve is old and stubborn, playing it safe and shutting off the main water supply for twenty minutes prevents accidental indoor flooding.
When working under pressure on a standard spigot with the main supply open, removing the bonnet nut will cause a brief spray of water as you unscrew the stem. By keeping the handle turned halfway open during extraction, you often relieve internal spring tension, though water will still push past the open port until the stem is completely removed. Having a towel, a bucket, and a helper nearby makes this quick maneuver completely manageable without dampening your basement or flowerbeds.
Tools and Materials Needed for the Job
Gathering your supplies beforehand ensures the repair goes smoothly. You will not need an expensive plumbing kit, but having the right grade of tools prevents you from stripping soft brass fittings.
- Adjustable wrenches (two are ideal so you can counter-hold the body)
- Standard flathead and Phillips screwdrivers
- Assorted faucet washer kit (containing flat bibb washers of various diameters)
- Replacement packing string, Teflon packing tape, or a new O-ring
- Plumber’s grease (silicone-based)
- A wire brush or rag for cleaning mineral deposits
Avoid using cheap slip-joint pliers that can easily mar, gouge, or round off the corners of brass packing nuts. Smooth-jawed adjustable wrenches or properly sized open-end wrenches provide the secure grip required for plumbing work.
It is also wise to keep a can of penetrating oil (such as WD-40 Specialist or PB Blaster) on hand if you are dealing with an outdoor spigot that has weathered years of rain, snow, and mineral buildup. Spraying stubborn bonnet nuts or packing nuts fifteen minutes prior to wrenching makes a massive difference in breaking corrosion bond lines without snapping delicate mounting brackets or twisting supply pipes.
Step-by-Step: Fixing a Handle Stem Leak (Packing Nut Repair)
If water leaks out around the handle shaft while the spigot is running, the packing seal has worn out. Fixing this requires zero plumbing teardown and takes less than five minutes.
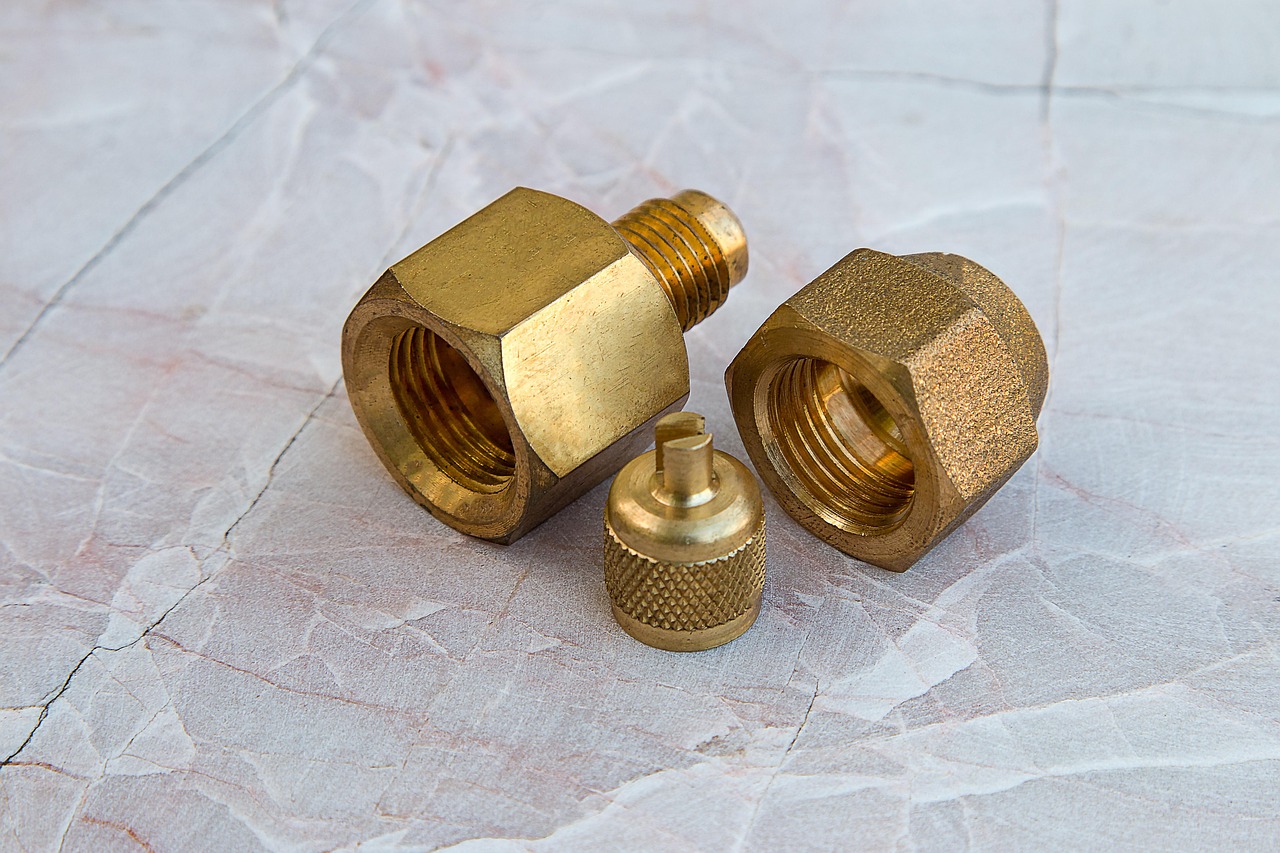
First, locate the hex-shaped packing nut located immediately behind the faucet handle. Take your primary adjustable wrench and place it securely on this nut. Take your second wrench and grip the main body of the hose bibb to act as a counter-hold. This step is critical; without a backup wrench, the torque you apply can twist and crack the copper supply line hidden behind your exterior wall.
Turn the packing nut clockwise (to the right) about a quarter to a half turn. Turn the faucet handle on and off to test the seal. If water still weeps past the stem, tighten the nut slightly more. If tightening the nut fully does not stop the leak, the internal packing material has degraded completely and must be replaced.
To replace old packing material, turn off the water supply, unscrew the packing nut all the way, and slide it up the handle stem. Remove the old stringy packing material or rubber washer from inside the nut cavity, wrap new Teflon packing cord or slide a new O-ring into place, rethread the nut, and snug it down. This simple restoration rejuvenates an aging seal and prevents recurring handle leaks throughout heavy summer watering seasons.
Step-by-Step: Replacing a Worn Spigot Washer
If your spigot drips continuously from the nozzle even after you have cranked the handle down firmly, the flat rubber washer at the bottom of the valve stem has eroded, cracked, or flattened out.
Begin by fully opening the spigot handle. This draws the internal stem forward, making it easier to unscrew. Next, grip the large bonnet nut (the larger hex nut directly below the handle assembly) with your adjustable wrench while using your second wrench to hold the faucet body steady. Turn the bonnet nut counter-clockwise to loosen and remove it.
Once the bonnet nut is free, turn the handle counter-clockwise to unscrew the entire stem assembly straight out of the faucet housing. Pull it completely out and inspect the components.
At the very tip of the stem, you will find a small flat rubber washer held in place by a brass screw. Use a short screwdriver to remove this screw. If the screw is severely corroded, spray it with penetrating oil and let it sit for a few minutes. Pop off the old rubber washer and take it to your hardware store to match its exact diameter and thickness, or test it against pieces from a standard universal faucet washer kit.
Be sure to inspect the screw itself during this process. A rusted or stripped brass screw will fail to hold the replacement washer securely, leading to immediate failure once pressure is reapplied. Swapping in a fresh brass screw guarantees long-term stability.
Reassembling and Lubricating the Valve Stem
Once you have mounted a fresh rubber washer onto the end of the stem, take a moment to inspect the brass screw. If the screw head is stripped or heavily rusted, replace it with a new brass screw from your kit so the washer does not fall off inside the pipe.
Before sliding the stem back into the housing, coat the threads and the rubber O-rings with a generous layer of food-grade silicone plumber’s grease. Avoid petroleum-based lubricants like Vaseline, as petroleum eats away at rubber and plastic plumbing components over time, causing premature failure.
Carefully guide the stem back into the faucet body, turning the handle clockwise to engage the threads. Do not force it; if you feel heavy resistance, back it out and check alignment. Once seated, tighten the bonnet nut securely with your wrenches, but do not overtighten, as excessive force can crack the brass housing.
After reassembly, slowly turn your water supply back on (if you shut it off) and test the valve. Open and close the spigot multiple times to seat the new rubber washer against the brass valve seat, checking carefully for any residual weeping around either the packing nut or the spout nozzle.
Troubleshooting Stubborn Spigots and Frost-Free Stems
Sometimes you will pull a stem assembly only to discover that the internal seat inside the pipe is deeply pitted, rough, or corroded. If a brand-new rubber washer still fails to stop a drip, the valve seat itself is likely damaged.
For standard spigots, you can use a tool called a faucet seat grinding tool (or seat dresser) to smooth out the brass seat inside the housing. Insert the tool into the valve body and turn it clockwise to grind away imperfections and create a fresh, flat seating surface for your new washer.
If you are working on a long frost-free sillcock and the internal washer replacement does not fix the leak, the entire internal valve rod may be bent or worn out at the far end. Fortunately, many manufacturers sell exact replacement stem assemblies online or at local home improvement stores. Unscrewing the old multi-inch stem and sliding in a brand-new factory assembly is often easier than trying to rebuild a heavily corroded vintage unit.
When selecting a replacement stem for frost-free models, make sure you measure the exact overall length from the base of the packing nut to the rubber tip at the end. Even a half-inch variance can prevent the internal plunger from closing completely against the seat inside your wall, rendering the new part ineffective.
Preventative Maintenance and Winter Care
Preventing future leaks is much easier than performing mid-summer plumbing repairs. Taking a few precautions every autumn protects your exterior plumbing from damage.
Always disconnect garden hoses from your spigots before the first freeze. Leaving a hose attached traps water inside the sillcock valve. When that water freezes and expands, it creates immense hydraulic pressure that cracks the brass body or splits the copper pipe inside your wall—a disaster that usually requires cutting into drywall to repair.
If your home does not have frost-free sillcocks, locate your interior shut-off valve for the outdoor lines in late autumn, turn it off, and open the exterior spigot completely to drain all lingering water out of the pipe exterior. Leaving the outdoor handle open slightly during freezing weather gives any residual moisture room to expand safely without splitting your pipes.
Additionally, consider installing insulated foam covers over your exterior spigots during severe winter weather. These inexpensive styrofoam or fabric domes strap over the protruding valve body, reflecting wind chill and providing an extra layer of thermal defense against sub-zero temperatures.
When to Call a Professional Plumber
While fixing a packing nut or swapping a rubber washer is an ideal weekend DIY project, certain scenarios call for professional intervention.
If the main body of the hose bibb cracks during disassembly, or if you discover that the pipe feeding the spigot is loose, rusted out, or vibrating inside the wall cavity, shut off your main water supply immediately and call a licensed plumber. Similarly, if your spigot is soldered directly to copper pipes without threaded fittings and you lack torch skills, trying to unsweat and replace the entire valve can easily lead to accidental house fires or major plumbing leaks.
For standard threaded repairs, however, taking your time, using two wrenches to protect your pipes, and installing fresh rubber seals will restore a quiet, leak-free spigot in less than an hour, keeping your home’s exterior water systems operating efficiently year-round.