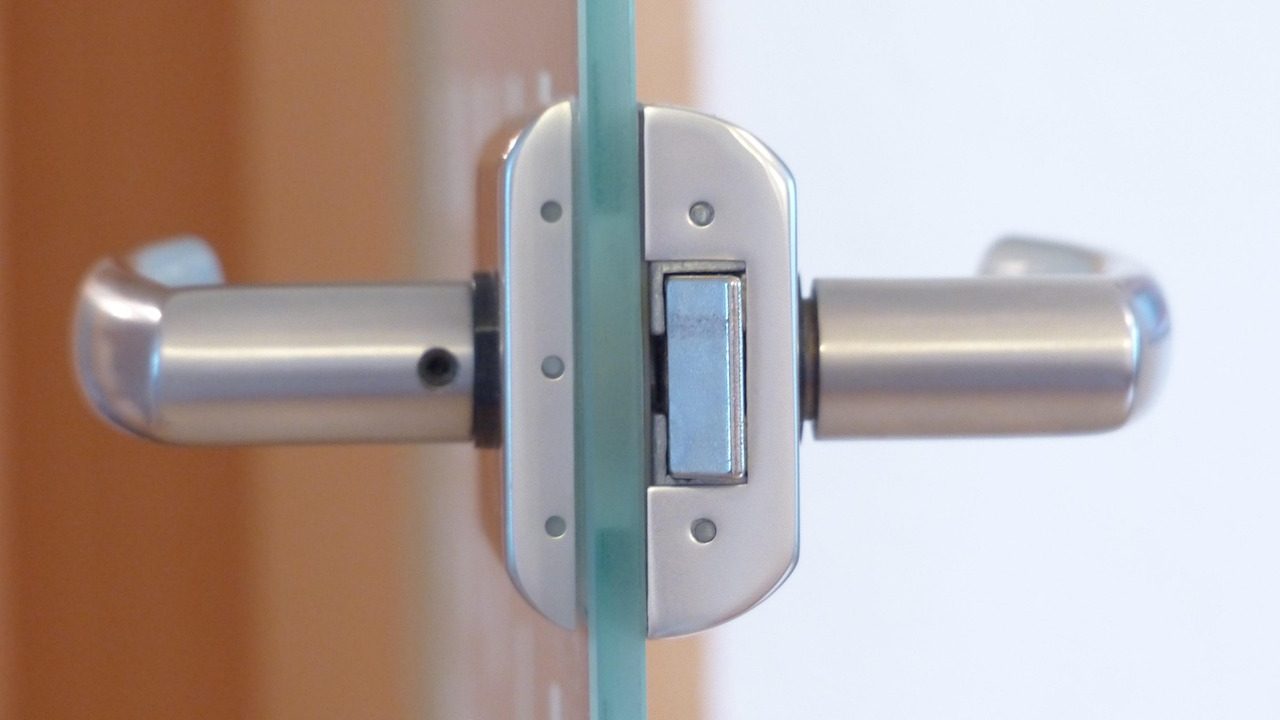
Few household annoyances are quite as persistent—or as easily ignored until they snap off entirely—as a wobbly interior door handle. When you grab a passage door to pull it open and the handle jiggles, sags, or spins freely without turning the latch, your immediate instinct might be to price out a full replacement at the local home improvement store. Fortunately, learning how to fix loose door knobs is typically a straightforward maintenance project that requires nothing more than a basic screwdriver, an Allen wrench, and ten minutes of your time.
Most residential interior doors use standard cylindrical locksets. Over months or years of daily use, normal vibration, centrifugal force from swinging doors, and torque from turning the handle cause fastening components to back out. Set screws loosen, threaded spindles wear down, and mounting plates lose their grip on the door face. Rather than spending money on an entirely new passage set, you can easily diagnose and repair the existing hardware with the right step-by-step approach.
Anatomy of an Interior Door Knob: Understanding the Mechanism
Before you dive in with tools, it helps to understand what is happening inside that rattling metal shell. A typical standard interior door knob consists of several key working parts, each playing a specific role in keeping the handle rigid and aligned:
- The Knobs or Handles: The exterior grips you actually touch, which may be traditional spherical knobs, architectural crystal handles, or modern lever-style handles.
- The Spindle: A square, rectangular, or threaded metal rod that runs through the door core, connecting both handles and passing directly through the central latch mechanism to transfer rotational force.
- The Set Screw: A tiny threaded fastener—often hexagonal or slotted—located on the neck of the knob that clamps the knob securely to the metal spindle shaft.
- The Rosette or Backplate: The decorative circular or square plate flush against the door face, which often conceals structural mounting screws and provides a finished look.
- The Chassis and Mounting Plate: The internal steel cage housing the spring mechanism, which bolts through the door face to anchor the entire assembly.
- The Latch Assembly: The spring-loaded bolt housed in the edge of the door that engages the strike plate in the door frame to keep the door shut.
When a handle feels loose, the failure point almost always traces back to one of three culprits: a back-out set screw, a loose mounting plate behind the rosette, or stripped threads inside the spindle mechanism. Diagnosing the exact fault prevents you from wasting time turning screws that aren’t actually loose or stripping delicate threads by over-tightening the wrong components.
The Essential Toolkit for Door Hardware Repairs
Before beginning your diagnostic walkthrough, gathering the correct tools will save you from frustrating trips to the hardware store mid-project. Because residential door manufacturers use a mix of standard and metric fasteners, having a comprehensive selection of basic hand tools ensures you are prepared for both vintage mortise locks and modern cylindrical passage sets.
Keep these items close at hand:
- Phillips Screwdriver (#2): The workhorse tool for tightening structural chassis screws hidden behind rosettes.
- Flathead Screwdriver: Useful for popping off snap-on rosettes, adjusting slotted set screws, and carefully prying stubborn trim plates.
- Hex Key (Allen Wrench) Set: Essential for modern doorknobs and lever sets that use small hexagonal set screws. Both SAE (fractional inch) and metric sets should be on hand, as hardware imported from different regions uses varied sizing.
- Locking Pliers (Vise-Grips): Crucial for gripping and removing stripped, rounded, or rusted set screws that refuse to turn with standard wrenches.
- Threadlocking Fluid (Blue): A bottle of medium-strength threadlocker prevents fasteners from vibrating loose under daily household traffic.
- Flashlight or Smartphone Light: Indispensable for peering into tight gaps on the neck of the handle to locate hidden screw heads.
Step 1: Inspecting and Diagnosing the Wobble
Begin your repair by testing the handle to isolate where the movement originates. Grab the knob and push, pull, and twist it gently while observing how the individual parts react to your input.
If the knob itself is spinning freely on the spindle or sliding back and forth along the metal shaft without moving the rest of the mechanism, the problem lies in the connection between the knob and the spindle—usually a loose or missing set screw. If the entire assembly—including the decorative backing plate—rocks against the wooden surface of the door, the internal mounting screws hidden beneath the rosette have backed out due to vibration. If the handle jiggles up and down while remaining attached, you may be dealing with internal wear within the chassis, a weak internal return spring, or a stripped spindle channel. Pinpointing this behavior tells you precisely which tools to grab.
Step 2: Fixing Loose Set Screws on Standard Knobs
Many traditional and commercial-grade interior door handles rely on a tiny set screw countersunk into the side or bottom of the knob’s neck. Over time, constant torque causes these screws to back out completely, rendering the knob completely wobbly or causing it to pull right off in your hand.
Examine the neck of the loose handle to identify the screw type. Some older models use a standard flathead or Phillips set screw, while modern architectural hardware almost universally uses a hexagonal socket set screw (often called an Allen screw). Select the correct-sized hex key or screwdriver by testing gently; forcing an incorrect size will strip the delicate internal hex socket, turning a simple two-minute fix into an extraction chore.
Insert your tool and turn clockwise to tighten. Do not over-tighten to the point of stripping the delicate threads inside the brass or steel neck, but make sure it seats firmly against the flat face of the spindle. If the screw keeps turning without tightening, the threads may be stripped, or you might be using the wrong size wrench.

Step 3: Accessing Concealed Screws and Securing Rosettes
If your door handle has no visible set screw on the neck, you are likely dealing with concealed-screw hardware. This common architectural design creates a clean, modern aesthetic by hiding all mounting hardware behind the decorative rosette or backplate.
To access these screws, you need to pop or unscrew the faceplate:
- Look closely at the edge of the rosette for a tiny slot, notch, or pinhole. Many manufacturers engineer a discreet release notch at the bottom 6 o’clock position.
- If you spot a small slot, insert a flathead screwdriver or a small tension tool and gently pry outward. The decorative cover plate should snap or slide off, revealing the structural chassis underneath.
- If the rosette has no slot, try twisting the plate counter-clockwise. Many modern interior rosettes thread directly onto an inner mounting ring using fine threads.
- Once the chassis is exposed, locate the two long machine screws running horizontally through the door, connecting the inner and outer mounting plates.
- Tighten both screws evenly using a Phillips screwdriver. Alternating between the top and bottom screw ensures the mechanism remains centered and doesn’t bind the latch.
- Snap or screw the decorative rosette back into place once the inner frame is rigid.
Step 4: Troubleshooting Lever Handles and Special Mechanisms
Modern lever-style handles introduce unique mechanical challenges because gravity constantly pulls down on the long handle, exerting significantly more leverage on the spindle and internal chassis than traditional round knobs do.
If you need to tighten a wobbly doorknob that features a lever design, look underneath the neck for a small Allen screw or a spring-loaded release pin. Many high-end levers use a specialized mounting bracket system where the lever slides over a spring clip. If that clip loses its tension, the lever slides off easily.
For levers with set screws, tightening the screw is rarely a permanent fix if the spindle has developed a groove from friction. If you tighten the screw into an old groove, the lever will quickly loosen again. The solution is to back the set screw out completely, slide the lever slightly deeper onto an unmarred section of the spindle, and re-tighten the screw firmly.
Step 5: Dealing with Stripped Set Screws and Damaged Threads
A frustrating scenario occurs when the set screw spins endlessly in its socket without biting. This indicates either a stripped screw head, stripped internal threads in the knob’s collar, or a rounded-out spindle channel.
If the screw head itself is stripped, grasp it with a pair of locking pliers (Vise-Grips) and back it out. Take the screw to a local hardware store to match its thread pitch and diameter; replacing a 50-cent set screw instantly solves the problem.
If the internal threads in the collar are stripped, a larger replacement screw may work if the hole can be re-tapped, though replacing that individual handle half is often faster and safer. For a temporary field fix on a stripped spindle, applying a drop of removable threadlocker (such as blue Loctite) to the screw threads before tightening provides extra friction to keep the fastener from vibrating loose.
Step 6: Replacing a Worn or Undersized Spindle
When tightening every screw fails to eliminate the wobble, the metal spindle itself may be worn down, or the manufacturer may have installed an undersized aftermarket replacement part during a previous repair.
To inspect the spindle, remove both door handles completely:
- Back out any set screws fully.
- Pull both knobs off the spindle.
- Unscrew the mounting chassis from the door face.
- Slide the spindle out of the central latch mechanism.
Inspect the metal rod for deep grooves, warping, or rounding at the corners. A standard spindle should have sharp 90-degree corners if it is square. If the metal is gouged or rounded where the set screws bite, the handle will always slip. Take the old spindle to a hardware store to find an exact dimensional match—typically a 1/4-inch or 9/32-inch square bar—and slide the new component into place.

Common Mistakes to Avoid When Fixing Door Hardware
While tightening a door knob is a straightforward DIY task, certain common pitfalls can turn a quick maintenance task into a frustrating ordeal. Keeping these errors in mind will save you time and prevent unnecessary damage to your door finish.
- Using Power Drills for Final Tightening: Electric drills and impact drivers deliver far too much torque for delicate brass or aluminum door hardware. Always finish tightening set screws and machine screws by hand to avoid stripping threads or cracking metal collars.
- Forgetting to Check Both Sides: Many homeowners tighten the loose handle on the room side while ignoring the opposing handle. Often, both handles share the same spindle and require balanced attention to eliminate play entirely.
- Ignoring Door Alignment: If a door scrapes against the jamb or latch strike plate, every turn of the handle forces the mechanism against physical resistance. Fix any alignment or latch binding issues before blaming the doorknob assembly itself.
- Using Permanent Threadlocker: Red threadlocker is designed for heavy machinery and automotive applications requiring heat to break loose. Always choose blue (medium strength) threadlocker for residential door hardware so you can service the lockset in the future.
Preventing Future Wobble: Maintenance Best Practices
Once you successfully fix loose door knobs throughout your home, a little preventative maintenance ensures you won’t have to repeat the project next year.
Door hardware works loose primarily due to continuous vibration from slamming doors. Adjust your door’s closer or latch strike plate so the door closes smoothly without requiring a hard shove or a violent slam. If you live in an older home where seasonal humidity shifts cause doors to swell and stick, rubbing against the frame, the resulting force places undue stress on the handles.
Furthermore, consider applying a tiny drop of blue threadlocker to set screws during your initial repair. Unlike permanent red threadlocker, blue formulations allow you to easily break the bond with standard hand tools later while locking the fastener securely against the loosening effects of everyday household traffic.
Frequently Asked Questions About Door Knob Repair
Can I fix a loose door knob if the screw hole is completely stripped out?
Yes. If the threaded hole in the knob’s collar is stripped out, you can often tap the hole to accept a slightly larger machine screw. Alternatively, wrapping plumber’s tape around the set screw threads or using a drop of threadlocker can provide temporary friction, though replacing the affected handle is the most permanent solution.
Why does my door knob keep getting loose every few months?
Frequent loosening usually points to heavy door usage combined with lack of threadlocker. If the door slams shut regularly, the kinetic shock travels directly into the set screws, causing them to back out. Adding a drop of blue threadlocker and adjusting the strike plate can solve chronic loosening.
Are interior door spindles universal in size?
No. While many modern residential locksets use standard 1/4-inch or 9/32-inch square spindles, vintage doors and high-end architectural hardware often feature proprietary dimensions, threaded mechanisms, or split spindles. Always measure your existing spindle with calipers before purchasing replacement parts.
When to Replace the Lockset Entirely
While most loose hardware issues are easily repaired, certain conditions mean it is time to retire the lockset. If the internal cast-metal chassis is cracked, if the latch bolt spring has failed inside the housing, or if the key cylinder in a privacy or locking door is completely seized, repair costs and effort outweigh the price of a new standard passage set.
For basic interior doors, replacing an entire lockset takes roughly fifteen minutes and requires only a screwdriver. However, before heading to the store, always check the set screws and mounting plates first. With a few basic tools and this diagnostic guide, you can eliminate annoying wobbly handles and restore solid, reliable operation to every door in your house.