When you are planning a kitchen renovation or simply replacing a broken cooking appliance, diving into wall oven electrical requirements is one of the most critical steps you can take. Homeowners often assume that any existing 240-volt slot in the kitchen can handle a new built-in unit. However, modern convection wall ovens, high-heat self-cleaning cycles, and double-oven setups have changed the electrical landscape. Installing a high-draw appliance on an undersized circuit can lead to nuisance breaker trips, severe voltage drops, and potential fire hazards.
Understanding what goes on behind the drywall helps you avoid costly installation delays. Whether your home was built in the 1970s with legacy branch wiring or constructed last year with heavy-duty copper lines, matching your appliance nameplate to your home’s electrical infrastructure is vital. This guide covers everything you need to know about circuit breaker sizing, amperage draws, wire gauges, and how to determine if your kitchen requires an infrastructure upgrade before scheduling a delivery team.
The Anatomy of 240-Volt Kitchen Circuits
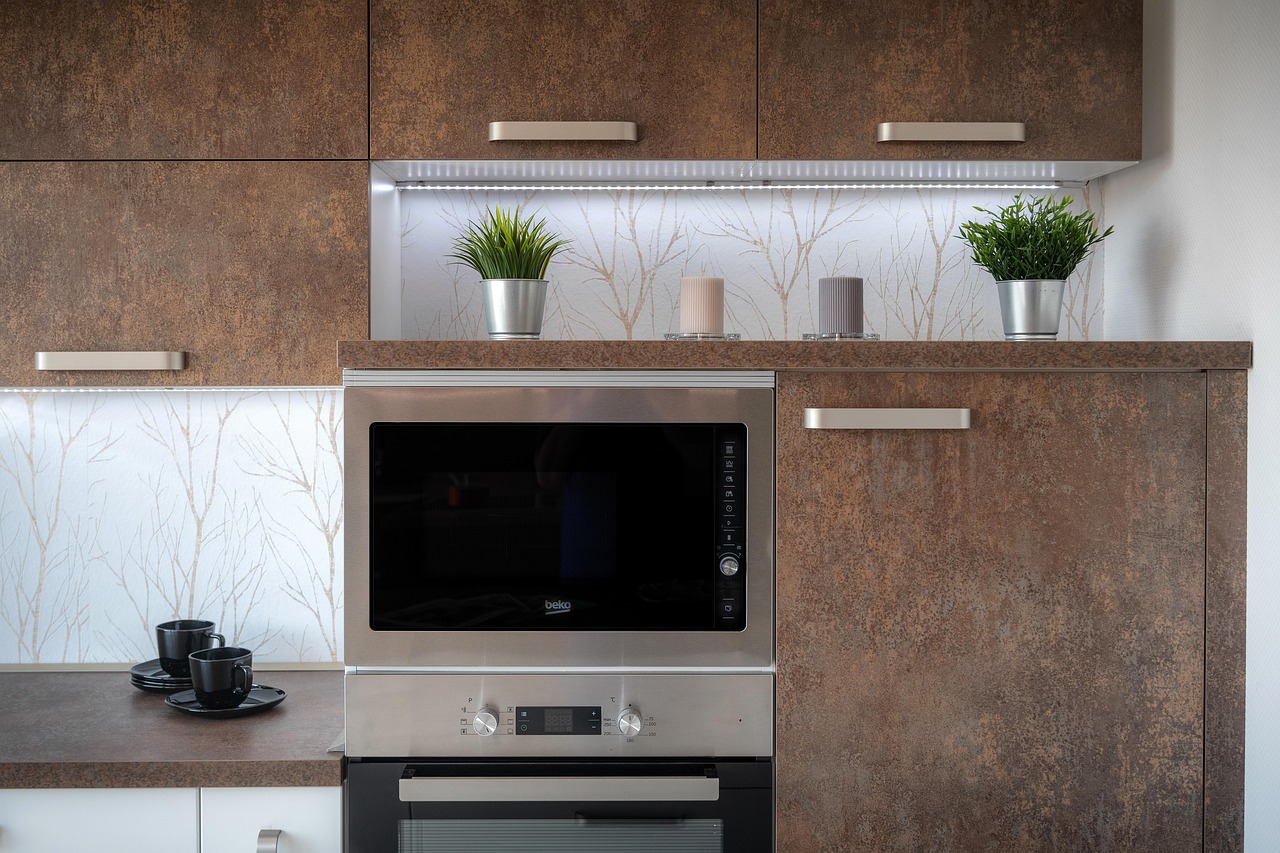
Unlike standard 120-volt countertop appliances that plug into ordinary receptacles, built-in electric wall ovens operate on 240-volt circuits. In North American residential electrical systems, standard 240V circuits use a double-pole circuit breaker that ties two 120-volt hot legs together, alongside a neutral and a bare copper grounding wire. Understanding how this power is delivered from your main service panel to the appliance junction box is essential for safe operation.
Older homes commonly feature 30-amp circuits dedicated to cooking equipment, while newer construction often features 40-amp or even 50-amp dedicated lines to accommodate heavy-duty ranges and dual-cavity wall ovens. The circuit breaker acts as a safety valve, shutting off power automatically if the current exceeds the safe operating threshold of the wire.
It is also important to recognize how power is distributed inside modern kitchen appliances. While the primary heating elements (bake, broil, and convection elements) draw 240 volts for maximum thermal efficiency, the internal electronic control boards, digital displays, cooling fans, and interior lighting systems typically operate on 120 volts. This is why many electric wall oven installations require a four-wire configuration consisting of two hot legs, one neutral, and one ground, ensuring that both 240V and 120V loads are supported safely without introducing imbalances or compromising grounding integrity.
Furthermore, understanding the physical journey of the circuit helps diagnose issues during an upgrade. The cable typically runs uninterrupted from the main electrical panel through wall studs, crawlspaces, or basements directly into a metal or plastic junction box secured behind the wall cutout where the oven sits. Any compromise in this run—such as unapproved splices or damaged insulation—must be corrected before installing a high-draw appliance.
Amperage Draw and Manufacturer Nameplate Specifications
Before purchasing a new wall oven, you must look past the marketing brochures and examine the manufacturer’s installation manual or the physical nameplate affixed to the appliance chassis. The nameplate provides the definitive electrical rating, including the total connected load in kilowatts (kW) at 240 volts, as well as the minimum required circuit protection.
Calculating the amperage draw requires a straightforward formula: divide the total wattage by the voltage. For example, a wall oven consuming 4,800 watts at 240 volts draws 20 amperes. However, the National Electrical Code (NEC) and manufacturer guidelines typically require a circuit breaker and wire size rated significantly higher than the continuous running load to account for initial heating surges, simultaneous element activation, and high-energy self-cleaning cycles.
Manufacturer testing protocols evaluate thermal loads under extreme operating conditions. When an oven engages its convection fan, broiler, and hidden bake element simultaneously during a rapid preheat phase, the instantaneous current draw spikes. If your circuit is sized too close to the bare minimum operating load without accounting for these spikes, the circuit breaker will likely experience thermal fatigue and trip repeatedly.
Furthermore, manufacturers calculate loads using specific engineering standards that factor in demand factors for residential cooking equipment. Even if an oven’s math suggests a 20-amp breaker is technically sufficient on paper, if the manufacturer explicitly mandates a 30-amp or 40-amp dedicated branch circuit in their installation instructions, you must follow those instructions to remain compliant with the NEC and to preserve your product warranty.
Evaluating Existing Branch Wiring and Wire Gauges
Your home’s wiring consists of insulated copper (or occasionally aluminum) conductors sized by American Wire Gauge (AWG) standards. The gauge number works inversely: a lower number indicates a thicker wire capable of carrying more electrical current safely without excessive heat buildup.
- 10 AWG Wire: Typically rated for up to 30 amps when using standard copper NM-B cable (romex) under normal conditions. Common in mid-century and late-20th-century kitchen installations.
- 8 AWG Wire: Rated for up to 40 amps. Frequently found in modern homes or installed specifically for high-capacity double wall ovens and heavy-duty electric cooktops.
- 6 AWG Wire: Rated for 50 amps or more. Required for commercial-grade residential units or massive multi-element cooking centers.
If your new wall oven specifies a 40-amp circuit, but your wall cavity contains existing 10 AWG wire tied to a 30-amp breaker, you cannot simply swap the breaker for a 40-amp model. Doing so creates a dangerous hazard where the breaker allows more current than the thin wire can handle safely, causing the wire insulation to melt inside the wall.
It is also crucial to inspect the condition of the existing wiring. Over decades of service, kitchen wires can suffer from thermal degradation, brittle insulation near high-heat zones behind old ovens, or corrosion in damp environments. An electrician will inspect not just the gauge, but the physical integrity of the copper conductors before making final splices.
To help you visualize how wire sizes correspond to circuit breakers and appliance types, refer to the quick-reference breakdown below:
| Wire Gauge (AWG) | Max Circuit Breaker Size | Typical Appliance Application |
|---|---|---|
| 10 AWG Copper | 30 Amps | Standard Single Wall Ovens, Compact Cooktops |
| 8 AWG Copper | 40 Amps | High-Draw Single Ovens, Standard Double Wall Ovens |
| 6 AWG Copper | 50 Amps | Heavy-Duty Double Ovens, Commercial-Style Ranges |
Single Wall Ovens vs. Double Wall Ovens: Load Differences
One of the most common mistakes homeowners make is assuming a single wall oven and a double wall oven have identical electrical demands. While a compact single convection oven might operate comfortably on a standard 30-amp circuit, double ovens practically mandate a dedicated 40-amp or 50-amp supply.
Running two separate baking cavities simultaneously while operating dual convection fans, broilers, and high-temperature cleaning modes pushes total electrical loads well past the limits of legacy 30-amp wiring. When reviewing appliance specifications, always check whether the manufacturer permits tap-in configurations or requires an entirely independent branch circuit.
In a double-oven setup, both upper and lower independent heating elements can draw substantial wattage during preheat phases. When combined with electronic logic boards and motorized door latches engaged during cleaning cycles, the aggregate load can easily exceed 6,000 to 8,000 watts. Ensuring your circuit can handle this combined peak load prevents nuisance tripping and protects your home’s electrical infrastructure from chronic thermal fatigue.
Additionally, because double ovens generate immense internal heat, the cabinet design and surrounding ventilation become vital. Excess heat radiating into the wall cavity can accelerate the aging of wire insulation, making proper electrical clearances and heat-resistant cabling mandatory in professional installations.
Common Installation Mistakes and Safety Risks
Skipping a professional electrical assessment before a kitchen appliance delivery often results in installation failure on the day of service. Delivery crews typically refuse to install units if the existing wall box, conduit, or breaker size violates local electrical codes or manufacturer instructions.
- Upsizing Breakers Incorrectly: Replacing a 30-amp breaker with a 40-amp breaker without verifying that the upstream wire is actually 8 AWG.
- Ignoring Local Amendments: Failing to check municipal electrical codes, which often have stricter requirements regarding junction box accessibility and conduit types than the baseline NEC.
- Overlooking Grounding Requirements: Older three-wire setups lacked a dedicated equipment grounding conductor, requiring careful adherence to modern safety codes during replacement.
Another frequent oversight involves improper wire termination and loose junction box connections. High-draw 240-volt appliances generate significant thermal expansion and contraction cycles at connection points. If wire nuts, split-bolt connectors, or terminal blocks are not torqued precisely to manufacturer specifications, high resistance can develop at the connection point. This resistance creates localized overheating, which can melt wire insulation, damage the back of the oven, or spark an electrical fire behind your kitchen cabinetry.
Furthermore, relying on old, tarnished wire ends without stripping them back to clean copper can compromise current flow. Professional installers always trim back oxidized wire sections to ensure a pristine, low-resistance connection inside the junction box.
Steps to Determine Your Kitchen Electrical Capacity
Assessing your kitchen’s readiness for a new wall oven involves a systematic review of your current setup before you spend money on equipment. Follow these practical steps to evaluate your infrastructure:
- Locate your home’s main electrical service panel and identify the dedicated double-pole breaker controlling the current wall oven. Note the amperage rating printed on the breaker switch (e.g., 30, 40, or 50).
- Consult the specification sheet or pre-installation guide for the specific wall oven model you plan to purchase, noting its required circuit breaker size and maximum kW rating.
- Access the junction box behind the existing oven (with power safely turned off at the breaker) to inspect the visible wire thickness or consult an electrician to verify the wire gauge if it is hidden inside conduit.
- Compare your findings: if the appliance requires a 40-amp breaker and 8 AWG wire, but your panel features a 30-amp breaker and 10 AWG wire, budget for a professional wiring upgrade before scheduling delivery.
- Hire a licensed electrician to run a new dedicated circuit if your existing infrastructure falls short of the manufacturer’s minimum requirements.
When performing these checks, always use a reliable non-contact voltage tester to confirm that power is completely cut off before opening junction boxes or inspecting wire terminals. Never rely solely on wall switches or assume a breaker is labeled correctly without physically testing the line.
Keeping a written record of your panel layout, wire measurements, and appliance nameplate data also streamlines the consultation process if you end up hiring a professional contractor to handle the wiring upgrade.
Understanding NEC Codes and Local Amendments for Kitchen Appliances
The National Electrical Code (NEC) serves as the nationwide benchmark for safe electrical design and installation practices in the United States. Article 422 specifically addresses appliances, setting forth rigorous standards for disconnecting means, branch-circuit ratings, and overcurrent protection. However, municipal and state jurisdictions frequently adopt local amendments that introduce stricter requirements.
For instance, some local building authorities mandate that all new kitchen appliance branch circuits incorporate arc-fault circuit-interrupter (AFCI) or ground-fault circuit-interrupter (GFCI) protection depending on the room layout and proximity to water sources. Furthermore, local inspectors often require that appliance junction boxes remain fully accessible and never permanently buried behind drywall or cabinetry panels. Reviewing these regional codes before starting a kitchen remodel prevents costly inspection failures.
Staying informed about code updates ensures that your home remains safe, fully insured, and compliant with local real estate disclosure laws should you decide to sell your property in the future.
What to Do If Your Panel is Out of Open Breaker Slots
A common hurdle homeowners encounter during a kitchen upgrade is discovering that their electrical service panel is completely full, leaving no physical space to add a new double-pole breaker for an upgraded 40-amp or 50-amp circuit.
When this occurs, a licensed electrician has a few standard remediation options:
- Installing Tandem Breakers: In some approved panels, replacing standard single-pole breakers with space-saving tandem (twin) breakers can free up physical slots to accommodate a new double-pole tie, provided the panel design and bus bar capacity support it.
- Adding a Subpanel: If the main panel is at maximum capacity or service amperage (e.g., an older 100-amp service), installing a dedicated kitchen subpanel or upgrading the main electrical service to 200 amps may be necessary to safely handle modern home electrical loads.
Evaluating overall home electrical capacity alongside your wall oven upgrade ensures that adding a high-draw appliance does not overload your main service entrance conductors, protecting your entire household from chronic electrical strain.
Frequently Asked Questions About Wall Oven Electrical Setup
Can I plug my electric wall oven into a standard kitchen wall outlet?
No. Standard kitchen countertop receptacles operate on 120 volts and are protected by 15-amp or 20-amp breakers. Electric wall ovens require 240 volts and significantly higher amperage, necessitating a dedicated hardwired connection or specialized heavy-duty receptacle.
Do gas wall ovens require a 240-volt circuit?
Generally, no. Gas wall ovens use natural gas or propane for heating and baking, meaning their primary energy source is gas piping. However, they still require a standard 120-volt grounded electrical outlet to power electronic ignition systems, digital clocks, interior lights, and convection blower fans.
What happens if I install a wall oven on an undersized circuit?
An undersized circuit will experience frequent circuit breaker trips as the oven draws more current than the breaker is rated to carry. More dangerously, the excessive current can cause hidden branch wiring to overheat, degrading the insulation and creating a severe fire hazard behind your kitchen walls.
Can I reuse an old conduit when upgrading my wall oven wire?
Often yes, provided the existing metal or PVC conduit is in good condition, large enough to accommodate thicker wire gauges (like transitioning from 10 AWG to 8 AWG), and securely anchored to building framing.
Working with Licensed Electricians for Kitchen Upgrades
Electrical work involving 240-volt circuits and high-amperage kitchen appliances is never a DIY weekend project for inexperienced homeowners. Working inside a live service panel or running heavy-gauge wire through tight wall cavities carries severe risks of electric shock, arc flashes, and structural fire hazards.
A licensed electrician ensures that your new installation complies fully with the National Electrical Code and local municipal regulations. They can safely fish new wire, install the correct heavy-duty receptacle or junction box, upgrade your circuit breaker, and provide the documentation often required by local building departments for major kitchen renovations.
Hiring a qualified professional also guarantees that your home insurance policy remains valid in the event of an electrical incident, as many insurance providers require proof of permitted, code-compliant electrical work for major appliance modifications.
Conclusion
Evaluating wall oven electrical requirements is an essential part of any kitchen appliance upgrade. By checking your home’s circuit breaker size, inspecting your existing wire gauge, and carefully reviewing manufacturer specifications before purchasing a new single or double convection unit, you can prevent costly delivery delays and ensure safe, reliable performance for years to come. When in doubt, consulting a licensed professional guarantees your kitchen is powered safely, efficiently, and completely up to code.