

When your home water pressure starts to drop noticeably every time someone turns on a faucet or runs the washing machine, the culprit is often hiding in your utility room. Routine whole house sediment filter maintenance is one of the most practical chores a homeowner can tackle to safeguard their plumbing fixtures, water heater, and household appliances. Whether your home relies on a private residential well churning up fine sand and silt, or a municipal line carrying heavy mineral scale, staying on top of your filtration schedule prevents costly plumbing emergencies down the road.
Ignoring a clogged sediment filter or an exhausted scale-prevention media tank does more than just restrict flow. Pressure drops stress your pump, sediment scores ceramic faucet cartridges, and unchecked minerals quickly form rock-hard scale inside tankless water heater coils. Fortunately, servicing these systems requires basic hand tools, a bit of patience, and a clear understanding of your specific plumbing layout. This guide walks you through the exact steps required to shut down your system safely, service the housings, and restore crystal-clear water to your taps.
Understanding Your Whole House Filtration Setup
Before touching a wrench, it helps to understand what your specific system is doing. Most whole house setups feature a multi-stage approach or a dedicated single-stage housing designed to capture particulate matter before it enters your home distribution lines. Sediment filters typically use spun polypropylene, string-wound cords, or pleated polyester mesh to trap physical debris ranging from 1 micron to 50 microns in size.
Alongside sediment filters, many homes—especially those with hard municipal water or aggressive well water—incorporate scale prevention systems. These often use template-assisted crystallization (TAC) media or polyphosphate feed systems to alter how calcium and magnesium behave, stopping them from bonding to pipe walls without removing the minerals entirely. Knowing whether your setup uses a clear plastic sump, an opaque heavy-duty housing, or a specialized media tank dictates how you approach routine upkeep.
Furthermore, evaluating your specific water profile helps determine the ideal filtration media. Spun polypropylene cartridges are exceptional at capturing a broad spectrum of graded sand and silt, acting as depth filters where larger particles are caught on the outer layers and finer particles are trapped near the core. String-wound filters, on the other hand, excel in high-sediment environments where heavy particulate loads would instantly blind a standard flat surface, as the diamond pattern creates hundreds of tiny pockets for debris accumulation. Pleated polyester cartridges offer vastly expanded surface areas, making them ideal for fine sediment where minimizing initial pressure drop is paramount.
Tools and Materials You Will Need
Gathering your supplies beforehand ensures the job goes smoothly without emergency trips to the hardware store halfway through a pipe shutdown. Keep these items staged near your filtration system:
- Replacement filter cartridge or correct volume of replacement media
- Dedicated filter housing wrench (matching your specific sump brand)
- Food-grade silicone grease for O-rings
- Clean, lint-free microfiber towels or rags
- A bucket to catch residual water trapped inside sumps
- Household bleach or specialized sanitizing solution
- Sturdy step stool or work light if your system is mounted overhead
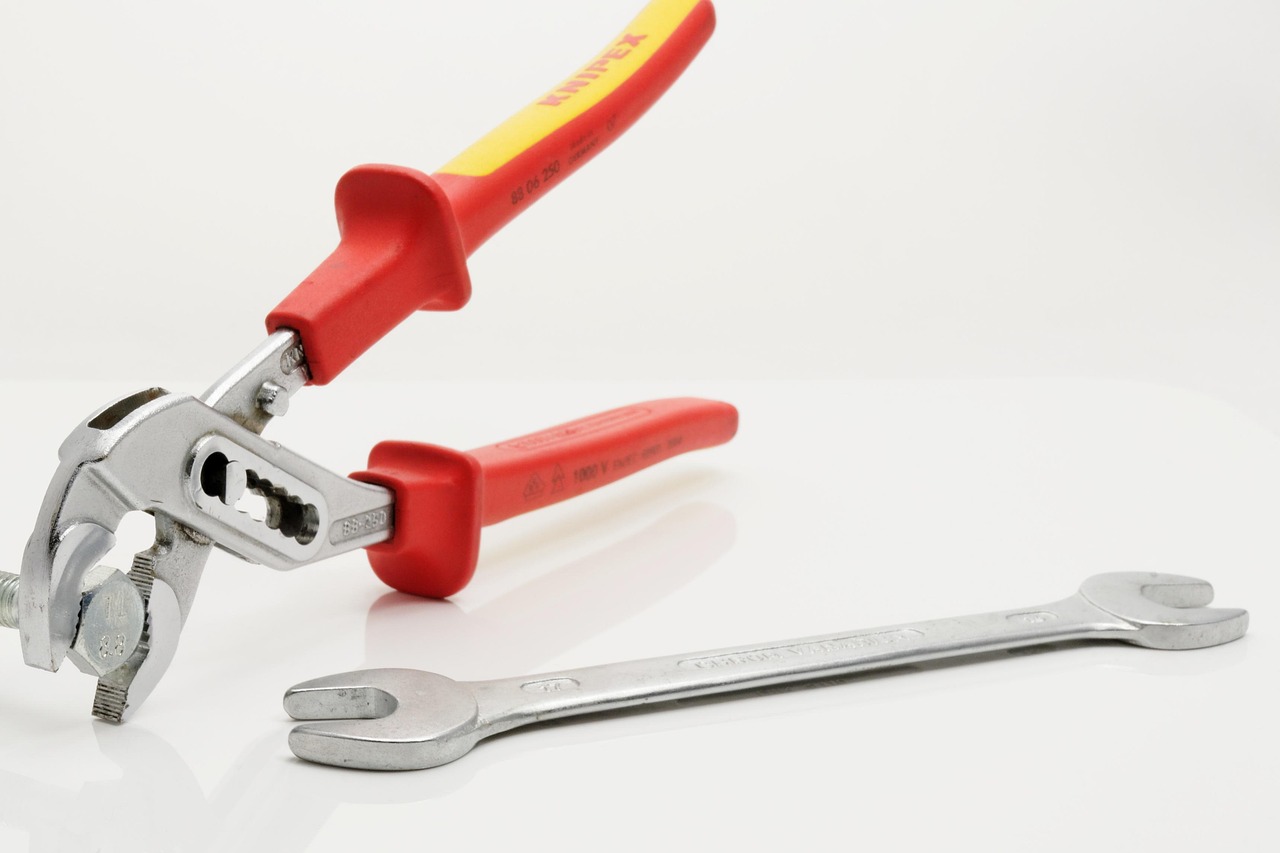
- Channel-lock pliers (use with extreme caution on plastic fittings)
- A pair of protective work gloves and safety glasses to guard against accidental splashes of stagnant water
Step 1: Shutting Off the Water Supply Safely
The golden rule of plumbing maintenance is isolation. You must stop water from entering the filter housing before you attempt to unscrew anything. Locate the primary shut-off valve immediately upstream of your filtration system. If your installation includes a bypass valve—common in three-valve bypass loops or integrated manifold heads—turn the valve to the bypass position.
If you only have a single shut-off valve before the filter, turn it completely clockwise until it is tightly closed. Next, relieve the internal pressure trapped inside the housing. Find the red or black pressure-relief button located on the top cap of the filter head and press it firmly. You should hear a hiss of escaping air followed by a drop in pressure. If your system lacks a relief button, carefully open a nearby downstream faucet—such as a laundry sink or exterior hose bibb—to drain the residual line pressure.
Taking your time during this initial isolation phase prevents sudden pressure blowouts that can spray water across your utility room or dislodge internal housing components. If your shut-off valve feels stiff or refuses to seat completely, do not force it; address the valve issue before proceeding with the filter service to avoid an uncontrollable leak.
Step 2: Removing the Filter Housing Sump
With the water off and pressure relieved, you are ready to remove the sump bowl. Place your bucket directly underneath the filter housing to catch the water that will inevitably spill out once the seal is broken. Slide your filter housing wrench upward from the bottom of the sump until the teeth engage securely with the ribs on the bowl.
Turn the wrench counterclockwise (looking up from beneath the unit) to loosen the sump. If the housing was tightened too aggressively during the last service, it may feel stuck. Tap the wrench handle gently with the palm of your hand to shock the threads loose. Avoid using metal cheater bars or long pipes for extra leverage, as over-torquing can easily crack the plastic head or sump collar. Once the threads break free, spin the bowl off by hand, empty the remaining water into your bucket, and set the heavy sump down on a stable surface.
Examine the extracted water and the spent cartridge inside the sump. The color, texture, and density of the accumulated debris can tell you a great deal about your water source. Heavy rust-colored staining indicates high iron concentrations or iron bacteria, while fine gray silt or gritty sand points toward well intake issues. Recognizing these visual cues allows you to adjust your maintenance intervals proactively rather than reacting only after a complete flow restriction occurs.
Step 3: Cleaning the Housing and Inspecting Components
With the old cartridge removed, take a close look at the interior of the sump bowl and the filter head. Over months of operation, iron slime, silt, calcium crust, and biological film can accumulate inside the unit. Wash the inside of the sump using warm water, a mild dish soap, and a non-abrasive sponge. Never use harsh chemical solvents, bleach concentrates, or abrasive scouring pads on plastic filter sumps, as these can weaken the structural integrity of the material and lead to catastrophic tank failure later.
Inspect the O-ring seal sitting in the groove at the top of the sump bowl. Check for cracks, flattening, pinching, or dry rot. A healthy O-ring should feel supple and round. Wipe down the O-ring and the sealing groove, then apply a thin, uniform coating of food-grade silicone grease. Lubricating the O-ring ensures a watertight seal and prevents the plastic from binding against the head during your next maintenance cycle.
If you notice any lingering bacterial slime or a musty sulfur odor during the cleaning process, take the opportunity to sanitize the housing. Fill the washed sump bowl with a gallon of clean water mixed with a teaspoon of unscented household bleach, let it sit for five minutes, and then rinse thoroughly with fresh water before reassembly. This quick sanitization step keeps microbial growth at bay, particularly in warm utility spaces.
Step 4: Installing the New Filter Cartridge
Unwrap your new sediment filter cartridge. Ensure the micron rating matches your water quality needs—dropping from a 50-micron filter to a 5-micron filter captures finer debris but will clog much faster. Carefully slide the new cartridge down over the central standpipe inside the sump bowl. Make sure the filter sits centered and upright at the bottom of the bowl.
As you lift the sump back up to thread it onto the filter head, guide the central standpipe carefully into the core of the filter cartridge. Hand-tighten the sump clockwise until it is snug. Use your filter housing wrench to snug it an additional quarter-turn, but stop immediately if you feel firm resistance. Over-tightening is the primary cause of cracked sumps and pinched O-rings.
Verify that the cartridge has not skewed or tilted off-center during the threading process. A misaligned cartridge can prevent the sump from sealing correctly against the head, resulting in a frustrating leak the moment water pressure is restored. Taking an extra five seconds to visually inspect the alignment through clear sumps, or feeling for uniform resistance on opaque housings, saves considerable time and cleanup.
Step 5: Flushing and Restoring System Pressure
Before sending filtered water back into your home’s main distribution lines, you must flush trapped air and loose carbon fines (if using combination filters) out of the system. If you used a bypass valve, open the inlet valve slightly while keeping the outlet valve closed, allowing water to fill the housing slowly. Press the pressure-relief button again until water bubbles out steadily, signaling that all trapped air has escaped.
Slowly open the downstream bypass or outlet valves to restore full water pressure to your home. Walk around the house and open the nearest cold-water faucet—such as a utility sink or bathtub—allowing it to run unrestricted for three to five minutes. The water may sputter or appear slightly cloudy with microscopic air bubbles at first; let it run until it flows completely clear and steady.
Monitoring the filtration unit closely during the first ten minutes post-service is critical. Watch the housing collar and threaded connections for any weeping water or slow drips. If a minor leak appears, shut off the inlet valve, relieve the pressure, and gently snug the sump another eighth of a turn. Never attempt to tighten a leaking housing while the system is under full line pressure.
Servicing Scale Prevention Systems and Media Tanks
While whole house sediment filter maintenance deals primarily with cartridge housings, scale prevention systems require a slightly different approach. If your home utilizes a salt-free scale conditioner tank or a traditional water softener, maintenance shifts from swapping cartridges to managing media beds and salt levels.
For electronic or automatic backwashing scale systems, inspect the control valve programming periodically to ensure the clock is accurate and regeneration cycles align with your household water usage. If your system relies on consumable polyphosphate feeder cartridges, monitor the transparent feeder bowl. When the solid scale-inhibitor balls dissolve down to roughly twenty-five percent of their original volume, shut off the water, depressurize the bowl, and top off the media according to the manufacturer specifications.
Neglecting scale prevention media can allow hard mineral buildup to return silently to your plumbing infrastructure. Over time, unchecked calcium and magnesium ions accumulate inside water heater tanks, dishwasher heating elements, and showerhead nozzles, drastically reducing their operating efficiency and shortening their functional lifespans. Integrating scale system checks into your regular sediment filter service routine ensures comprehensive protection for your entire home water network.
Establishing a Sustainable Maintenance Schedule
How often you should service your filtration equipment depends heavily on your daily water consumption and raw water quality. Homes with high iron, heavy sediment load, or high particulate counts may need sediment filter changes every one to three months. In contrast, municipal systems with cleaner incoming water can often stretch cartridge life to six months.
Create a simple maintenance log near your water shut-off valve. Note the date of each service, the part numbers of your filters, and any observations about water pressure or discoloration. Establishing this routine prevents you from guessing when your filters were last changed and protects your home from unexpected pressure drops.
Consider setting a recurring calendar reminder on your smartphone or writing the target replacement date directly on the filter housing with a permanent marker. This proactive approach eliminates guesswork and ensures that even if multiple family members use the water system, everyone understands when service is due. Consistency is the single most effective tool for preventing premature equipment failure.
Recognizing Subtle Signs of a Failing Filter
While a sudden drop in water pressure is the most obvious indicator that your whole house sediment filter requires attention, other subtle symptoms often appear weeks earlier. Learning to identify these early warning signs helps you stay ahead of complete flow restrictions and protects your downstream appliances from operating under sub-optimal conditions.
One common sign is a gradual reduction in flow rate at remote fixtures on the second floor or distant bathrooms, even while the main kitchen sink feels relatively normal. As particulate matter accumulates within the interstitial spaces of the filter medium, the overall volumetric capacity of the housing decreases, manifesting first at fixtures furthest from the main supply line. Additionally, if you notice fine grit accumulating in aerator screens or washing machine inlet filters, it indicates that your sediment cartridge is either saturated, bypassed, or operating beyond its intended micron threshold.
Troubleshooting Common Maintenance Pitfalls
Even with careful planning, unexpected hurdles can pop up during routine upkeep. Here is how to handle the most common issues homeowners encounter:
- Stuck Filter Housings: If the sump refuses to turn, make sure you have fully relieved the internal pressure. If it remains locked due to mineral binding, spray a small amount of food-grade penetrating oil around the threads and let it sit for fifteen minutes before trying the wrench again.
- Persistent Leaks After Installation: If water drips from the housing collar, the O-ring is likely pinched, dirty, or unlubricated. Shut off the water, unscrew the sump, clean the O-ring groove, apply fresh silicone grease, and ensure the O-ring is seated flat in its channel.
- Sudden Pressure Drops Immediately After Service: Double-check that you fully opened both the inlet and outlet valves after completing the filter swap. Also verify that you installed the correct cartridge type and that it didn’t slip off the central standpipe during reassembly.
- Water Discoloration Post-Service: If fine carbon fines or residual iron sediment appear in your taps after a filter change, simply let a high-flow bathtub faucet run wide open for an additional five minutes to thoroughly flush out the downstream distribution lines.
Frequently Asked Questions About Whole House Sediment Filters
Homeowners frequently encounter specific operational questions when managing their residential filtration equipment. Reviewing these common inquiries helps clarify best practices and ensures long-term system reliability.
Can I wash and reuse a disposable sediment filter cartridge? Standard spun polypropylene and string-wound cartridges are designed for single-use applications and cannot be effectively cleaned once particulate matter penetrates deep into the fiber matrix. Attempting to wash them often compresses the fibers or damages the structural integrity, leading to premature tearing and unfiltered water bypass. Only specially designated washable mesh or pleated polyester screens should be rinsed and reused according to manufacturer instructions.
What happens if I ignore my whole house sediment filter entirely? Ignoring a severely clogged filter creates an extreme pressure differential across the cartridge. In worst-case scenarios, the excessive differential pressure can cause the fragile filter core to collapse inward, sending a surge of trapped sediment directly into your home plumbing, water heater, and appliance valves.
Does a sediment filter remove bacteria or chemicals? No. Standard sediment filters are strictly physical barriers designed to catch suspended particulate matter such as sand, silt, rust flakes, and turbidity. They do not remove dissolved minerals, heavy metals, chlorine, volatile organic compounds (VOCs), or harmful pathogens like bacteria and viruses. Addressing those specific contaminants requires specialized equipment such as activated carbon blocks, reverse osmosis systems, or ultraviolet (UV) disinfection units.
When to Call a Professional Plumber
While basic sediment filter maintenance is well within the wheelhouse of most DIY-minded homeowners, certain situations warrant calling a licensed plumbing professional. If your main water shut-off valve is old, corroded, or fails to stop the flow of water completely, attempting to service the filter can result in an indoor flood. Similarly, if your filter housings show signs of UV degradation, hairline cracks, or deep structural scratches in the plastic, shut off the system and have a plumber replace the entire manifold assembly.
Investing a small amount of time every few months into preventative filter care pays massive dividends in water quality and appliance longevity. By following proper safety procedures, respecting torque limits on plastic components, and keeping a steady supply of replacement parts on hand, you can keep your home water system running smoothly for years to come.



