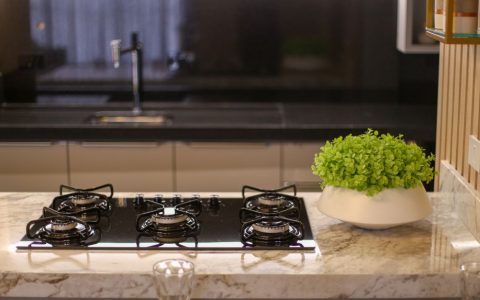
If you have ever walked into your kitchen on a freezing winter morning and felt an unmistakable chill radiating down from your stove, you are not alone. Many homeowners experience persistent cold drafts pouring straight out of their kitchen ventilation systems. While you might initially suspect a poorly sealed window or a drafty door gasket, the culprit is frequently hiding right above your cooktop. Proper range hood backdraft damper maintenance is essential because a faulty exhaust flap lets outdoor air push backward into your home, turning your ventilation ductwork into an open pipe to the outdoors. When the wind picks up outside, that pipe acts as a direct conduit for sub-freezing air, chilling your kitchen floor, cabinets, and countertops.
Addressing this issue requires a hands-on approach. Unlike standard heating and cooling ducts that recirculate conditioned air within a closed loop, kitchen exhaust systems run directly to the outside world, bypassing your home’s conditioned envelope except for the small mechanical barrier meant to stop outside air. When that barrier fails, your furnace works overtime to heat the great outdoors, driving up monthly utility bills while leaving your living space uncomfortable. This guide explores why standard gravity flaps fail, how to locate and inspect your system, and what steps you can take to permanently seal out cold air infiltration through routine upkeep and targeted hardware upgrades.
Understanding How Kitchen Ventilation Dampers Work
To fix a draft effectively, you first need to understand the basic mechanics of how kitchen exhaust systems manage airflow. Every proper range hood connects to a rigid or flexible duct that travels either straight up through the roof or horizontally out an exterior wall. At the termination point outside—and sometimes right behind the hood collar or inline within the concealed ductwork—sits a damper. This one-way valve is engineered to do one simple job: swing open effortlessly when the blower fan pushes air out, and snap or drop tightly shut when the fan turns off to prevent outdoor air from coming back in.
There are two primary styles of dampers found in residential homes. The first and most common is the standard gravity flap. These typically feature two lightweight aluminum or plastic butterfly doors balanced on a central hinge pin. When the fan blows, air pressure pushes them open against gravity. When the fan stops, gravity pulls them down to rest in a closed position. The second style is the spring-loaded damper, which uses light tension springs to force the flaps shut immediately upon fan shutdown, providing a much tighter mechanical seal against wind pressure and thermal stack effect.
Understanding your system’s diameter and CFM (Cubic Feet per Minute) rating also matters. A high-powered range hood moving 600 CFM requires a robust damper capable of handling high-velocity air without vibrating loose or warping over time. Unfortunately, neither standard nor spring-loaded styles are entirely maintenance-free. Over time, environmental factors, cooking residue, and thermal cycling compromise their ability to seal tightly, making regular inspections an essential part of homeownership.
Why Standard Gravity Flaps Fail to Stop Cold Air
Gravity flaps are inexpensive and ubiquitous in residential construction, but they have distinct engineering limitations when it comes to preventing cold air infiltration during freezing weather. Because they rely solely on their own weight to close, even minor obstructions can prevent them from sealing completely, leaving a permanent gap for cold air to cascade into your kitchen.
Grease is the primary enemy of kitchen dampers. Whenever you sear a steak, fry vegetables, or boil stocks, cooking atomizes microscopic oil droplets that travel up the exhaust stream along with steam and smoke. These droplets coat the interior walls of the ductwork and settle directly onto the damper hinges, pins, and edges. Over weeks and months, this residue oxidizes and turns into a sticky, varnish-like glue. The accumulation adds friction to the hinge pins, preventing the gravity flaps from dropping fully shut. A gap as narrow as a sixteenth of an inch—invisible from the room below—is enough to let a steady stream of cold winter air bleed into your kitchen day and night.
Furthermore, standard gravity flaps offer virtually zero resistance against outdoor wind. When high winter winds blow directly against your exterior vent cap, the exterior pressure can easily push lightweight gravity flaps open from the outside. If you notice your kitchen getting drafty specifically on windy days, or if you hear a faint rattling noise inside your ductwork during a storm, your exterior termination cap and internal duct flaps are failing to resist exterior air pressure. Condensation is another major hazard; warm indoor air meeting a cold metal damper during sub-zero temperatures creates moisture that can freeze the flaps shut or rust the hinge pins solid.
Locating Your Exhaust Damper and Assessing the System
Effective maintenance starts with a comprehensive system audit. Because range hood configurations vary widely depending on whether your home is single-story, multi-story, ranch-style, or a condominium, you need to locate every potential damper in your ventilation run. Never assume there is only one damper; many complex installations feature both an internal damper at the hood and an exterior louvered cap.
Start your search indoors by removing the metal grease filters from beneath your range hood and looking upward with a bright flashlight. Depending on the manufacturer and model, you may see a built-in damper right at the exhaust collar where the hood meets the transition piece. Next, trace the duct visually if it runs through an exposed basement ceiling, crawlspace, or utility room. Many longer installations include an inline damper section secured with foil tape or sheet metal screws to assist with backdraft prevention along horizontal runs.

Finally, you must locate the exterior termination point on your roof or exterior wall. Safe access is paramount here. If your vent exits through a side wall at ground level or via an accessible single-story eave, you can inspect it safely from a sturdy ladder planted on level ground. If your vent terminates on a steep second-story roof, prioritize personal safety and inspect it from inside the attic space where the duct penetrates the roof deck, or hire a qualified professional to handle the exterior check rather than risking a fall.
When examining the exterior cap, look for missing louvers, warped plastic frames, or obstructions such as bird nests, insect colonies, and lint buildup. Tap gently on the exterior flap if it is visible, and observe whether it moves freely and returns smoothly to a fully closed position without dragging.
- Inspect the range hood collar for an integrated damper flap and check its freedom of movement.
- Check accessible sections of smooth or flexible ductwork for an inline damper that may have slipped or jammed.
- Examine the exterior roof cap or wall louver for physical damage, UV degradation, or warping caused by seasonal temperature swings.
- Test the movement of all flaps to ensure they swing open smoothly and close tightly without catching on debris.
- Look for signs of condensation staining or insulation sagging around the duct penetrations in unconditioned attic spaces.
Step-by-Step Guide to Cleaning and Lubricating Existing Dampers
If your physical inspection reveals that your current dampers are simply stuck due to accumulated grease, dust, or minor corrosion, a thorough cleaning can restore their performance completely without requiring expensive replacement parts. Dedicating an afternoon to this preventative maintenance task will immediately cut down on unwanted winter drafts and improve overall exhaust efficiency.
Begin by cutting power to the range hood at your main circuit breaker panel to ensure complete safety while working near internal electrical components and blower motors. Remove the metal mesh or baffle filters and any accessible duct sections near the hood collar. Prepare a warm solution of hot water and a heavy-duty degreasing dish soap, or use a specialized commercial kitchen degreaser designed to break down baked-on animal fats and vegetable oils.
Scrub the damper flaps and the surrounding interior housing thoroughly using a non-abrasive scrub sponge or nylon brush to remove all traces of sticky grease. Pay special attention to the pivot pins, springs, and hinges, as this is where friction invariably accumulates. Once the metal or plastic surfaces are spotless and completely dry, check the mechanical movement once more. If the hinge mechanism feels dry, stiff, or squeaky, apply a tiny drop of high-temperature, food-safe silicone lubricant or lightweight machine oil to the pivot points. Avoid heavy, sticky greases that will quickly attract new cooking dust and lint, compounding the problem over time.
If your inspection uncovers a physically damaged gravity flap—such as a cracked plastic door, a snapped spring, or a bent aluminum hinge pin—do not attempt to patch it with duct tape, as heat and moisture will quickly degrade the adhesive. Replacement damper inserts are inexpensive and widely available at local hardware stores and home improvement centers. Simply slide out the old unit and slide in the new one, securing all joints with UL-listed aluminum foil tape to ensure a permanently airtight connection.
Upgrading to Superior Backdraft Prevention Options
If cleaning, lubricating, and minor parts replacement do not stop the cold air infiltration, your kitchen ventilation system may simply be suffering from an inferior or outdated design. Upgrading your hardware is the most reliable way to permanently solve persistent draft issues in harsh climates.
Consider replacing a standard gravity wall cap with a heavy-duty louvered cap equipped with magnetic closures or tight rubber gaskets. These premium exterior caps feature physical seals that snap shut and hold exceptionally well against high wind loads, preventing outdoor air from forcing the louvers open. Another exceptional upgrade is installing a spring-loaded inline backdraft damper inside your accessible ductwork. These dedicated units use internal stainless steel or galvanized springs to pull the butterfly doors shut with positive tension, neutralizing standard indoor-outdoor pressure differentials.
For ultimate thermal performance, homeowners can install a motorized damper wired directly to the range hood switch or an auxiliary power pack. When you turn on your exhaust fan, an electric motor opens the damper fully before the fan begins moving air. When you turn the fan off, the motor drives the damper completely closed, creating a positive mechanical seal that wind pressure cannot force open under any circumstances. While more complex to wire and install, motorized dampers offer the absolute best defense against cold air infiltration in homes located in cold winter regions.
Preventative Habits to Keep Your Ventilation System Draft-Free
Maintenance does not end once you successfully fix the immediate winter draft. To ensure your kitchen stays warm and your ventilation system operates at peak efficiency year after year, establish a simple, structured routine for your home hardware. Incorporate these proactive practices into your seasonal home care checklist:
- Clean your metal grease filters monthly in the dishwasher or with hot soapy water to dramatically reduce the amount of oil vapor traveling up into the ductwork.
- Inspect the exterior vent cap twice a year—once in late autumn before freezing weather sets in, and once in spring after winter storm season has passed.
- Run your range hood for five to ten minutes after you finish cooking meals to clear residual moisture, steam, and grease vapor out of the entire duct run, preventing accumulation on the damper.
- Check for pest intrusion annually, as birds, mice, and insects frequently nest inside exterior vent caps during the off-season, holding the damper flaps open permanently.
- Verify that your home has adequate makeup air if you operate a high-CFM range hood, preventing negative pressure from pulling outside air down through alternative gaps.
By maintaining clear airflow and ensuring your damper seals completely, you eliminate a major hidden source of heat loss in your home. Taking these steps protects your indoor comfort, prevents structural moisture damage within your ductwork, and lowers your monthly utility bills all winter long.
Conclusion
Cold air infiltration through a kitchen ventilation system is an avoidable annoyance that compromises both your home’s thermal comfort and your household heating budget. By understanding how gravity and spring-loaded flaps operate, regularly inspecting your indoor and exterior vent components, and removing stubborn grease buildup, you can ensure your system seals tightly when not in use. Whether a simple cleaning session restores your existing hardware or an upgraded spring-assisted damper provides the heavy-duty seal you need, proactive range hood maintenance keeps your kitchen warm and your energy efficiency intact season after season.