Purchasing a pre-owned tent trailer is one of the most cost-effective ways to get off the ground and into the world of recreational vehicle camping. However, unlike traditional hard-sided travel trailers, folding camping trailers rely heavily on fabric walls, complex lift mechanisms, and lightweight wood framing. When you are buying a used popup camper guide principles become your best defense against unexpected repair bills. While a vintage or gently used rig might look pristine on a classified listing, moisture intrusion, degraded canvas, and neglected lift cables can hide just beneath the fiberglass skin. This comprehensive manual walks you through evaluating structural wear, spotting water damage before it ruins your investment, and calculating the true total cost of ownership.
Understanding the Allure and Reality of Tent Trailers
Popup campers strike a unique balance between tent camping and RV comfort. They offer elevated sleeping quarters, protection from ground moisture, and often amenities like a refrigerator, sink, and furnace. Because they collapse into a low-profile trailer, they are easy to store in a standard garage and can be towed by mid-sized SUVs, crossovers, and even some larger sedans. Yet, this very design introduces vulnerable points that traditional trailers avoid.
The primary trade-off with a popup camper is exposure. The canvas or vinyl tenting is constantly subjected to UV rays, rain, wind, and temperature fluctuations. Meanwhile, the wooden cabinetry and subfloors are susceptible to trapped humidity. When shopping on the pre-owned market, your goal is to separate cosmetic wear from structural failure. A faded exterior decal is easy to live with; a rotted roof side board requires a complete woodworking rebuild.
Furthermore, understanding the different eras of popup camper manufacturing helps set realistic expectations. Older models from the 1980s and 1990s often feature simpler mechanical systems that are easier for DIYers to service, but they are also more likely to suffer from degraded wiring, brittle plastics, and water-damaged cabinetry. Newer models incorporate lightweight composites and advanced lift designs, but electronic control boards and specialized parts can complicate roadside repairs. Knowing what you are looking at helps you budget for immediate post-purchase updates.
The Exterior Inspection: Roof, Seals, and Frame
Always begin your evaluation from the outside before the seller cranks up the roof. Walk around the perimeter of the trailer and examine the exterior walls, roof edges, and tongue structure. Look for wavy aluminum siding, which is a classic indicator of water intrusion and rotting interior studs. Check the roof seams and sealant, known as putty tape or lap sealant, around roof vents, air conditioners, and corner caps. Cracked, peeling, or hardened sealant is a sure sign that water has had an open invitation into the roof structure.
Pay close attention to the roof material itself. Many campers manufactured from the late 1990s through the mid-2000s—particularly certain Coleman and Fleetwood models—used a single-piece ABS plastic roof. While smooth and aerodynamic, these roofs are prone to thermal degradation, hairline cracking, sagging, and delamination if they were exposed to intense sun without protective coatings. If you spot spider cracks or deep warping on an ABS roof, walk away or factor in the high cost of a total roof replacement or specialized coating system. Aluminum-skinned and fiberglass-skinned roofs are generally more forgiving, provided the corner seams have been maintained with fresh butyl tape and self-leveling sealant.
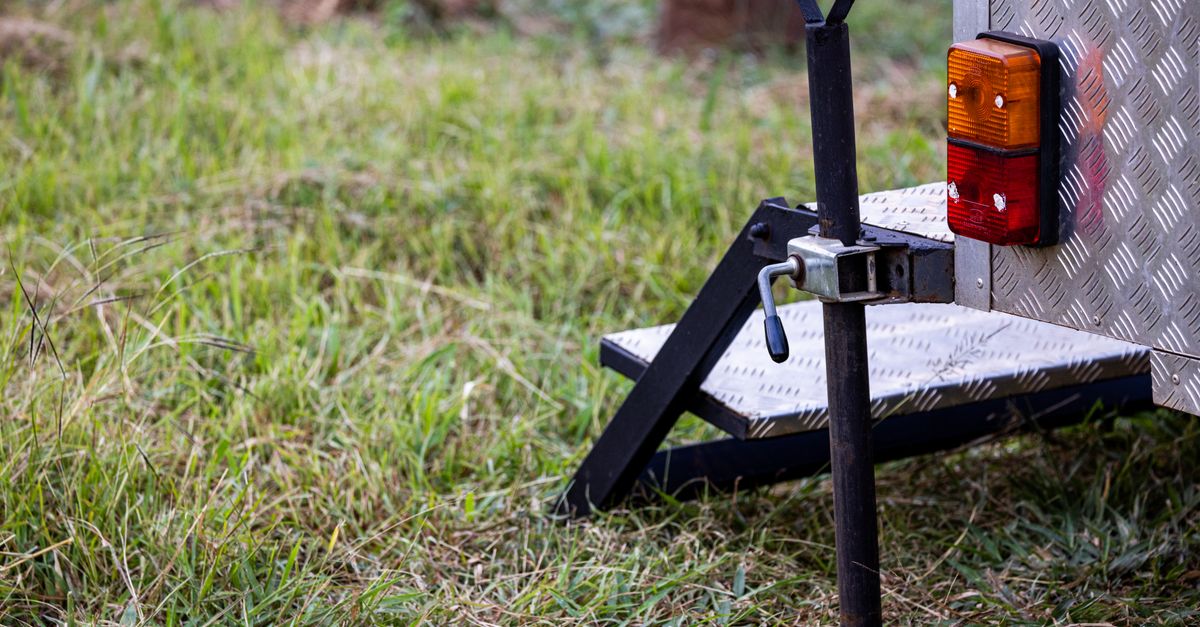
Inspect the trailer frame for rust. Surface rust on a steel frame is normal and easily remediated with wire brushing and rust-inhibitive paint, but deep pitting, structural bending, or cracks near the axle mounting points are deal-breakers. Check the tongue jack and safety chains for integrity. If the trailer is equipped with brakes, inspect the wiring harness and backing plates for corrosion.
Evaluating Lift Systems and Cable Wear
The roof lift system is the mechanical heart of any popup camper. There are a few common designs, including winch-and-cable systems (most notably the Goshen system), direct-drive chain systems, and hydraulic or pneumatic lifts. Regardless of the brand, you must operate the lift system yourself. Never let the seller have the roof already raised when you arrive; you need to hear, feel, and see how the mechanism performs under load.
As you crank the roof upward, listen for grinding noises, popping sounds, or excessive resistance. The crank handle should turn smoothly, and the friction brake or ratchet stop should hold the roof securely at any point if you let go of the handle. Once the roof is fully extended, examine the four corner posts. They should rise evenly without binding or tilting. Look underneath the trailer or inside access panels to inspect the lift cables for fraying, rust, or stretching. Replacing a frayed cable is manageable for a handy DIYer, but a snapped cable system can cause the roof to drop precipitously, creating a severe safety hazard.
If the camper uses a Goshen lift system—recognizable by a heavy tube running across the underside of the frame with cables extending to each corner—inspect the main pusher springs inside that channel. These springs must be well-greased and free of rust buildup. For older lift systems where replacement parts are obsolete, sourcing custom hardware can turn a minor mechanical glitch into a frustrating restoration project.
Canvas Mildew Limits and Fabric Integrity
The tenting material is one of the most expensive components on a popup camper to replace, often costing upwards of a thousand dollars for a custom-fit aftermarket replacement. When evaluating the canvas, examine every square foot for signs of dry rot, UV degradation, pinholes, and mildew. Modern campers typically use multi-layer acrylic or vinyl-laminated fabrics, while older models may feature heavy-duty cotton canvas or Sunbrella.
Mildew stains are common, but active mold and mildew that have eaten through the fabric fibers will cause leaks during rainstorms. Check the stitching along seams and windows; thread deteriorates over time under intense sunlight, causing seams to split apart. Open and close every zipper, screen, and clear vinyl window. Zippers that are stuck, corroded, or missing teeth can be tedious and costly to repair. Furthermore, inspect the bunk-end support poles and shepherd’s hooks to ensure they are straight and securely mount to the roof and box.
When inspecting vinyl-laminated canvas, look closely at the fold lines and corners where the fabric compresses when closed. This is where cracking most frequently occurs. If the vinyl coating is flaking off or brittle to the touch, the canvas is near the end of its lifespan. While surface mildew can often be cleaned with specialized marine-grade canvas cleaners and re-waterproofed, rotted fabric or degraded stitching requires either professional restitching or total replacement.
Interior Water Damage Risks and Floor Soft Spots
Water is the ultimate enemy of a tent trailer. Because popups are constructed with lightweight particle board, luan plywood, and foam insulation, moisture can quickly compromise their structural integrity. Once the roof is up and the canvas is exposed, look closely at the interior ceiling panels, especially around the roof vents and corners. Dark water stains, sagging ceiling panels, or spongy roof framing indicate active or past leaks.
Next, inspect the floors. Walk systematically across the entire linoleum-covered surface, paying special attention to the corners under the dinette, near the door threshold, and around the slide-out if the model features one. Soft spots, dips, or areas where your foot noticeably depresses the floor mean the subfloor has rotted from water pooling inside or wicking up from road spray. Fixing a rotted subfloor requires gutting the interior cabinetry and furniture, making it a major restoration project.
Don’t forget to check inside cabinets, under bench seats, and around wheel wells. Musty odors are a dead giveaway that the trailer has been closed up while damp. Even if visible surfaces look clean, a persistent mildew smell usually points to hidden moisture trapped within the wall cavities or under the slide-out box.
Appliances, Electrical, and Plumbing Systems
A popup camper may be simple, but modern units often include a three-way refrigerator (120V AC, 12V DC, and propane), a propane furnace, a water pump, a sink, and interior lighting. Do not take the seller’s word that these systems work; test every single one before exchanging money.
Plug the camper into shore power or a generator to verify that the converter transforms 120V AC power down to 12V DC for the interior lights and water pump, and that all electrical outlets function. Test the refrigerator on both electricity and propane if possible, noting that absorption refrigerators can take several hours to cool down. If the camper has a propane furnace, ignite it and check that it blows hot air and cycles off properly via the thermostat. For the plumbing system, fill the onboard water tank or connect a fresh water hose, operate the hand pump or electric faucet, and check underneath the sink and around the water heater for leaks. Also, test all running lights, brake lights, and turn signals by plugging the seven-way or four-way trailer connector into your tow vehicle.
Take extra time to evaluate the electrical converter box, especially in vintage campers. Older single-stage converters lack smart charging capabilities and can easily boil dry a deep-cycle marine battery if left plugged in continuously. Upgrading to a modern three-stage converter is a common and necessary project for older popups, so factor that minor parts cost into your purchase negotiation if the unit is dated.
Common Popup Camper Brands and Structural Quirks
Different camper manufacturers utilized distinct construction methods, and knowing these brand-specific quirks can save you from buying a lemon. For instance, Coleman and Fleetwood campers built between 1996 and 2003 are famous for their ABS plastic roofs; while some owners love their sleek appearance, unmaintained roofs from this era are notorious for sagging and delaminating. Meanwhile, older Starcraft and Jayco models are often praised for their durable wood framing and traditional aluminum siding, but their lift cables and pulleys require diligent lubrication to prevent binding.
Rockwood and Flagstaff campers often feature high-wall configurations that offer taller interior headroom and hard-sided bathrooms, but the added weight places greater strain on the lift system and requires a more robust tow vehicle. By researching the specific make, model, and year you are considering, you can pinpoint exact problem areas—such as specific wood rot prone corners or proprietary lift parts—before you schedule an in-person inspection.
The Step-by-Step Field Test Protocol
When you arrive to inspect a used popup camper, follow a strict, repeatable protocol to avoid missing critical flaws. First, do a walk-around while the trailer is completely closed. Check tire age codes, frame rust, tongue weight, and exterior sealant. Next, hitch the trailer or ensure it is securely chocked, and test all exterior running lights with your tow vehicle.
Third, ask the seller to let you operate the crank. Watch how the roof lifts from all four corners simultaneously, listening for binding or clicking sounds. Once fully extended, raise the door, install the bunk-end bows, and extend the canvas beds. Inspect every zipper, window screen, and interior cabinet. Finally, turn on every appliance—refrigerator, furnace, water pump, and lights—and let them run for the duration of your inspection. A seller who refuses to let you perform a complete setup is hiding something.
Towing Requirements and Vehicle Compatibility
Before you commit to buying a used popup camper, verify that your towing vehicle is actually up to the task. Many first-time buyers focus solely on the dry weight of the camper listed in the brochure, forgetting to account for cargo, water, propane, and gear. A popup that weighs 2,000 pounds empty can easily reach 3,000 pounds when loaded with camping gear, a full water tank, and a battery.
Consult your vehicle owner’s manual to determine its maximum towing capacity and tongue weight limits. Remember that towing capacity decreases when climbing steep grades or driving at high altitudes. Check your vehicle’s hitch receiver class; a Class I or Class II hitch may not support a heavier camper or a weight-distributing hitch if required. Additionally, ensure your vehicle has the necessary wiring harness and transmission cooler to handle the extra load without overheating.
Pay close attention to tongue weight—the downward force the trailer tongue exerts on the hitch ball. Ideally, tongue weight should fall between 10% and 15% of the total loaded trailer weight. If the tongue weight is too light, the trailer can sway dangerously at highway speeds; if it is too heavy, it can unload the front tires of your tow vehicle, reducing steering traction.
Total Cost of Ownership Beyond the Purchase Price
The sticker price of a used popup camper is only part of the financial equation. Smart budgeting requires looking at the total cost of ownership over the first year of camping. Factor in the following expenses when evaluating your overall budget:
- Registration and Taxes: Most states require trailers to be registered and titled annually, along with applicable sales tax on private or dealer sales.
- Insurance: While standard auto policies sometimes offer minimal liability coverage for towed trailers, a dedicated RV or comprehensive trailer policy protects against theft, storm damage, and accidents.
- Safety Maintenance: Budget immediately for new trailer tires. Tires degrade from UV exposure and age (often rotting after five to seven years) even with plenty of tread left. Wheel bearing repack or replacement is another non-negotiable safety expense for a newly acquired trailer.
- Storage Fees: If you cannot park the camper in your driveway or garage, secure off-site storage will add a recurring monthly or annual cost.
- Camping Gear and Supplies: Upgrades like a heavy-duty leveling kit, chocks, a fresh water hose, a surge protector, and holding tank chemicals are essential initial purchases.
Additionally, set aside a miscellaneous repair fund. Even well-maintained trailers occasionally demand minor fixes, such as replacing a blown fuse, resealing a marker light, or patching a minor screen tear. Having a buffer prevents unexpected maintenance from derailing your camping season.
Frequently Asked Questions About Buying a Used Popup Camper
Can I tow a popup camper with a four-cylinder crossover or sedan?
Some ultra-lightweight, small popup campers weigh under 1,500 pounds empty and can be safely towed by certain four-cylinder vehicles, provided you check the manufacturer’s tow rating and ensure you do not exceed payload limits. Always verify your vehicle’s manual rather than guessing.
How difficult is it to replace canvas on an older popup camper?
Replacing canvas is a labor-intensive project that requires careful measurement and fastening, but it is entirely manageable for a patient DIYer. Custom replacement canvases can be ordered online from specialty manufacturers, though they require an investment of several hundred dollars.
What should I look for regarding trailer tires?
Check the Department of Transportation (DOT) date code on the sidewall of the tires. A four-digit code like ‘2118’ indicates the tire was manufactured in the 21st week of 2018. Any trailer tire older than five to six years should be replaced immediately, regardless of tread depth, to prevent catastrophic blowout on the highway.
Negotiating and Closing the Deal
Armed with your inspection findings, you are ready to negotiate. Use documented flaws—such as cracked sealants, worn tires, outdated canvas, or a sticky lift mechanism—as leverage to lower the asking price. Request a clear title free of liens. In many states, older trailers are transferred via a bill of sale rather than a title, so verify your local Department of Motor Vehicles requirements before handing over cash.
Finally, ensure the transaction takes place in a safe, well-lit location, preferably during daylight hours so you can perform a complete setup and teardown test. Taking the extra time to methodically evaluate your prospective camper ensures you drive away with a reliable basecamp rather than a costly driveway ornament.