When a cat stops eating for any extended period, their body mobilizes peripheral fat stores to supply emergency energy to the liver. Because a feline liver is not metabolically adapted to process large quantities of mobilized fat rapidly, lipids accumulate within the liver cells (hepatocytes), leading to severe liver dysfunction, jaundice, and dangerous systemic illness. Receiving a fatty liver diagnosis can feel overwhelming, but mastering feline hepatic lipidosis tube feeding home care US protocols allows you to deliver life-saving liquid nutrition directly to your cat while their liver gradually recovers.
With prompt veterinary intervention and structured, consistent home nursing care, hepatic lipidosis carries an excellent prognosis. The core mechanism of treatment is deceptively straightforward: balanced, high-protein calories delivered continuously via an esophagostomy feeding tube (e-tube) until the cat regains an appetite and voluntarily meets their daily energy requirement. This guide breaks down essential daily procedures, syringe feeding calculations, bandaging protocols, nausea management strategies, and practical troubleshooting steps to help you safely guide your cat through home recovery.
Understanding Hepatic Lipidosis and Nutritional Recovery
Feline hepatic lipidosis typically develops when an overweight or obese cat experiences a sudden period of anorexia lasting more than three to five days. Primary triggers often include acute environmental stress, moving into a new home, introduction of a new pet, sudden changes in diet, or underlying medical conditions such as pancreatitis, inflammatory bowel disease (IBD), feline lower urinary tract disease (FLUTD), or chronic kidney disease. Regardless of the underlying cause, once anorexia sets in, a dangerous physiological feedback loop begins: fat builds up inside the hepatocytes, causing progressive liver swelling, bile stasis, and severe nausea, which further extinguishes the cat’s desire to eat.
Fatty liver disease cannot be reversed with oral medications alone. The ultimate therapy is adequate, continuous high-protein nutrition. Trying to force-feed an anorexic cat by mouth using a syringe or spoon is strongly discouraged by veterinary specialists. Syringe-feeding into the mouth frequently causes severe food aversion, intense panic, and a high risk of life-threatening aspiration pneumonia if food enters the airway. An esophagostomy tube (e-tube) bypasses the mouth entirely, allowing pet owners to deliver precise volumes of liquid diet, supplemental water, and oral medications directly into the lower esophagus without stress, pain, or struggling.
Setting Up Your Home Feeding Station and Toolkit
Establishing an organized, designated care area in your home saves valuable time and establishes a predictable routine for your cat. Choose a quiet, low-traffic room with good lighting and a flat, easy-to-clean working surface, such as a sturdy table or kitchen countertop. Placing a non-slip rubber mat or soft blanket under your cat helps them feel secure and comfortable during each nursing session.
Before bringing your cat home from the veterinary hospital, assemble a complete home feeding toolkit containing the following essential supplies:
- Prescription Liquid Recovery Diet: Veterinary-formulated diets (such as Royal Canin Recovery Liquid, Hill’s Prescription Diet a/d, or similar high-calorie liquid enteral formulas) specifically designed for smooth delivery through standard feeding tube diameters.
- Feeding and Flush Syringes: A steady supply of 35 mL to 60 mL catheter-tip syringes for food delivery, along with smaller 5 mL to 12 mL syringes for pre- and post-meal water flushes and medication administration.
- Water Flush Supply: Clean, lukewarm water (filtered or distilled water is preferred) to maintain hydration and flush the line clear after every feeding session.
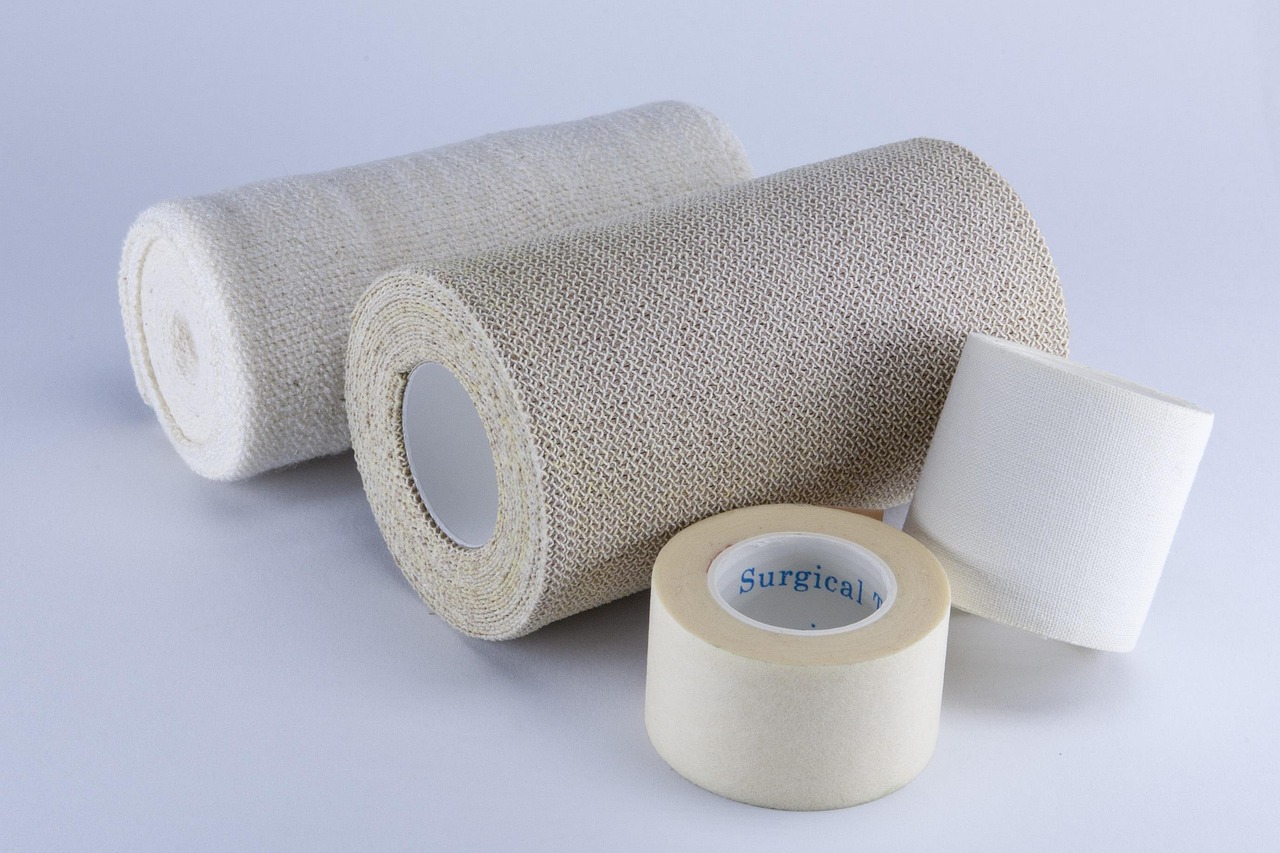
- Bandage and Hygiene Supplies: Sterile 2×2 or 4×4 gauze pads, pre-cut split gauze sponges, chlorhexidine or dilute povidone-iodine disinfectant wipes, soft cotton orthopedic padding (Cast Padding), and flexible self-adhesive bandage wrap (Vetwrap or Flexus).
- Digital Gram Scale: A reliable digital scale to weigh your cat daily at the same time each morning to track real weight trends and fluid retention.
- Nursing Care Logbook: A dedicated notebook or electronic tracking sheet to record daily body weight, exact meal times, calculated food volumes, water flush amounts, medication times, bowel movements, and any observed signs of nausea.
Calculating Daily Caloric Intake and Feeding Volumes
Your primary care veterinarian will calculate your cat’s target daily caloric intake based on their resting energy requirement (RER) and current dry body weight. It is crucial never to begin feeding 100% of the calculated target calorie goal on the first day home. Rapid refeeding after a period of starvation can trigger dangerous intracellular shifts of potassium, phosphorus, and magnesium—a life-threatening metabolic complication known as refeeding syndrome.
Determining the Resting Energy Requirement (RER)
The standard metabolic formula used by veterinary professionals to calculate baseline energy requirements is:
RER (in kilocalories per day) = 70 × (Body Weight in kg)^0.75
Alternatively, a simplified linear calculation suitable for domestic cats weighing between 2 kg and 10 kg (4.4 lbs to 22 lbs) provides a close approximation:
RER (in kilocalories per day) = (30 × Body Weight in kg) + 70
For example, a cat weighing 4 kg (8.8 lbs) has an estimated RER of approximately 190 kcal per day. If utilizing a liquid veterinary enteral diet that provides 1.0 kcal per milliliter, the cat will eventually require 190 mL of formula total per 24-hour period once fully transitioned.
Gradual Refeeding Schedule
To safely adapt your cat’s gastrointestinal tract and prevent electrolyte imbalances or acute gastric dilation, expand daily caloric intake gradually across the first several days of home care as instructed by your veterinarian:
- Day 1 Home: Administer 25% to 33% of the total calculated daily RER, divided across 4 to 6 small, evenly spaced feedings.
- Day 2 Home: Administer 50% to 66% of total daily RER divided into 4 to 5 small feedings.
- Day 3 Home: Administer 75% to 80% of total daily RER divided into 4 feedings.
- Day 4 Onward: Administer 100% of calculated daily target calories divided into 3 to 4 daily meals until voluntary eating resumes.
Step-by-Step Tube Feeding Procedure
Syringe feeding through an esophagostomy tube must always be a calm, unhurried procedure. Rapid injection of cold food into the esophagus triggers esophageal distension, gastric spasms, immediate regurgitation, and intense nausea. Follow this step-by-step nursing routine for every meal:
1. Food and Water Preparation
Accurately measure the exact pre-calculated meal volume into a clean measuring cup or bowl. If utilizing a canned recovery diet instead of a premixed liquid diet, blend the food thoroughly with warm water using a blender and pass it through a fine-mesh strainer to eliminate any micro-clumps that could occlude the internal lumen of the e-tube. Warm the prepared meal gradually by floating the food cup in a warm water bath until it reaches room temperature or approximate body temperature (98°F to 100°F). Always test a small drop on the inside of your wrist; never use a microwave oven, as microwaves create dangerous localized hot spots that can burn sensitive esophageal tissue.
2. Position Your Cat Comfortably
Place your cat on their comfortable, towel-lined feeding station in a natural upright sitting or sphinx position. Never attempt to feed a cat while they are lying flat on their side or turned upside down, as improper positioning greatly increases the risk of esophageal reflux and secondary aspiration into the lungs.
3. Confirm Tube Placement and Perform Initial Flush
Unwrap the protective outer wrap to access the end port cap of the e-tube. Unclamp the tube line (if clamped) and attach a small syringe containing 3 mL to 5 mL of lukewarm water. Before pushing water in, gently pull back on the syringe plunger slightly to confirm negative pressure. Next, smoothly inject the warm water flush. If the water flows smoothly without resistance and your cat remains calm without coughing, spluttering, or swallowing frantically, the tube is properly situated in the esophagus.
4. Administer the Liquid Meal Slowly
Attach the primary syringe containing the warm liquid diet to the e-tube port adapter. Slowly depress the plunger, injecting the formula at a rate of approximately 1 mL every 3 to 5 seconds. A standard meal volume of 25 mL to 40 mL should take between 10 and 15 continuous minutes to administer. Maintain continuous visual contact with your cat’s eyes, ears, and facial expression throughout the entire injection.
5. Clear the Line with a Final Flush
Once the full food volume has been delivered, disconnect the food syringe and attach a clean syringe filled with 5 mL to 10 mL of lukewarm water. Smoothly inject the flush to clear all remaining milk or food residue completely out of the internal lumen of the tube into the stomach. Leaving residual nutrient liquid inside the tube line encourages rapid bacterial proliferation and creates stubborn, dried physical clogs. Once flushed, re-cap the port securely, close any tube clamps, and gently tuck the feeding line back into the protective neck wrap.
Esophagostomy Tube (E-Tube) Site Maintenance
The insertion site on the left side of your cat’s neck, known as the stoma, requires meticulous daily hygiene to prevent local bacterial infection, skin breakdown, and subcutaneous abscess formation. A healthy stoma should appear clean and dry or show minimal clear to light pink serous exudate.
Perform a complete wrap change and stoma examination at least once daily (or immediately if the wrap becomes soiled, wet, or shifted) using the following protocol:
- Wash your hands thoroughly with antibacterial soap and gather clean sterile gauze, chlorhexidine cleaning solution, fresh cotton padding, and flexible wrap.
- Carefully unwap the outer Vetwrap layer and underlying soft padding, taking extreme care not to snag or pull on the feeding tube itself or cut the retention sutures anchoring the flange to the skin.
- Inspect the surrounding skin thoroughly for signs of redness, heat, foul odor, thick purulent (yellow/green) discharge, or focal swelling.
- Using a sterile gauze pad dampened with dilute chlorhexidine solution, gently clean away dried crusts and discharge surrounding the stoma base, moving in a continuous outward circular motion. Avoid aggressive scrubbing.
- Pat the skin completely dry with fresh sterile gauze. Moisture trapped underneath tight bandages rapidly leads to skin maceration, open ulcerations, and fungal growth.
- Place a fresh pre-cut split gauze sponge flat against the skin directly underneath the rubber tube flange to cushion the skin against pressure points.
- Apply a fresh layer of soft cotton padding around the neck, lay the looped tube line comfortably against the padding, and wrap smoothly with self-adhesive wrap. The completed wrap should feel snug enough to stay in place but loose enough to easily slide two fingers underneath the bandage edge.
| Condition Visualized | Normal Finding | Abnormal / Vet Action Needed |
|---|---|---|
| Stoma Margin | Pink, healthy skin; minor clear/pink fluid | Bright red skin, heat, foul odor, green or yellow pus |
| Neck Tissue | Soft, supple, smooth skin around wrap | Subcutaneous swelling, crackling air feeling (emphysema) |
| Suture Line | Intact sutures securing tube flange firmly | Loose or snapped sutures, tube slipping outward |
| Tube Material | Clear, flexible silicone or polyurethane tube | Kinked, cracked, discolored, or brittle tubing |

Managing Nausea, Vomiting, and Salivation
Persistent nausea is the most frequent clinical challenge encountered during feline hepatic lipidosis home recovery. When a cat experiences systemic nausea, forced stomach filling triggers abdominal distress, retching, and potential vomiting, which defeats the purpose of enteral feeding, creates food aversion, and risks displacing the feeding tube during violent retching.
Recognizing Feline Nausea Cues
Cats demonstrate nausea through subtle physical behaviors prior to overt vomiting. Watch carefully for these signs before, during, or immediately following any syringe feeding session:
- Excessive, repetitive lip smacking or swallowing movements
- Profuse, thick salivation or drooling (hypersalivation) hanging from the lips
- Repeatedly licking the lips while turning the head away from food or turning toward the wall
- Restlessness, vocalizing, growling, or sudden postural shifts during syringe injection
- Visible abdominal contractions, dry heaving, or retching
Antiemetic and Prokinetic Interventions
You should work closely with your veterinarian to establish a preventive antiemetic medication schedule before bringing your cat home. Common veterinary medications prescribed during hepatic lipidosis treatment include:
- Maropitant Citrate (Cerenia): A highly effective NK1 receptor antagonist that blocks the vomiting center in the brain. Commonly administered once daily through the e-tube or via subcutaneous injection.
- Ondansetron (Zofran): A 5-HT3 receptor antagonist that targets both peripheral serotonin receptors in the gut and central receptors in the chemoreceptor trigger zone. Highly effective when administered 30 to 45 minutes prior to scheduled feedings.
- Metoclopramide: A prokinetic agent that stimulates gastric emptying and upper gastrointestinal motility, helping empty the stomach efficiently in cats experiencing delayed gastric transit time.
If your cat shows clear signs of nausea during a feeding session, stop pushing the syringe plunger immediately. Allow your cat to rest quietly in a dimly lit, stress-free environment for 15 to 20 minutes. If signs of nausea resolve completely, resume the meal at half the previous injection speed. If actual vomiting occurs, hold the remaining food volume for that session, record the event in your log, notify your veterinary hospital, and administer antiemetics as directed.
Troubleshooting Common Feeding Tube Complications
Even with meticulous home care, practical tube complications can occasionally occur. Understanding how to address minor technical issues calmly prevents unnecessary stress and protects your cat’s safety.
Unclogging an Obstructed Feeding Tube
If you encounter strong mechanical resistance when depressing the syringe plunger during a water flush or meal delivery, the inner lumen of the tube is likely obstructed by dried liquid diet or debris. Use this step-by-step troubleshooting sequence to safely clear the line:
- Never force the plunger: Applying intense manual pressure with a large syringe can rupture the silicone tube wall or tear the internal retention sutures anchoring the tube inside the esophageal wall.
- Switch to a smaller syringe size: Fill a small 3 mL or 5 mL syringe with warm water. Smaller syringe barrels generate significantly higher internal hydraulic pressure with lower volume displacement than large 60 mL catheter syringes.
- Apply gentle pull-push pressure: Connect the small syringe securely and gently pull back on the plunger to create a mild internal vacuum, then push forward gently. Repeat this slow, alternating pull-push motion repeatedly to break up the blockage.
- Utilize Carbonated Water or Enzymatic Solutions: If warm water fails to clear the obstruction, fill the tube lumen with carbonated club soda or warm isotonic saline, clamp the end of the tube, and let the liquid sit inside the line for 15 to 20 minutes to break down dried protein deposits before attempting to flush again with warm water.
Managing Accidental Tube Dislodgement or Removal
If your cat manages to scratch off their protective neck wrap and partially or completely pulls the feeding tube out of their neck, stay calm and never attempt to reinsert the tube back into the stoma site. Pushing a non-sterile, contaminated tube line back into an open neck tract can introduce severe deep-tissue bacterial infection, cause subcutaneous emphysema, or damage the internal carotid artery, jugular vein, or esophageal tissue.
Cover the open neck stoma immediately with a clean, sterile gauze pad, secure it loosely with a temporary wrap or bandage, and transport your cat directly to your local veterinary hospital or emergency clinic. If addressed promptly, a veterinarian can safely pass a replacement sterile catheter through the existing, open stoma tract under light sedation without requiring full surgery.
Monitoring Hydration, Weight, and Transitioning to Voluntary Eating
Home care during feline hepatic lipidosis recovery is a marathon process, typically requiring between three weeks and two months of consistent enteral nutritional support. Systematic tracking of body weight, hydration levels, and spontaneous appetite indicators determines when the tube can eventually be safely removed.
Tracking Daily Weight and Hydration
While commercial liquid enteral diets supply complete balanced caloric intake, they may not always meet a cat’s complete daily fluid requirement—especially if the cat is receiving concurrent medications or experiencing fluid losses. Check hydration daily by gently lifting the skin over the shoulder blades (skin turgor test) and inspecting the oral mucous membranes. Healthy skin should snap back instantly, and the gums should feel slick and moist to the touch, not dry or tacky. Your veterinarian will calculate the exact volume of supplemental free-water flushes required daily to maintain optimal hydration.
Weigh your cat on a digital gram scale every morning before the first scheduled meal and log the result. Steady weight gain or stability indicates adequate caloric intake, whereas continuous weight loss necessitates a re-evaluation of your daily meal volume calculations with your veterinarian.
Testing Appetite and Encouraging Voluntary Eating
The ultimate goal of hepatic lipidosis recovery is a complete return to independent, voluntary eating. However, you should never offer food while your cat is actively nauseated or immediately following a stressful nursing session. To safely assess spontaneous appetite:
- Offer a small, highly palatable meal of smelly canned food, warm cooked chicken breast, or plain meat baby food (containing no onion or garlic powder) first thing in the morning when your cat is most rested and hungry, prior to administering the first tube meal.
- Place the food dish nearby for 15 to 20 minutes in a quiet, low-stress environment without forcing the dish against the cat’s face or smearing food on their whiskers, which can trigger food aversion.
- If your cat eats voluntarily, praise them quietly and record the estimated caloric intake in your nursing logbook. Subtract those consumed calories from that day’s scheduled tube feeding total.
- Once your cat consistently eats 100% of their calculated target daily RER voluntarily for 7 to 10 consecutive days while maintaining stable body weight, your veterinarian will schedule the simple, non-surgical removal of the esophagostomy tube in the clinic.
When to Call Your Veterinarian Immediately
Contact your primary care veterinarian or urgent care emergency clinic immediately if you observe any of the following clinical warning signs during home care:
- Persistent vomiting, violent retching, or severe distress despite receiving prescribed antiemetic medications
- Elevated body temperature (rectal temperature exceeding 102.5°F) or severe lethargy, collapse, and unresponsiveness
- Rapid, shallow, or labored breathing and persistent coughing following a meal delivery (potential indicators of dangerous aspiration pneumonia)
- Severe, expanding redness, tissue swelling, heat, or thick purulent yellow/green discharge surrounding the stoma site
- Sudden onset of muscle tremors, generalized weakness, head pressing, or extreme wobble (signs indicative of dangerous electrolyte derangements or hepatic encephalopathy)
- Partial or complete displacement, slippage, or physical damage to the feeding tube line
Conclusion
Managing a cat with fatty liver disease through home tube feeding requires patience, structure, and attentive daily nursing care, but the clinical rewards are profound. By establishing an organized feeding station, maintaining strict hygiene around the neck wrap and stoma site, administering warm liquid meals slowly, and preemptively managing nausea under veterinary guidance, you provide your cat with the essential nutritional bridge required for full liver recovery. With dedicated home care and time, the vast majority of cats successfully overcome hepatic lipidosis and return to vibrant, healthy, independent lives.