When a overhead fixture starts to shake, rattle, or hum, the problem often feels far worse than it actually is. Beyond the irritating rhythm of a squeaking hanger or ticking motor housing, violent shaking places dynamic stresses on the mounting assembly, electrical junction box, and surrounding drywall. Tackling a noisy ceiling fan downrod wobble repair DIY US project requires a structured, diagnostic approach rather than random trial and error. By systematically isolating mechanical play in the support hardware, measuring blade pitch variances, and applying fine counterweights, you can restore smooth, whisper-quiet operation to virtually any room fixture.
Ceiling fan movement is governed by fundamental physical forces: an eccentric mass distribution or uneven aerodynamic drag generates an oscillating force at the center of rotation. When this force matches the natural resonant frequency of the downrod and ceiling bracket assembly, visible swaying occurs. Distinguishing between structural looseness—such as an unanchored electrical box or an unseated hanger ball—and dynamic blade imbalance is the critical first step. This diagnostic manual breaks down the complete fix into clear, actionable steps tailored to standard US home electrical systems and construction practices.
Safety First: Power Disconnection and Initial Structural Assessment
Before positioning a stepladder beneath a ceiling fan or touching a single screw, turn off electrical power at your home’s main breaker panel. Simply turning off the wall switch is insufficient for safe troubleshooting. Wall switches can be bypassed, double-pole configurations may leave live hot conductors in the junction box, or smart wall switches may maintain small trickle currents. Confirm that circuit power is completely shut off by toggling the wall switch while checking the fixture, and verify the circuit with a non-contact voltage tester directly at the canopy housing before touching any bare connections.
Set up an A-frame stepladder on a flat, level surface directly alongside the fixture. Make sure the ladder is tall enough to allow comfortable access to the canopy, downrod, and motor housing without standing on the top two steps or leaning dangerously. Once in position, perform an initial hands-on stability check by grasping the downrod firmly near the upper canopy ring and applying mild side-to-side pressure. You should feel zero slop, play, or rotational movement where the downrod enters the ceiling assembly. If the entire mounting assembly shifts against the drywall, your issue originates inside or above the electrical junction box itself.
Step 1: Verify Outlet Box Rating and Structural Joist Mounting
The National Electrical Code (NEC) strictly mandates that standard plastic or thin metallic outlet boxes designed solely for lightweight lighting fixtures cannot support dynamic, moving loads like ceiling fans. A ceiling fan requires a UL-listed fan-rated electrical box clearly marked as suitable for fan support, rated to support fixtures weighing up to 35 pounds (or up to 70 pounds for larger models). If a fan was installed as a retrofit without upgrading the box, the continuous vibration from motor rotation will gradually loosen the mounting fasteners, strip thin plastic threads, or pull screws out of structural framing.
To thoroughly inspect the ceiling box assembly:
- Loosen the decorative canopy cover screws (or twist off the bayonet locking collar) and slide the canopy down the downrod to expose the ceiling mounting bracket.
- Locate the two heavy-duty steel machine screws securing the metal mounting bracket to the junction box. Test these screws for tightness using a #2 Phillips manual screwdriver.
- Confirm that the outlet box itself is securely anchored directly to a ceiling joist, wood blocking, or a heavy-gauge adjustable steel ceiling fan brace spanning between two ceiling joists.
- If the electrical box flexes, twists, or shifts when you push on the bracket, halt your repair and upgrade the box mounting system before attempting to balance the fan blades. Attempting to balance blades on a loose box is ineffective and presents a long-term fall hazard.
Step 2: Inspect the Downrod, Hanger Ball, and Locking Hardware
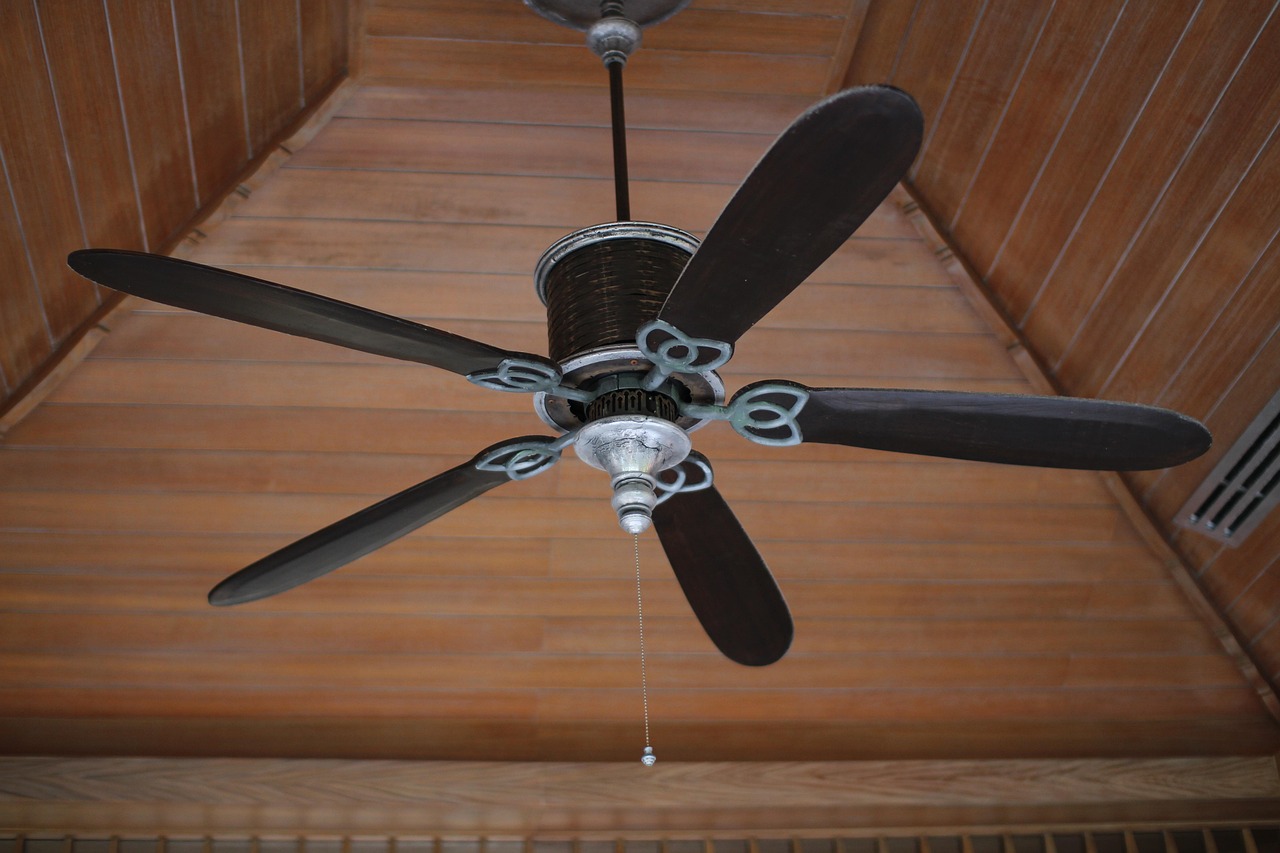
The downrod assembly relies on a socket-and-ball hinge joint that allows the fixture to hang perfectly plumb while absorbing minor motor oscillations. However, if the top hanger ball is not seated properly inside its alignment slot, or if the lower downrod attachment hardware is loose, the fan will quickly develop a rhythmic mechanical knock and severe rotational sway.
Start at the top of the downrod inside the ceiling mounting bracket. The metal or plastic hemisphere (hanger ball) attached to the upper end of the downrod features a molded groove or slot. This groove must drop fully onto the matching alignment tab inside the mounting bracket. If an installer forced the canopy shut while the hanger ball was twisted out of alignment, the ball will sit cocked at an angle, preventing proper self-leveling and generating severe operational vibration.
Next, move down the downrod shaft to the lower motor coupling housing. Standard ceiling fan downrods installed in US homes utilize one of two securing methods at the motor yoke:
- Threaded Downrod with Cross-Pin and Cotter Pin: A steel clevis pin passes completely through both the outer motor coupling collar and the inner downrod wall, secured in place by a hair-pin cotter clip. Inspect this pin to ensure it is fully inserted and locked. Next, locate the one or two hex-head set screws threaded through the side of the coupling collar. These set screws must be torqued down firmly against the downrod threads to eliminate all mechanical slop.
- Threaded Downrod with Lock Nuts: Ensure the main downrod shaft is threaded deeply into the motor yoke, and use an adjustable wrench to lock the jam nut tight against the yoke casting base.
If these set screws or locking nuts are even slightly loose, the rotational torque of the motor switching speeds will cause the downrod to rock back and forth inside the socket, translating into severe wobble at the blade tips.
Step 3: Replace Isolation Rubber Grommets and Secure Canopy Trim
A frequent source of persistent motor hums and high-frequency ticking sounds is missing, dry-rotted, or over-compressed dampening components. Modern ceiling fans utilize small rubber isolation grommets in two critical locations: between the metal blade irons and the rotating motor flywheel, and around the ceiling mounting bracket screws.
Over several years, dry indoor heating and continuous mechanical strain break down these synthetic neoprene or rubber washers. When an isolation rubber grommet flattens out or disintegrates, bare metal comes into direct contact with bare metal. As the motor turns, subtle torque fluctuations produce an audible ticking or buzzing sound that resonates throughout the entire ceiling frame.
To execute a full isolation rubber grommet replacement and fix loose canopy components:
- Canopy Trim Ring: Verify that the lower lip of the canopy cover does not rub against the rotating portion of the motor yoke. Ensure all canopy locking screws incorporate small rubber or silicone washers to prevent vibrations from rattling the thin decorative sheet metal against the ceiling bracket.
- Blade Arm Grommets: Remove the blade arm mounting bolts from the lower motor face one by one. Inspect the rubber washers sandwiched between the metal arm flange and the motor hub. Replace brittle or cracked washers with universal rubber grommets available at hardware stores. Tighten the mounting screws evenly until the rubber compresses slightly without bulging outward.
Step 4: Check Blade Elevation Alignment and Pitch Consistency
Before placing adhesive counterweights on individual blades, verify that the entire blade assembly is geometrically level and square. An aerodynamic imbalance occurs when one blade sits at a different height or angle relative to the ceiling than the others. This variance causes unequal vertical lift and drag forces as the fan spins, resulting in violent shaking.
To measure blade drop tolerances accurately:
- Select a fixed reference point on the ceiling approximately two inches past the outer tip of a fan blade. You can use a rigid yardstick, a folding rule, or a piece of painter’s tape affixed to the ceiling.
- Position the outer tip of Blade 1 directly under your reference point. Measure the vertical distance from the top edge of the blade tip straight up to the ceiling surface. Record this measurement to within 1/16 of an inch.
- Manually rotate the fan assembly to bring Blade 2 to the exact same ceiling reference point. Measure and record its vertical distance. Repeat this process for every blade on the unit.
The total blade drop variation across all blades should not exceed 1/8 of an inch (0.125 inches). If one blade tip sits 1/4 inch lower or higher than the rest, the fan will wobble aggressively at medium and high speeds regardless of how many balancing weights you install.
Correcting Bent Metal Blade Irons
If a blade tip height measurement falls outside acceptable tolerances, do not attempt to twist or bend the wood, plastic, or composite blade board itself. Instead, gentle manual correction must be applied to the metal blade iron (the cast-metal arm connecting the blade board to the motor hub):
Grasp the root of the metal blade iron firmly near the motor hub with one hand, and place your other hand near the outer blade attachment screws. Apply light, controlled upward or downward pressure to bend the metal arm back into alignment. Re-measure the distance to the ceiling reference point until the blade tip matches the baseline dimension. Repeat this process for any out-of-spec blade arms.
Step 5: Inspect Blade Weight Consistency and Check for Warping
In addition to blade elevation alignment, variances in individual blade weights or physical board warping will induce noticeable axial vibration. Natural wood blades absorb room humidity unevenly over time, especially in damp environments or rooms located directly below uninsulated attic spaces. Synthetic and plastic blades can bow or cup if exposed to radiant solar heat or direct light.
Remove the blades from their metal arms by taking out the three decorative fasteners per blade. Lay each blade board down flat on a known level surface (such as a laminate table or granite countertop). Check for visible bowing, twisting, or cupping along the length of the board. Replace warped blades as a complete factory-matched set; replacing only a single blade breaks weight distribution symmetry.
Next, use a digital kitchen scale measuring in grams to weigh each raw blade board. A mass discrepancy greater than 2 to 3 grams between blades in a single assembly is enough to induce noticeable high-speed wobble. If you identify a single lightweight blade board, attach small strips of electrical tape or a thin metal flat washer under the mounting bolt flange on top of the blade to bring its total mass into alignment with the rest of the set.

Step 6: Master Class in Ceiling Fan Balancing Kits
If your ceiling electrical box is rock-solid, downrod set screws are torqued down, blade drop variances are within 1/8 inch, and all blades weigh the same, any remaining high-speed sway can be tuned out using a standard ceiling fan balancing kit. These inexpensive kits contain a U-shaped plastic testing clip weighing 3 to 5 grams along with several adhesive-backed lead or steel counterweights.
Follow this systematic procedure to eliminate persistent operational wobble using a balancing kit:
- Establish a Operational Baseline: Turn the ceiling fan on high speed. Stand back and observe the magnitude and direction of the downrod movement. Turn the fan off and allow it to come to a complete stop.
- Attach the Testing Clip: Select one blade at random. Slide the plastic testing clip onto the trailing edge of the blade board, midway between the metal blade arm and the outer tip.
- Test Run: Turn the fan on high speed. Observe the wobble carefully. Is the shaking noticeably reduced or significantly worse? Turn the fan off completely.
- Iterate Around the Assembly: Move the plastic testing clip to the exact same mid-point location on the next blade. Turn the fan on high speed again and observe the motion. Repeat this evaluation systematically for every single blade on the fixture. Note which blade location yielded the smoothest overall rotation.
- Isolate Radial Position: Place the plastic clip back onto the blade that produced the best result. Slide the clip inward toward the motor hub, test the fan on high speed, then slide it outward toward the blade tip and test again. Identify the exact spot along the blade length where wobble is minimized.
- Apply Permanent Adhesive Counterweight: Peel the protective backing off an adhesive counterweight from the kit. Press the weight firmly onto the top flat surface of the blade board, centered directly in line with the plastic testing clip along the blade’s radial length. Remove the plastic testing clip.
- Final High-Speed Verification: Turn the fan back on high speed. If a minor wobble remains, repeat the testing process using a second smaller weight placed adjacent to the first weight.
Troubleshooting Electrical and Mechanical Motor Hums
Not all ceiling fan noise stems from dynamic wobble. Electrical hums, buzzing, and scraping noises originate inside the motor housing or wall control circuitry. Use the following diagnostic reference matrix to identify and resolve internal motor noise issues.
| Symptom | Probable Root Cause | Corrective Action |
|---|---|---|
| Continuous low-frequency 60Hz motor hum | Incompatible solid-state wall dimmer switch | Replace standard dimmer switch with a dedicated fan speed control incorporating stepped capacitors. |
| Rhythmic scraping or metal-on-metal rubbing | Housing trim ring contacting rotating motor bell | Loosen housing cover screws; realign metal bell housing to establish a consistent 1/16-inch air gap. |
| Clicking noise occurring once per revolution | Unseated downrod clevis pin or loose blade arm bolt | Tighten all blade iron bolts and ensure downrod set screws bite firmly into lower shaft metal. |
| High-pitched squealing during operation | Dry upper or lower sleeve motor bearings | Apply 2–3 drops of non-detergent 30-weight SAE motor oil to upper oil port on top casing. |
Wall Controls and Solid-State Waveform Interference
One of the most common installation mistakes in residential homes is wiring a fan motor to a standard wall dimmer designed for incandescent lighting. Solid-state lighting dimmers chop the incoming AC voltage sine wave to dim lights, which severely distorts the magnetic field inside the fan motor windings. This distortion causes a loud, continuous electrical hum that cannot be eliminated through mechanical tuning.
To eliminate electrical motor hum, replace standard light dimmers with a dedicated ceiling fan speed control switch. Dedicated fan controls use stepped capacitors to alter motor speed while keeping the AC voltage waveform smooth and sinusoidal, resulting in completely silent operation across low, medium, and high speeds.
Common DIY Repair Mistakes to Avoid
When performing a noisy ceiling fan downrod wobble repair DIY US project, home improvers frequently encounter several pitfalls that can worsen mechanical issues or create safety hazards:
- Over-tightening Blade Screws into Natural Wood: Excessive force when tightening blade board screws into cast-metal arms can strip out screw threads or crush natural wood fibers unevenly, causing the blade board to seat out of plane.
- Ignoring Weight Ratings on Existing Junction Boxes: Installing a heavy modern fixture onto a plastic outlet box held only to drywall by plaster ears is dangerous. Always ensure your ceiling box is anchored to framing.
- Bending Blades Instead of Metal Arms: Prying directly on real wood or composite blade boards causes internal fractures, leading to permanent structural warping or blade failure over time. Always adjust pitch by gently bending the cast-metal blade arm near its base.
- Balancing Before Securing Hardware: Applying adhesive balancing weights to a fan before tightening loose downrod set screws, blade bolts, or canopy brackets wastes time, as mechanical looseness will cause wobble to shift randomly over time.
Comprehensive Diagnostic Decision Tree
When approaching a malfunctioning unit, following a structured decision tree prevents unnecessary work and narrows down root causes efficiently:
- Is the wobble present at all speeds or only high speed?
- All Speeds: Look for structural looseness (ceiling box, loose mounting bracket, unseated hanger ball, or loose downrod set screws).
- High Speed Only: Indicates an aerodynamic pitch variance or minor blade weight imbalance suitable for clip-on balancing.
- Is the noise mechanical (clicking/scraping) or electrical (humming/buzzing)?
- Mechanical: Check blade iron tightness, canopy cover clearances, downrod pin seating, and rubber grommet condition.
- Electrical: Inspect wall switch compatibility, smart switch wiring, or degraded motor capacitors inside the switch housing.
Seasonal Maintenance Checklist
To maintain smooth, quiet operation year-round, complete a brief preventive inspection annually—ideally when reversing blade rotation for seasonal heating or cooling shifts:
- Check Blade Fasteners: Operational vibration naturally loosens threaded fasteners over time. Confirm that all screws securing blade boards to arms and arms to the motor hub are snug.
- Clean Dust Accumulation: Thick, uneven dust buildup along the trailing edge of fan blades creates drag and weight imbalances. Wipe both sides of each blade clean using a damp microfiber cloth.
- Inspect Canopy and Downrod Hardware: Ensure the top canopy cover ring remains tight against the ceiling drywall and verify that downrod set screws remain securely seated into the motor yoke.
- Verify Reverse Switch Engagement: Confirm that the directional slide switch on the motor housing is fully seated in either the up or down position. A mid-position switch can interrupt power or cause motor noise.
Frequently Asked Questions
Why does my ceiling fan wobble only on high speed?
At low speeds, rotational forces are insufficient to overcome the inertia of the hanging assembly. As motor speed increases, dynamic aerodynamic drag and mass imbalances scale quadratically, amplifying slight pitch or weight differences into visible sway.
Can a wobbling ceiling fan fall from the ceiling?
A minor wobble will not cause a fan to fall. However, severe long-term shaking attached to an un-rated plastic electrical box can fatigue screws or pull fasteners out of framing over time. Ensuring your box is fan-rated eliminates fall risk.
How much wobble is considered normal for a downrod fan?
A slight movement (less than 1/8 inch of total horizontal sway at the bottom of the motor) on high speed is normal for fans hanging on long downrods due to the flexible ball-and-socket hinge design. Shaking that creates visible canopy movement or audible noise should be corrected.
Restoring Smooth, Quiet Performance
Fixing a shaky, noisy ceiling fan is a straightforward diagnostic process when approached logically. By verifying that your ceiling box is UL fan-rated, securing lower downrod set screws, verifying equal blade drop heights, and using a balancing kit to offset minor mass variations, you can resolve operational sway and noisy motor symptoms safely. Taking the time to work through these mechanical checkpoints restores quiet comfort to your living space while extending the operating life of your fixture.