Your home’s electrical service panel is the central nervous system of your entire household. Every watt of power pulled by your refrigerator, HVAC system, lighting, and electronics passes through its main breakers and distribution circuits. Yet, for most homeowners, the metal box in the garage, utility room, or basement remains a complete mystery until a breaker trips or the lights flicker. Implementing a regular routine outlined in an electrical panel maintenance guide can prevent unexpected outages, equipment damage, and severe electrical fire hazards.
While complex wiring projects and internal breaker replacements strictly require a licensed, insured electrician, performing an annual visual audit is a manageable task for a careful homeowner. This guide walks you through the practical steps required to safely inspect your main breaker box, identify early warning signs of component failure, and recognize when it is time to call a professional trade contractor.
Understanding Your Electrical Service Panel
Before lifting a screwdriver, it helps to understand what is happening behind the metal door of your service panel. Power enters your home from utility company lines through the exterior weatherhead and meter socket, terminating at the main circuit breaker inside your panel. This main breaker controls the flow of electricity to all individual branch circuit breakers, which in turn protect the individual wiring runs throughout your walls.
Where the heavy service entrance cables enter the main breaker, they are secured by heavy-duty mechanical fasteners known as lugs. Over years of seasonal temperature fluctuations, heavy electrical loads, and natural thermal expansion and contraction, these terminal lugs can loosen. A loose connection creates electrical resistance, which rapidly generates intense localized heat. Left unchecked, this thermal stress can melt wire insulation, damage the breaker housing, or trigger an electrical fire.
To build a comprehensive maintenance perspective, it is also essential to recognize the difference between the main breaker and the branch circuit breakers. The main breaker is typically rated for 100, 150, or 200 amperes (or sometimes 400 amperes in larger homes) and cuts off power to the entire house. Branch breakers protect specific zones, appliances, or rooms, ranging typically from 15 to 50 amperes. Each of these components relies on secure mechanical contact to function safely under load.
Furthermore, residential distribution panels feature neutral and ground bars where white neutral wires and bare or green grounding wires terminate. Corrosion, poor bonding, or loose screws on these bars can cause erratic voltage fluctuations, humming noises, or sensitive electronic equipment failures throughout the home. An effective maintenance routine accounts for every termination point visible within the cabinet.
Moreover, modern electrical panels must also accommodate arc-fault circuit interrupter (AFCI) and ground-fault circuit interrupter (GFCI) breakers in many jurisdictions, depending on the edition of the National Electrical Code (NEC) enforced locally. These specialized breakers feature internal electronic testing circuitry and self-diagnostic features that make visual checks even more critical for identifying environmental stressors like dampness or dust accumulation.
In North American residential construction, standard service panels operate on a split-phase 120/240-volt system. Two hot bus bars run vertically or horizontally down the center of the panel, alternating phases to supply 120 volts to standard single-pole breakers and combining phases through double-pole breakers to deliver 240 volts to heavy appliances like clothes dryers, water heaters, and central air conditioners. Understanding this layout clarifies why maintaining structural integrity across every terminal bus is vital for balanced household power delivery.
Preparation and Essential Safety Equipment
Safety is the absolute priority when working around any electrical equipment. Even when individual branch circuits are switched off, the main service lugs inside the panel remain energized with lethal voltage directly from the utility grid. You cannot turn off the power supply to the main breaker lugs from inside the house without utility company intervention.
Before you begin your inspection, assemble the proper safety gear and diagnostic tools:
- Personal Protective Equipment: Safety glasses with side shields and heavy-duty, closed-toe footwear. Avoid wearing synthetic clothing that can melt if exposed to an arc flash.
- Insulated Tools: Any hand tools used near electrical panels should feature rated insulation to prevent accidental short circuits.
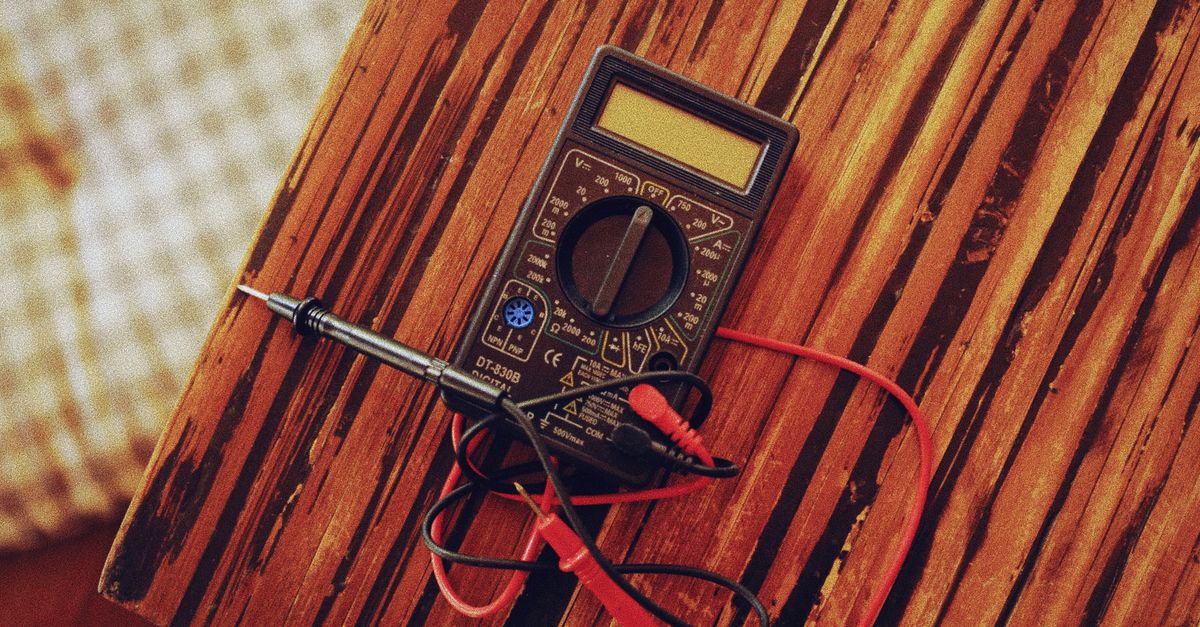
- Reliable Voltage Tester: A non-contact voltage tester and a digital multimeter to confirm zero energy states on branch circuits.
- Flashlight or Headlamp: Adequate lighting is non-negotiable when examining dark cabinet interiors and tiny wire markings.
Never perform an inspection if the floor is damp or if you are standing in water. Ensure the area around the panel is completely clear of stored boxes, laundry, or shelving to give yourself an unhindered, stable workspace. When handling diagnostic meters, verify that your test leads are rated for CAT III or CAT IV environments, which ensures they can safely withstand transient overvoltage spikes common in residential electrical service entries.
Step-by-Step: Removing the Panel Cover Safely
Removing the deadfront cover of a residential electrical panel requires methodical care. The cover protects you from touching live internal bus bars while holding the breakers in place. Follow these steps to expose the interior safely:
- Clear the Area: Ensure you have at least three feet of clear workspace in front of the panel, conforming to standard electrical codes.
- Turn Off Heavy Appliances: While not strictly mandatory for a visual inspection, turning off major 240-volt loads like your air conditioner or electric range reduces potential electrical arc risks.
- Unscrew Fasteners Methodically: Support the weight of the metal cover with one hand while removing the retaining screws around the perimeter with the other. Most standard residential panels use four to six machine screws.
- Remove the Cover Carefully: Pull the cover straight back toward you without letting it scrape against the breaker toggles or internal wiring. Set the cover and screws aside in a secure location where they cannot be knocked over.
Once the cover is off, look at the interior components. Do not touch any bare metal bars, screw heads, or wire terminals. Your inspection at this stage must be entirely visual. If you encounter painted-over cover screws or a cover that feels unusually stuck due to decades of paint layers or settlement, use a utility knife to score the paint seal gently before attempting to back out the screws, preventing damage to the surrounding drywall and cabinet lip.
What to Look For: Thermal Discoloration and Loose Lugs
With the panel cover removed, conduct a systematic visual scan from top to bottom. Take your time and use your flashlight to inspect every visible connection. Here are the primary red flags you must watch for:
- Discoloration and Browning: Look closely at the plastic housings around breakers, the metal bus bars, and the main lugs. Any brownish or yellowish staining indicates chronic overheating.
- Charring or Soot: Blackened plastic or carbon residue points to past arcing events or severe thermal stress. This is an immediate emergency requiring professional intervention.
- Corrosion and Rust: White powdery buildup or red rust suggests moisture infiltration from a leaky roof, unsealed conduit entries, or high ambient humidity in spaces like basements or garages.
- Frayed or Pinched Insulation: Wire insulation should sit flush against terminal connectors. If you see melted, brittle, or pulled-back insulation exposing bare copper, the circuit has experienced severe thermal overload.
Pay special attention to the main service lugs at the top of the panel where the thick utility cables terminate. If you notice any wobbling, sagging wires, or visible gaps between the cable and the terminal block, you are looking at loose connections.
In addition to thermal indicators, listen carefully when standing near the panel. While a faint hum from a transformer is sometimes normal, a loud buzzing, crackling, or snapping sound indicates electrical arcing. Arcing occurs when electricity jumps across a microscopic gap in a loose connection or damaged insulation, generating temperatures hot enough to melt metal. If you hear these sounds, immediately back away from the panel and call an emergency electrician.
Furthermore, inspect the physical orientation of each breaker. A breaker that sits crookedly or feels loose in its mounting slot indicates that the stab connection gripping the central bus bar has weakened or burned away. This lack of firm mechanical seating compromises trip performance and creates an intense localized resistance pocket.
Common Environmental Hazards Affecting Panels
The physical environment surrounding your electrical panel plays a massive role in its long-term health and reliability. Many homeowners install panels in basements, crawlspaces, or attached garages where environmental factors accelerate wear and tear.
Moisture is the primary enemy of electrical infrastructure. In coastal regions, salt air can penetrate unsealed utility conduits and cause rapid oxidation on copper and aluminum bus bars, manifesting as a chalky green or white crust. In subterranean basements, seasonal humidity condensation can pool inside the bottom of the cabinet, compromising terminal integrity. Ensuring that all knockout holes are plugged with approved metal seals and that the main service conduit is packed with duct seal putty prevents external elements from migrating directly into the live cabinet.
Dust and debris accumulation also presents hidden risks. If your panel is located in a woodshop, laundry room, or active storage area, fine particulate matter can settle on internal surfaces. Over time, combustible dust combined with microscopic electrical tracking can form conductive paths, increasing the likelihood of tracking faults or localized shorts.
The Limits of DIY Maintenance: When to Call an Electrician
Homeowners often wonder if they can simply grab a screwdriver and tighten any loose lug they discover. In almost all residential scenarios, the answer is a firm no. Attempting to torque main lugs while the service entrance cables remain live exposes you to extreme electrocution and arc flash hazards that can cause severe injury or death.
Furthermore, tightening electrical connections requires precise torque specifications determined by the manufacturer and measured with a calibrated torque screwdriver. Over-tightening can crush the wire strands or crack the breaker housing, while under-tightening leaves high-resistance gaps that continue to generate heat.
Call a licensed, bonded electrician immediately if you observe any of the following conditions:
- Loose main breaker lugs or service cables.
- Signs of thermal damage, melting, or burnt plastic on any component.
- Rust or corrosion on internal bus bars or breaker terminals.
- Breakers that feel hot to the touch during normal household operation.
- A panel manufactured by brands known for historical safety failures, such as Federal Pacific Electric (Stab-Lok) or Zinsco.
When selecting a contractor for panel repairs or upgrades, verify their state licensing, general liability insurance, and familiarity with the latest edition of the National Electrical Code (NEC). A qualified professional will not only correct the immediate issue but also perform comprehensive testing to ensure your home’s entire grounding and bonding system is intact.
Establishing an Annual Electrical Audit Routine
Electrical panels do not fail without warning, but their distress signals are hidden behind locked metal doors. Incorporating an annual safety audit into your household maintenance calendar ensures small issues are caught long before they turn dangerous.
Set a recurring reminder on your calendar every autumn—perhaps when you test your smoke detector batteries—to perform your visual panel check. Keep a maintenance log noting the date of each inspection, any observations about ambient basement humidity, and the contact information of your trusted local electrician. By combining proactive visual oversight with prompt professional service when anomalies arise, you protect your home, your family, and your investment for years to come.
Beyond the annual inspection, cultivate everyday awareness regarding your home electrical network. Pay attention to flickering lights, unexplained burning odors near walls or appliances, or breakers that trip repeatedly under normal loads. These everyday symptoms often trace back to connections within the service panel, bridging the gap between daily habit and long-term fire prevention.
Additionally, keeping your panel accessible is a legal and practical safety requirement. Never store paint cans, cardboard boxes, clothing, or cleaning supplies within three feet of your electrical box. Emergency responders and utility workers rely on rapid, unobstructed access in the event of an outage or domestic crisis. Review your utility room or hallway setup annually to make sure no clutter has gradually encroached upon this mandatory clearance zone.
Finally, consider upgrading your home protection strategy by discussing whole-house surge protection devices (SPDs) with a licensed electrician during your next service call. Modern electronics and smart home appliances are exceptionally sensitive to voltage spikes caused by lightning, downed utility lines, or local grid switching. Integrating a surge protection module directly into your main panel defends every circuit in your house simultaneously, offering a robust second line of defense alongside your diligent physical maintenance routine.
Frequently Asked Questions About Electrical Panels
Homeowners frequently encounter specific questions when undertaking electrical maintenance. Reviewing these common inquiries helps clarify the boundaries between safe homeowner observation and professional trade intervention.
Can I spray contact cleaner inside my electrical panel to remove dust?
No. Standard aerosol contact cleaners and generic lubricants should never be sprayed inside a live electrical panel. Many chemical solvents are flammable or leave residues that attract dust and debris, creating new hazards. If dust accumulation is severe, a qualified electrician should evaluate and clean the panel using specialized vacuum equipment while power is safely disconnected.
How often should a professional electrician inspect my service panel?
While annual homeowner visual checks are encouraged, having a licensed electrician perform a comprehensive diagnostic inspection every three to five years—or whenever you purchase a home over twenty years old—is a wise investment. Professionals can check terminal torques with calibrated tools and test overall system load balance.
What should I do if a single circuit breaker feels warm?
A slightly warm breaker can be normal under heavy continuous loads (like an electric oven or EV charger), but a hot breaker indicates overloading, a loose terminal screw, or an internal mechanical defect. Turn off the connected appliance, monitor the temperature, and contact an electrician if the heat persists or if the surrounding panel metal feels hot.