Your home’s roof system relies heavily on balanced airflow to manage temperature extremes throughout the year. During sweltering summer months, attic temperatures can easily soar past 150 degrees Fahrenheit if trapped heat cannot escape. Powered attic ventilators—whether mounted on the roof, gable walls, or ceiling bulkheads—work in tandem with passive soffit and ridge vents to exhaust superheated air before it can radiate down into your living spaces or prematurely age your roof shingles. However, because these units operate in dusty, harsh environments with minimal human oversight, they require regular attention.
Executing proper attic ventilation fan maintenance once or twice a year keeps your mechanical systems running efficiently, reduces the risk of electrical fires, and extends the operational lifespan of both the motor and the housing unit. While hiring a professional electrician or HVAC contractor is always an option, a basic seasonal tune-up is entirely manageable for a careful DIY homeowner who respects electrical safety guidelines and basic mechanical principles. This guide walks you through the complete lifecycle of a service inspection, from initial safety shutoffs to motor bearing lubrication and thermostat testing.
Understanding Your Attic Ventilation System
Before climbing into the attic with a tool belt, it helps to understand what kind of ventilation fan you have and how it interacts with your home. Powered attic ventilators generally fall into three categories: roof-mounted dome fans, gable-mounted louvers, and solar-powered units. Each design uses a permanent split-capacitor or shaded-pole electric motor attached to a metal or plastic blade assembly. Attached to these motors are usually two critical control components: an adjustable thermostat that turns the fan on when attic temperatures reach a specific threshold (typically between 85 and 110 degrees Fahrenheit), and a thermal cutoff switch designed to kill power if the motor overheats.
Over months of continuous operation, these fans pull massive volumes of air through the attic space. Along with that air comes attic dust, fiberglass insulation fibers, pollen, and insect debris. This particulate matter settles onto the motor housing, coats the fan blades, and works its way into sleeve or ball bearings. Furthermore, constant thermal expansion and contraction can loosen electrical connections over time. By establishing a routine inspection schedule, you catch these minor vulnerabilities before they turn into seized motors, tripped breakers, or costly roof repairs.
Gathering Tools and Personal Protective Equipment
Working in an attic environment requires specific gear to protect both yourself and your home finishes. Attics are notorious for cramped spaces, protruding roofing nails, extreme heat, and irritating insulation materials. Before starting your maintenance checklist, assemble the following tools and protective items:
- N95 respirator mask or dust mask to avoid breathing in settled fiberglass and dust
- Sturdy work gloves and safety glasses
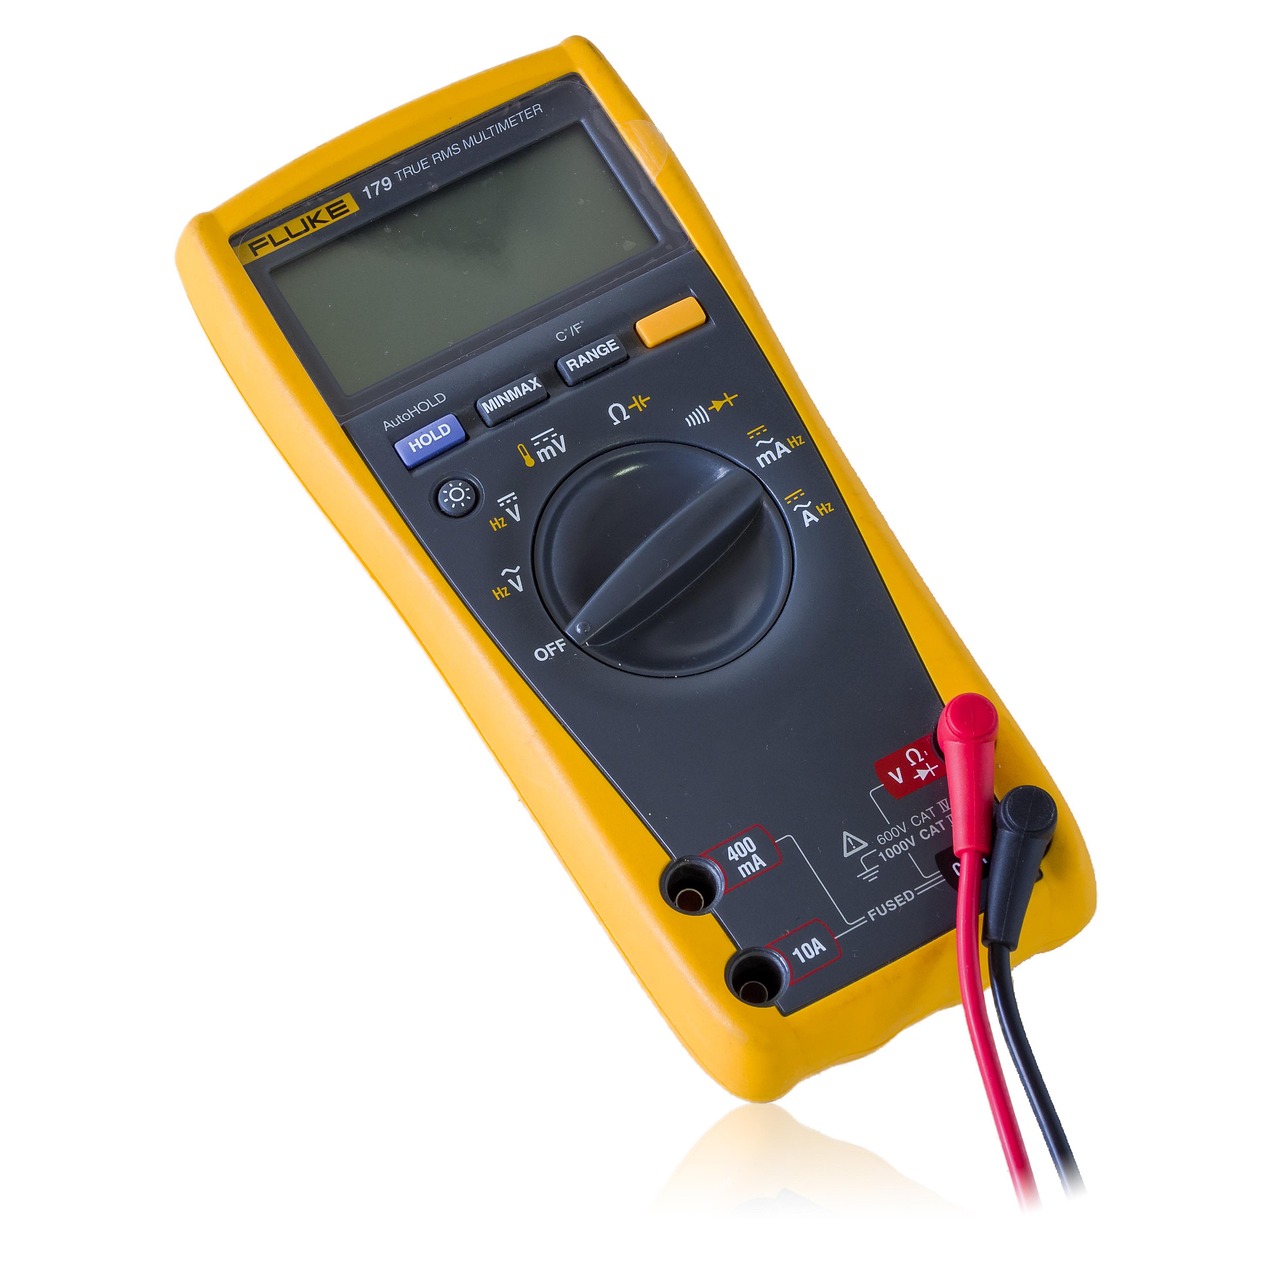
- Non-contact voltage tester and a digital multimeter
- A portable drop light or LED headlamp
- Compressed air can or a soft-bristled nylon brush
- Household vacuum cleaner with a brush attachment
- Standard screwdriver set and nut drivers
- Lightweight machine oil (such as non-detergent SAE 20 or specific electric motor oil)
- Clean shop rags
Never rush preparation. Make sure someone in the house knows you are working in the attic, keep your smartphone with you, and ensure your attic ladder or access hatch is secure and stable before carrying heavy gear up into the space.
Step 1: Electrical Safety and Power Disconnection
The golden rule of any electrical maintenance project is absolute verification of zero energy state. Attic fans are typically wired directly into a dedicated circuit breaker in your main electrical panel or tapped into an existing attic lighting circuit. Never rely solely on turning off a wall switch or thermostat dial, as these may only break the low-voltage control leg while leaving live 120-volt current at the motor junction box.
Locate the correct breaker in your electrical panel, switch it to the OFF position, and secure it with a lockout tag if other people are in the home. Next, head up to the attic, locate the fan, and use your non-contact voltage tester against the metal housing and the incoming wire conduit. Follow this by touching the metal probes of a digital multimeter to the supply terminals inside the junction box to double-check that zero voltage is present. Only when you have physical confirmation should you touch any internal components.

Step 2: Cleaning Motor Dust and Debris Buildup
With power safely disconnected, you can begin the physical cleaning process. Dust is the number one enemy of electric attic fan motors. As a layer of dust blankets the motor housing, it acts as an insulating blanket, trapping internal heat generated by the copper windings. This accelerated heat buildup degrades wire insulation and leads to premature motor failure.
Start by using a soft-bristled nylon brush to gently sweep away heavy clumps of dust and cobwebs from the exterior of the motor housing, the fan blades, and the safety guards. For tight corners around the ventilation housing or motor ventilation slots, use a can of compressed air to blow the debris outward. Follow up with a vacuum hose fitted with a brush attachment to suck up loose particles rather than letting them fall into your attic insulation. If the fan blades are heavily coated with greasy dust or grime, wipe them down with a damp cloth and mild dish soap, ensuring no moisture enters the electrical compartments. Allow all parts to dry completely before restoring power.
Step 3: Inspecting and Testing the Thermostat Control
The thermostat is the brain of your attic ventilation system. If it fails, your fan will either run continuously—racking up electricity bills and pulling conditioned air out of your house—or fail to turn on at all during the hottest days of the year. Most attic fan thermostats feature a dial marked with temperature increments.
Inspect the physical housing of the thermostat for cracked wires, loose terminal screws, or corrosion. Tighten any loose screw terminals gently. To test whether the thermostat is functional, lower the temperature setting dial until it clicks. On a cool day, you may need to apply a gentle source of warmth, such as a hair dryer held at a safe distance, to the bimetallic sensor coil inside the thermostat housing. Listen for the distinct mechanical click that signals the switch is closing the circuit. If the switch fails to click or shows physical signs of melting or scorching, replace the thermostat assembly immediately.
Step 4: Lubricating Motor Bearings
Not all attic fan motors require manual lubrication. Modern brushless or permanently sealed ball-bearing motors are factory-sealed for life and cannot be serviced. However, many standard sleeve-bearing motors feature small oil ports labeled ‘Oil’ or ‘Oil Drops Here’ near the shaft housing.
Consult your fan’s user manual or inspect the motor housing for these designated ports. If your motor has them, apply two to three drops of non-detergent lightweight motor oil (avoid thick household oils like 3-in-One or vegetable-based lubricants, which gum up under high heat). Spin the fan blade gently by hand after oiling to distribute the lubricant evenly along the shaft. If you encounter grinding noises, stiff rotation, or obvious side-to-side play in the motor shaft, the bearings are worn past the point of lubrication, and you should plan to replace the entire motor unit.
Step 5: Diagnostic Checks on the Thermal Cutoff Switch
Safety devices like thermal cutoff switches are designed to protect your home from electrical fires. A thermal switch contains a fusible link or a bi-metallic disc that permanently or temporarily breaks the circuit if the motor temperature exceeds safe operating limits due to a jammed blade or electrical short.
Inspect the thermal switch wiring for signs of discoloration, melting, or soot. Using your multimeter set to the continuity (ohms) setting, test across the terminals of the thermal switch while power is disconnected. A working closed switch should show near-zero resistance (continuity). If your multimeter reads infinite resistance (open circuit) while the motor is cool, the thermal switch has tripped permanently and must be replaced before the fan can operate safely again.
Step 6: Checking Structural Integrity and Hardware
Vibration is a constant companion of motorized ventilation equipment. Over hundreds of hours of spinning, vibration works screws loose, warps mounting brackets, and degrades weather-sealing flashings.
Check all mounting bolts securing the fan housing to the roof deck, gable studs, or ceiling joists. Tighten any loose fasteners. Examine the wire mesh or safety screens designed to keep wildlife, birds, and large insects out of the attic. A rusted or torn screen invites squirrels and raccoons into your attic space, where they can chew through electrical wiring. Finally, if you have a roof-mounted dome fan, inspect the exterior flashing and rubber boot around the stack for cracks, missing roofing nails, or failing caulk that could allow rainwater to leak into your attic.
Troubleshooting Common Attic Fan Malfunctions
Even with careful seasonal maintenance, mechanical components can experience issues. Understanding how to diagnose common symptoms saves time and prevents unnecessary service calls. If your attic fan exhibits unusual behavior, review these common failure modes:
- Fan Fails to Start on Hot Days: First, check the main circuit breaker to ensure it hasn’t tripped. If the breaker is on, use your multimeter to verify that voltage is reaching the thermostat. If voltage is present at the thermostat input but not at the motor when the switch is closed, either the thermostat or the thermal cutoff switch has failed.
- Loud Humming Sound with No Blade Rotation: This usually indicates a seized motor bearing, a jammed blade obstructed by debris, or a failed capacitor. Disconnect power immediately and attempt to spin the fan blades by hand. If the blades feel stiff or locked in place, the motor requires replacement.
- Excessive Vibration and Noise: A loud rattling or thumping noise generally points to loose mounting hardware, a bent fan blade, or severe bearing wear. Inspect the blade assembly for balance and tighten all structural screws securing the unit to the roof or gable framing.
- Fan Runs Continuously Regardless of Temperature: If the fan refuses to turn off even during cool evening hours, the thermostat bimetallic switch has likely welded shut due to an electrical surge or age. Replace the thermostat switch assembly.
Frequently Asked Questions About Attic Fan Care
Homeowners often have specific questions regarding the operational limits and maintenance schedules of powered attic ventilators. Here are answers to common concerns:
- How often should I lubricate my attic fan? For motors equipped with oil ports, once a year—preferably in the spring before summer peak temperatures arrive—is sufficient. Never over-lubricate, as excess oil attracts floating dust and creates a gummy sludge.
- Do solar attic fans require maintenance? Yes. While solar fans eliminate electrical wiring maintenance and breaker checks, their photovoltaic panels require periodic cleaning to maintain peak charging efficiency. Dust and bird droppings block sunlight, reducing motor power. Furthermore, the motor housings, blades, and bearings still accumulate dust and require physical cleaning and occasional lubrication.
- Can I run my attic fan during winter? In most climates, attic fans should be powered off during the winter heating season. Leaving them running can accidentally exhaust warm, conditioned air from your living spaces into the attic via passive gaps, increasing heating bills and creating moisture condensation issues.
Reassembly, Power Restoration, and Final Testing
Once you have completed cleaning, lubricating, and inspecting all mechanical and electrical components, reverse your steps to reassemble the fan housing. Ensure all safety guards and wire covers are screwed back into their proper positions so that no moving parts are exposed.
Return to your main electrical panel and switch the circuit breaker back to the ON position. To confirm proper operation, adjust the attic thermostat dial down until it trips the circuit. You should hear the motor hum to life and feel steady airflow moving through the exhaust vent. Observe the fan for a few minutes: listen for excessive vibration, squealing, or imbalance, and watch for any smoking or burning smells that would indicate an electrical issue. If the fan operates quietly and moves air smoothly, your preventative maintenance cycle is complete.
Establishing a Seasonal Maintenance Schedule
Consistency is key to getting the maximum performance and longevity out of your attic ventilation system. Marking your calendar for routine checks ensures that small issues never snowball into expensive emergency repairs.
- Spring Inspection: Perform a complete mechanical and electrical check before the summer heat arrives. Clear out winter debris, test the thermostat, and lubricate bearings.
- Late Summer Check: Do a quick visual check from the attic hatch to verify the fan is cycling on and off appropriately during peak afternoon heatwaves.
Fall Review: Check wildlife screens and ensure gable louvers or roof caps are clear of autumn leaves and windblown debris.
By investing an hour or two each year into proper attic ventilation fan maintenance, you protect your home’s roof deck, reduce your summer cooling loads, and extend the safe operational life of your mechanical equipment.